How to Refill a Butane Torch Safely (Step-by-Step)
Resin Affairs is reader-supported. If you buy through links on this page, we may earn a small commission at no extra cost to you. We only link to gear we would use ourselves — prices and availability change, so check the current listing.
As an Amazon Associate I earn from qualifying purchases.
Quick answer: Turn the torch off and let it cool to room temperature. Set the flame dial to its lowest setting and hold the torch upside down, fill valve up. Press the butane can straight down onto the valve in short bursts, and stop as soon as fuel starts spitting back out. Let the torch sit upright for at least 3 minutes before you light it.
⚠️ Please read this first.
Butane is an extremely flammable gas stored under pressure. Refill outdoors or in a well-ventilated space, away from any flame, pilot light, spark or heat source, and never near open cups of resin, alcohol ink or solvent. Your torch’s instruction manual and your butane’s label and Safety Data Sheet (SDS) always come first. If anything here conflicts with them, follow the manufacturer. How we approach safety content →
Sourcing & review: This page is written and maintained by Alex Rivers based on the butane manufacturer’s Safety Data Sheet (Worthington/Bernzomatic), a torch manufacturer’s instruction manual (Bernzomatic) and ArtResin’s published torching guidance, checked against our editorial & safety standards. It has not been reviewed by a fire-safety professional. Last reviewed: 24 September 2026.
Why this matters for resin work
A butane micro torch is the fastest way to pop surface bubbles on a small resin pour. The trouble is that torches tend to run low at the worst moment. A torch that starts sputtering halfway through a pour gives you an uneven flame, and it tempts you to hold it closer or linger in one spot. That’s how you get the dimples, yellowing and scorch marks we cover in How to Get Bubbles Out of Resin.
The fix is simple: refill before you start mixing, not mid-pour, and refill properly so the flame is steady when you need it.
Before you start: safety basics
- Butane is extremely flammable and pressurized. The manufacturer’s SDS says it “may explode if heated”. It also says not to store or heat it above 120°F (about 49°C). That means no cans in a hot car, on a sunny windowsill or next to a heater.
- Refill outdoors or somewhere well ventilated. Butane vapor is about twice as heavy as air, so it sinks and pools at floor level instead of drifting away. Keep well clear of pilot lights, candles, stoves and anything that sparks.
- Let the torch cool completely first. Torch makers say to wait until the torch is back at room temperature before refilling.
- Wear safety glasses and gloves. Liquid butane that escapes is extremely cold and can cause frostbite on bare skin. The SDS first aid for frostbite is to soak the area in warm water, no hotter than 105°F (41°C), for 20–40 minutes, and get medical help.
- Clear the resin bench first. Refill away from open cups of resin, alcohol ink, isopropyl alcohol or solvent-soaked paper towels. Those are the most flammable things in a resin workspace.
For the rest of your resin safety gear, see Resin PPE for Beginners.
What you’ll need
- Refined butane in a can with a nozzle (or adapter tip) that fits your torch’s fill valve. Cleaner, multi-refined butane leaves less residue to clog the burner.
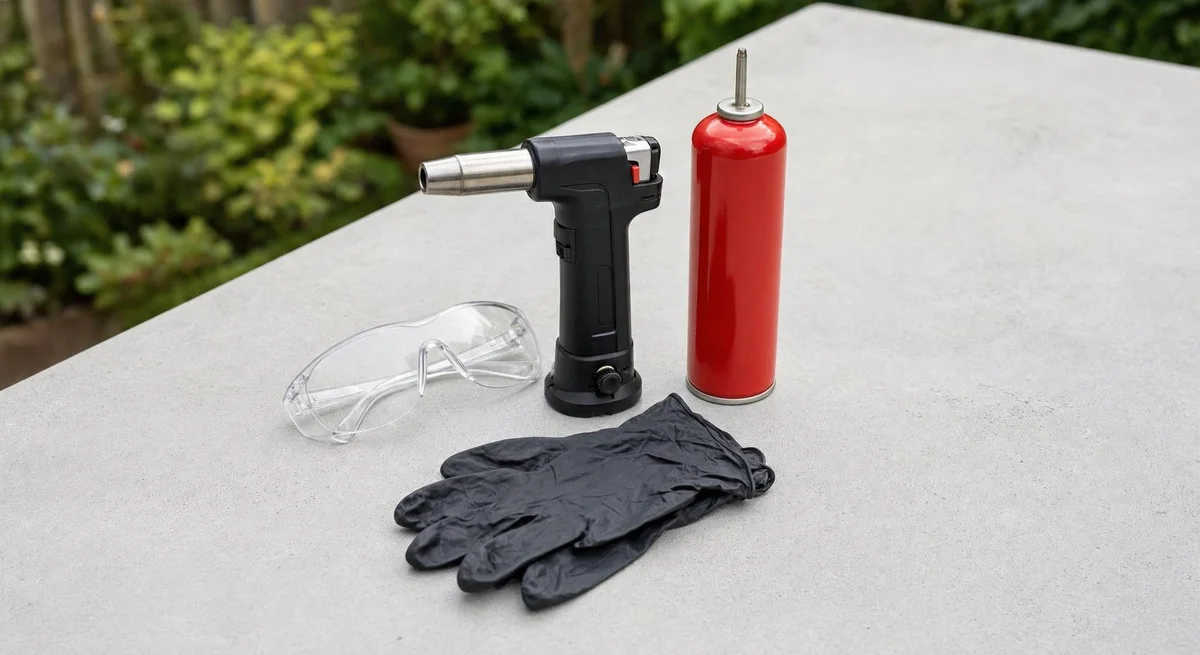
- Safety glasses and nitrile gloves.
- A small plastic tool or thin screwdriver, only if you need to bleed the torch (see below).
- A paper towel to wipe off any residue.
🧰 Recommended Kit for This Project
- Sondiko Refillable Butane Torch with Fuel Window — a compact, refillable torch sized for bubble-popping on small pours. The clear fuel window and MAX line show when it needs a refill and when to stop filling. We haven’t tested this one ourselves; we picked it for the fuel window. Butane isn’t included.
- Colibri Premium Butane Fuel (300 ml, 2-pack) — high-purity butane (Colibri states 99.999% pure) that comes with adapter tips to fit most fill valves, so it’s less likely to clog your burner. Colibri’s own store doesn’t ship it to California, Alaska, Hawaii or Puerto Rico, so check the delivery options on the listing.
- NoCry Clear Anti-Fog Safety Goggles (ANSI Z87) — protects your eyes from fuel spray during refills and splashes during pours
- Nitrile Gloves — the same gloves you already use for resin
How to refill a butane torch, step by step
- Turn it off and let it cool. Make sure the torch is fully off (and locked, if it has a safety lock), and wait until it’s back at room temperature.
- Turn the flame dial to the lowest setting (usually marked “–” or 1). This is standard refill advice, though not every torch manual mentions it.
- Hold the torch upside down so the fill valve on the base faces up.
- Check the can’s label, then turn it upside down, nozzle pointing down. Brands disagree on shaking: some fuel makers say to shake the can first, while others warn that shaking pushes extra propellant into the tank and causes lighting problems. Do what your can says.
- Press the can straight down onto the fill valve. Keep it vertical, not angled: a crooked nozzle leaks fuel instead of filling the tank.
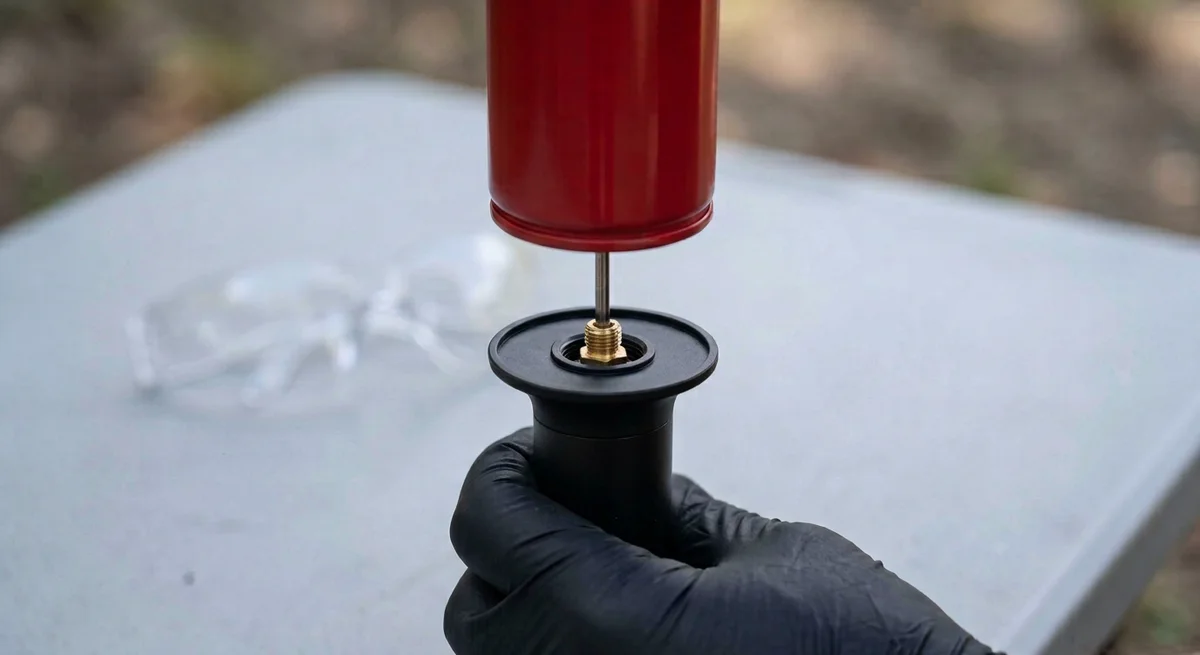
- Fill in short bursts. A few seconds at a time works well. One manufacturer’s manual says a small torch fills in about 10 seconds in total.
- Stop as soon as fuel starts spitting back out. That’s the tank telling you it’s full. Don’t keep pressing to “top it up”: that’s overfilling, and it just sprays cold fuel on your hands.
- Wipe off any residue around the valve with a paper towel.
- Stand the torch upright and wait at least 3 minutes (the manual’s figure) before lighting. This lets the fuel settle and warm back up. Some guides suggest 5–10 minutes, and waiting longer never hurts.
- Test-light it pointing away from you and anything flammable, then adjust the flame back to your normal setting.
Should you bleed the torch first?
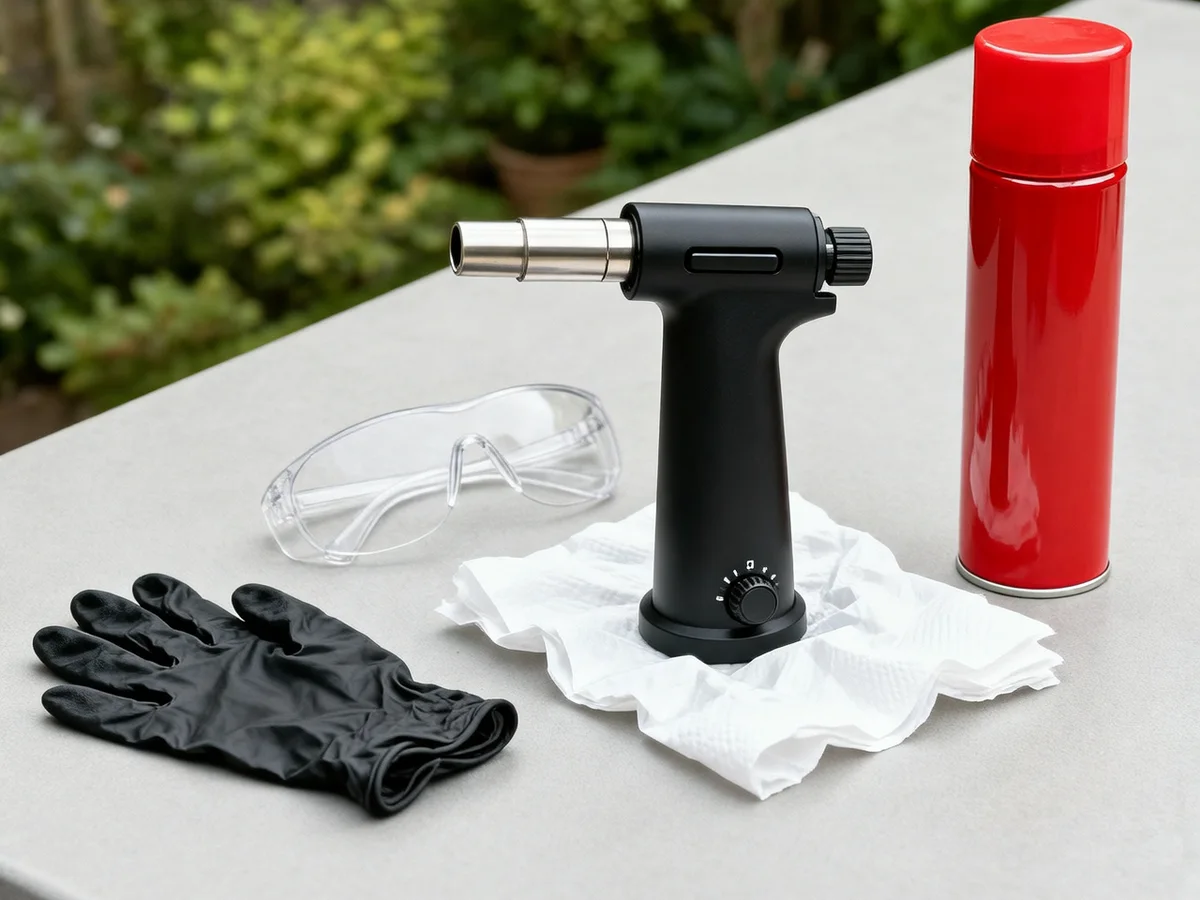
“Bleeding” (or purging) means pressing the fill valve with a small tool to let out whatever is left in the tank before refilling. Over several refills, a little air can build up inside and stop the tank from filling properly. Symptoms are a torch that sputters or dies soon after a “full” refill. Bleeding it clears that air.
You don’t need to bleed every time. Do it if your torch has started sputtering or won’t hold a flame after refills:
- Do it outdoors, away from any flame, with the torch cool and the flame dial at its lowest.
- Hold the torch valve-up and press the valve with a small screwdriver or plastic tool (not a ballpoint pen) until the hissing stops.
- Then refill as above.
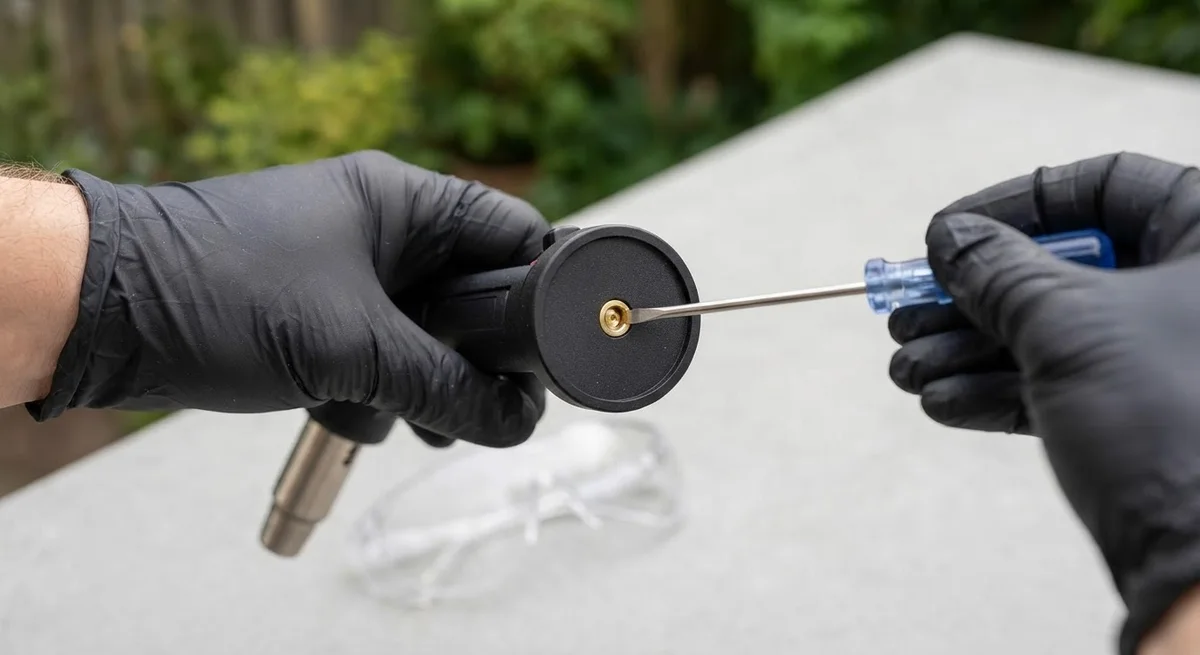
Check your torch’s manual first. Some manufacturers don’t mention bleeding at all.
Why won’t my torch light after refilling?
| Symptom | Likely cause | Fix |
|---|---|---|
| Clicks but won’t light, straight after refilling | Fuel is still too cold | Stand it upright and wait a few more minutes |
| Lights, then sputters or dies | Air in the tank | Bleed it (above) and refill |
| Weak, tiny flame | Flame dial still on lowest | Turn the dial up gradually after lighting |
| Won’t light even after waiting | Nozzle clogged by residue from low-grade fuel | Try cleaner, higher-purity butane; follow the manual’s cleaning guidance |
| Hissing, a gas smell, or frost on the valve when it’s not in use | Leaking valve | Stop using it. See below |
Leaks: when to retire a torch
If a torch hisses when it’s off, smells of gas while stored, or frost forms around the valve, the valve is leaking. Don’t try to fix a leaking valve yourself, and don’t keep using it. Take it outdoors, away from anything that can ignite, and let any gas escape well away from people and ignition sources. Then dispose of or replace it as the manufacturer directs.
Using your torch on resin
This is where a properly filled torch pays off. ArtResin’s guidance is a good baseline:
- Hold the flame a few inches above the surface, so the flame only “lightly kisses” the resin.
- Keep it moving, “as if you were ironing clothes”. Don’t hover over one spot.
- Less is more. Over-torching causes dimples and ripples, yellowing, burn marks and even smoking resin. If you see smoke, stop.
- Size matters: a butane micro torch suits small pieces. ArtResin suggests a propane torch head for pieces over about 24″ × 24″. I found this out the hard way: in my Let’s Resin starter kit review, a plumbing torch scorched the paper around three small ornaments. A small butane torch is far more forgiving on pieces that size.
- Never torch resin that contains alcohol ink or solvent. Alcohol is flammable. For those pieces, use a heat gun instead: see How to Get Bubbles Out of Resin.
- Refill first, pour second. A torch that starts sputtering mid-pour is exactly when people over-torch.
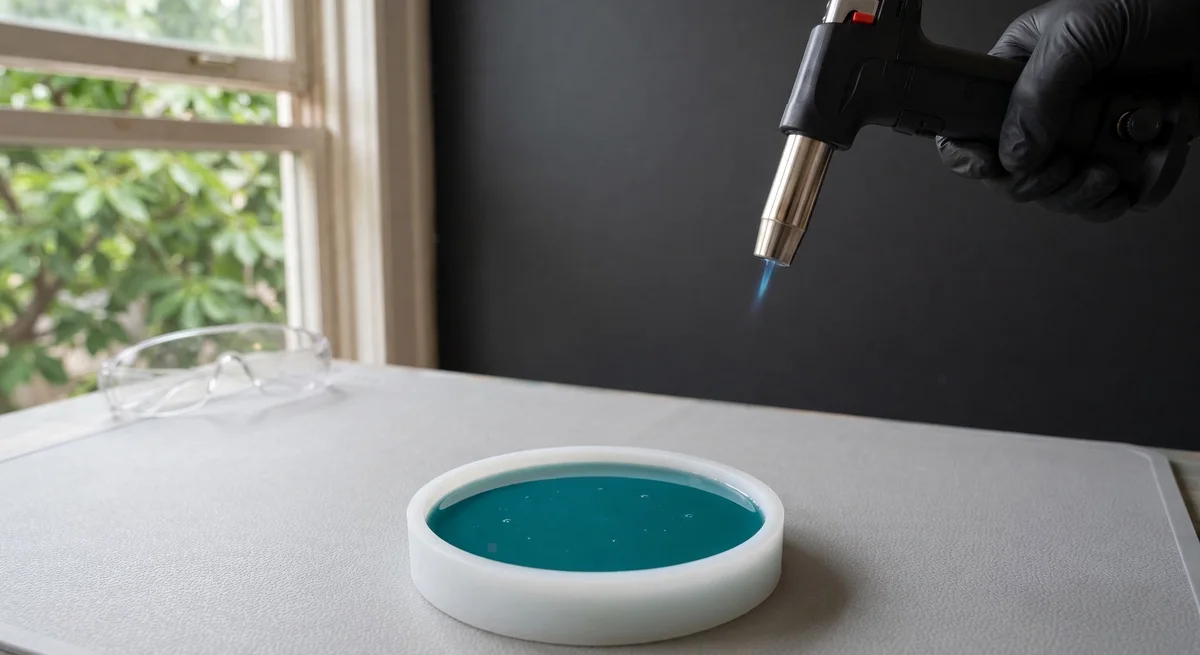
For the full bubble-prevention playbook, including warming your resin and mixing slowly, see How to Get Bubbles Out of Resin. For the rest of the essentials, see Essential Resin Tools Every Beginner Needs.
Storing your torch and butane
- Store the torch and cans upright, somewhere cool and dry, out of direct sun, and never above 120°F (49°C).
- Keep them away from heaters, stoves and your resin curing area if you use heat to cure.
- Keep them out of reach of children.
- Don’t store spare cans in a car.
Frequently Asked Questions
Can I use any butane in my torch?
Use a refined butane whose nozzle fits your torch’s valve. Some torch makers specify their own brand. Cheaper butane can leave residue that clogs the burner over time.
How often will I need to refill for resin work?
It depends on the tank size, the flame setting and how long you torch each pour. Small micro torches hold only a little fuel, so the easy habit is to check and refill before every pour session.
Is a butane torch or a heat gun better for resin bubbles?
A torch is quicker and more precise on small, pure-resin pours. A heat gun is the safer choice for anything containing alcohol ink or solvent, because there’s no open flame. Many resin makers keep both.
Is it safe to refill a torch indoors?
The butane SDS says to use it only outdoors or in a well-ventilated area. It also warns that butane “may displace oxygen and cause rapid suffocation”. Butane vapor is heavier than air and collects low, so refill outdoors, or at minimum by an open door, well away from any flame or spark.
Sources
- Worthington Enterprises (Bernzomatic), Butane BF55/BF9 Safety Data Sheet (rev. 9 Sept 2022): hazard statements, 120°F storage limit, ventilation, frostbite first aid, vapor density, oxygen displacement.
- Bernzomatic, ST500 Butane Torch Instruction Manual (refilling section): cool before refilling, fill valve up, ~10-second fill, stop at overflow, wait 3 minutes.
- ArtResin, How To Use A Torch On Epoxy Resin: distance, motion, butane vs. propane, alcohol warning.
- ArtResin, Can You Over Torch Resin?: effects of over-torching; stop if the resin smokes.
- Holt’s Clubhouse, How to Bleed a Torch Lighter: why and how to bleed air from a butane tank.
- Torch Blue, Lighter Refill Instructions and Cigar Advisor, Why you don’t shake a can of butane: the two opposing positions on shaking the can.
- Resin Obsession, How to Use Alcohol Ink in Epoxy: use a heat gun rather than a flame with alcohol ink.
- Colibri, Premium Butane 300ml: purity, adapter tips, shipping restrictions.
Get new guides in your inbox
For step-by-step tutorials, safety reminders and honest gear recommendations as we publish, join the Resin Affairs newsletter →
This guide is general information for hobby use, not professional fire-safety advice. Always follow your torch’s instruction manual and your butane’s label and Safety Data Sheet. If you’re unsure, ask the manufacturer.
Enjoyed this guide? Join the Resin Affairs newsletter for new tutorials, safety tips, and project ideas straight to your inbox.