Resin Sanding Dust Collection: My Budget Shop Vac and Cyclone Setup
Resin Affairs is reader-supported. If you buy through links on this page, we may earn a small commission at no extra cost to you. The cyclone linked below is the one I actually bought and use. Prices and availability change, so check the current listing.
As an Amazon Associate I earn from qualifying purchases.
Quick answer: To keep resin sanding dust under control, put a cyclone separator between your sander and your shop vac, and let the dust drop into a rigid, sealed bin instead of a bare bucket. In my workshop that catches the bulk of the sanding dust before it ever reaches the vac filter. It doesn’t catch 100%, and it does nothing for fumes, so the respirator still goes on every time.
Please read this first.
Dust extraction reduces dust. It doesn’t replace a respirator. When you sand cured resin or wood, wear a particulate respirator rated N95 or better, even with extraction running.
Never sand resin that isn’t fully cured. Epoxy stays chemically reactive until it has cured, and WEST SYSTEM warns that breathing the dust of partially cured epoxy can cause serious health problems. Check your resin’s full cure time first (see how long resin takes to cure).
A vacuum or cyclone filters no fumes at all. Fumes come from mixing, pouring and curing, not from sanding fully cured resin. For those stages you need ventilation and an organic-vapor cartridge respirator. See resin PPE for beginners.
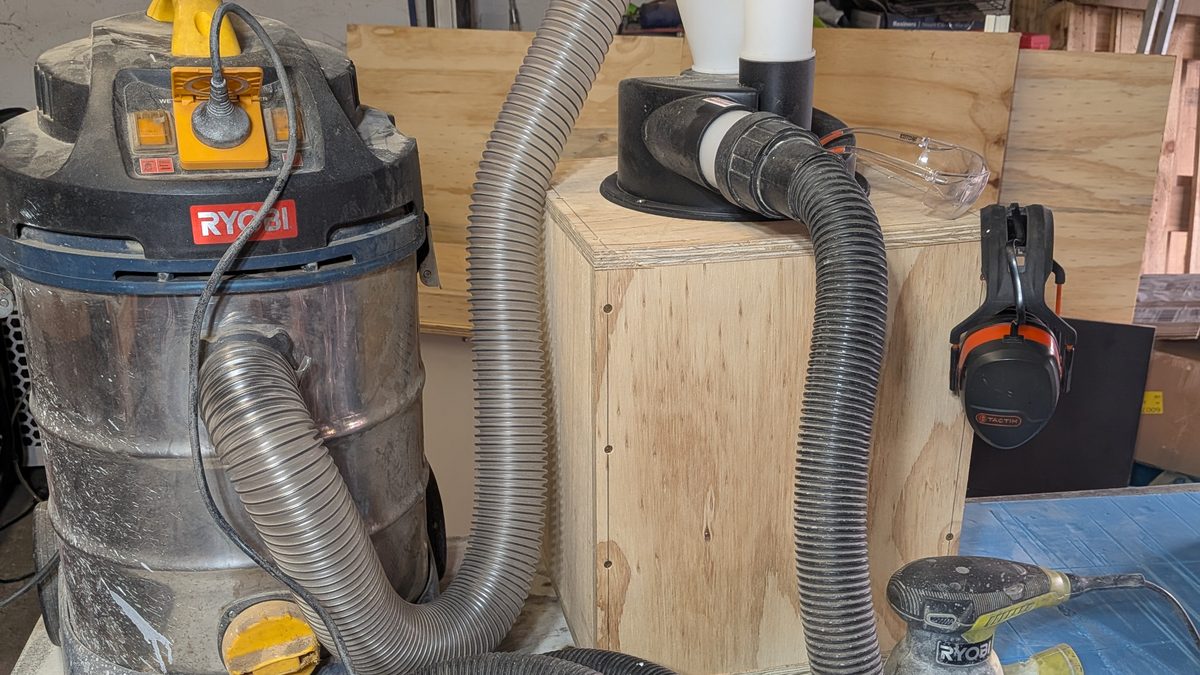
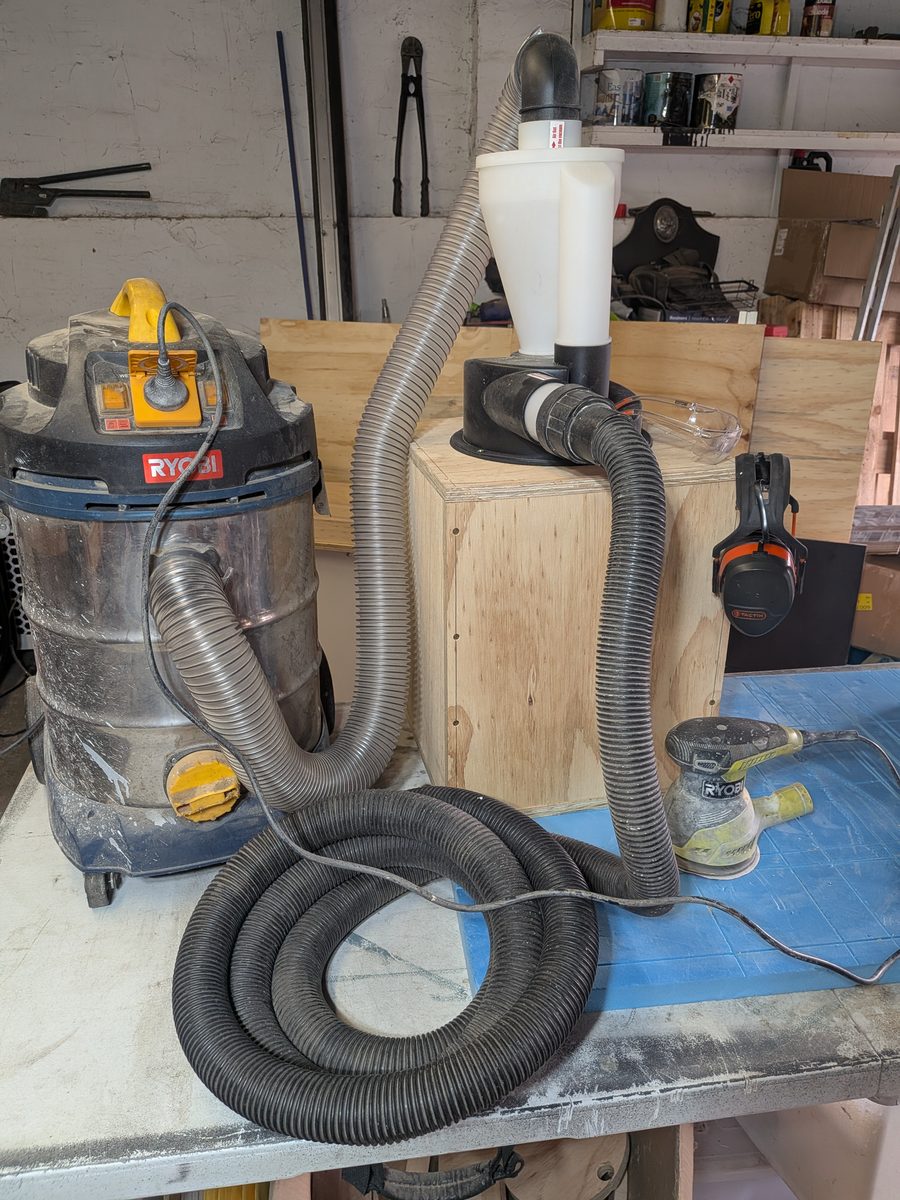
This is my own resin sanding dust setup, photographed in my own workshop. Every number and every mistake below is from actual use, not from a product listing.
Why dust collection matters when you work with resin
Most resin projects end with sanding. Coasters, trays, river tables and butcher blocks all need their edges and surfaces sanded flat, and a random orbital sander throws that dust everywhere. Wood projects add sawdust from cutting molds and blanks.
Two kinds of dust are worth taking seriously:
- Epoxy dust. Fully cured epoxy is the only kind you should be sanding. Dust from partially cured epoxy is still chemically reactive, and WEST SYSTEM notes that it can also cause contact dermatitis if it settles on your skin. Repeated exposure is how people become sensitized (allergic) to epoxy, and that can happen after many exposures or just one.
- Wood dust. According to OSHA, wood dust is classified as carcinogenic to humans by the International Agency for Research on Cancer (IARC) and as a known human carcinogen by the U.S. National Toxicology Program. It’s also linked to dermatitis, asthma and other respiratory problems.
Here’s why I bother with extraction. I was cutting plywood for a resin mold and forgot to hook my track saw up to the vac. The first photo is from one cut. The second is the same kind of cut with extraction connected.
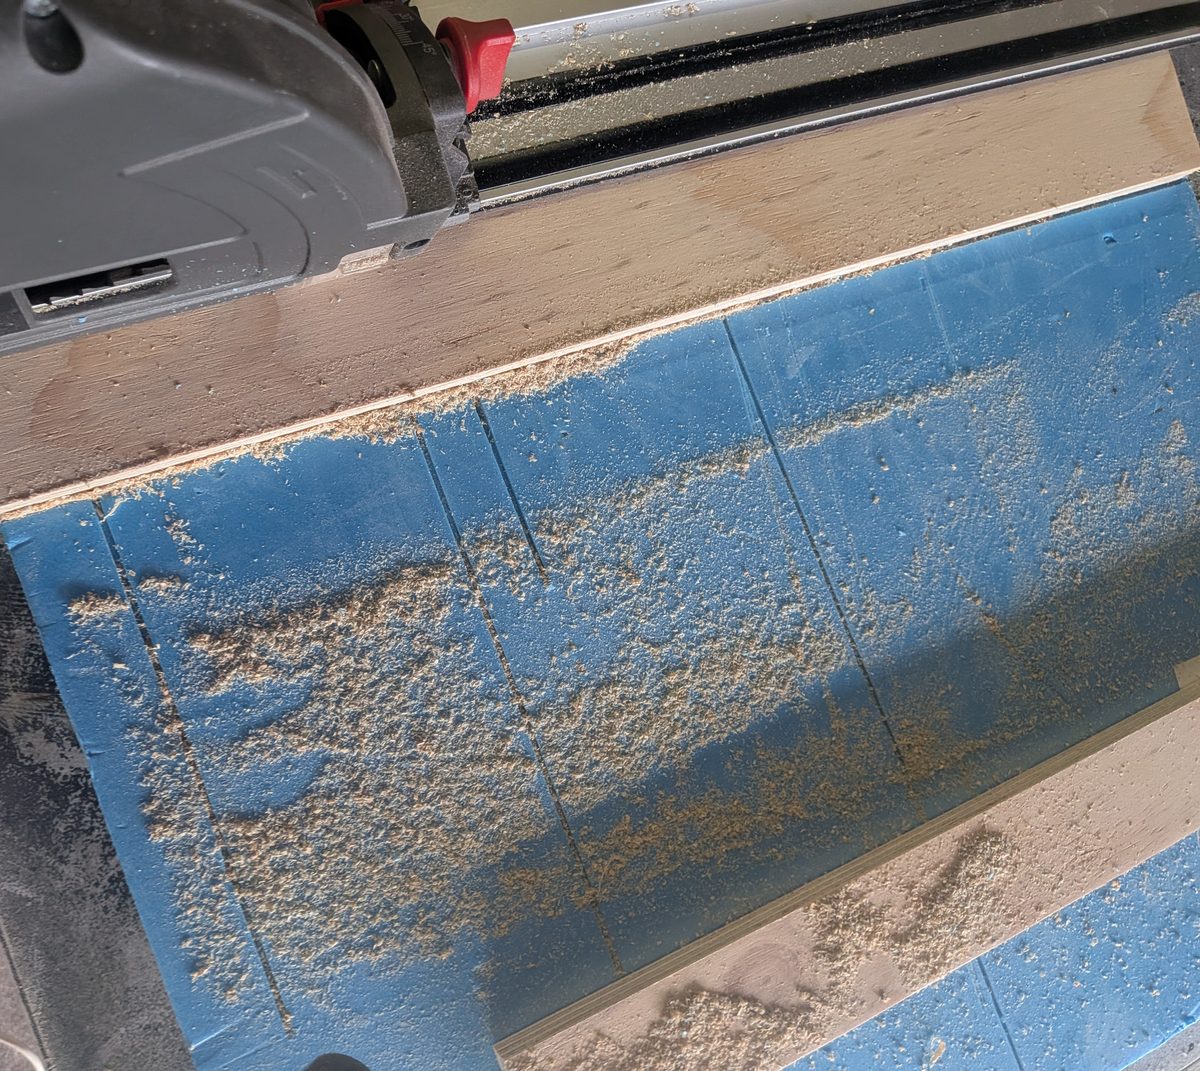
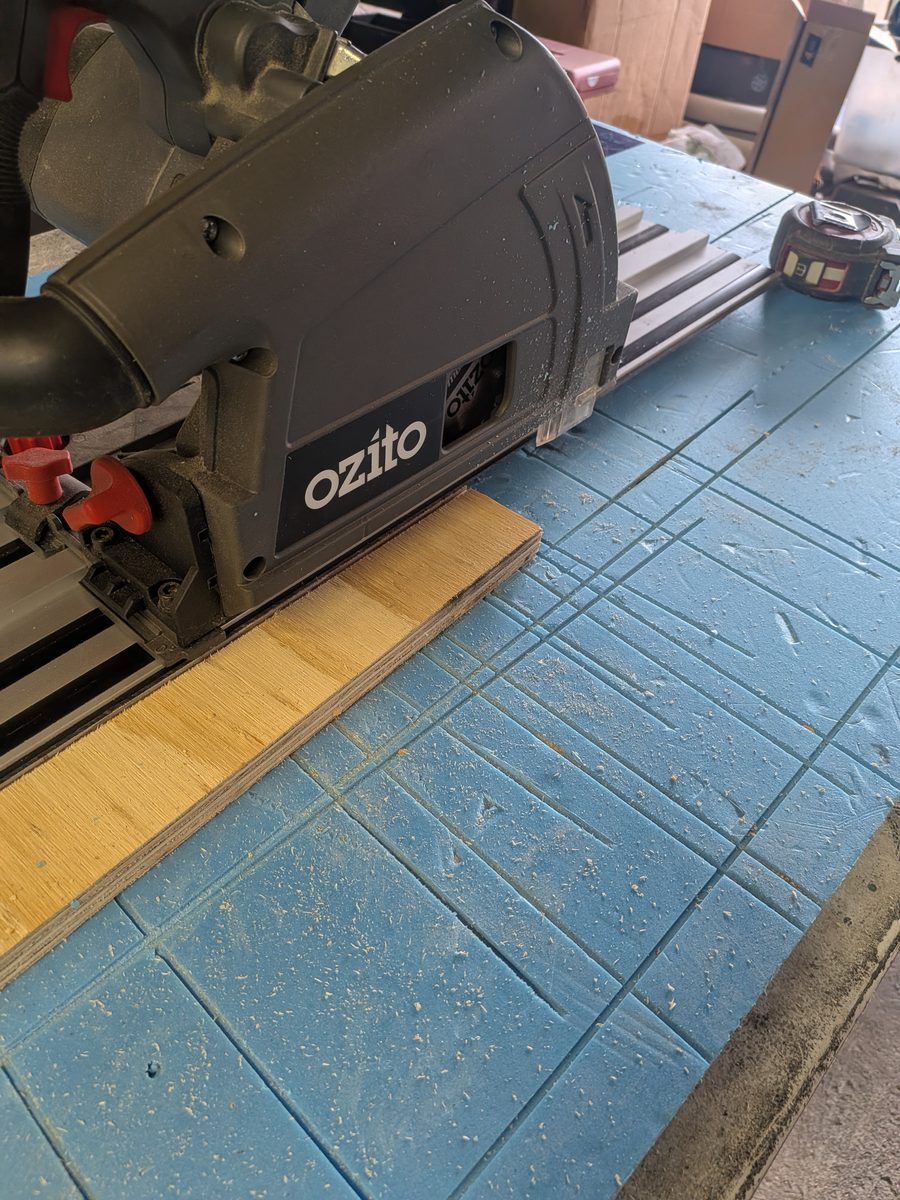
The chips you can see aren’t the real problem. It’s the fine dust you can’t see, which hangs in the air and ends up in your lungs. Extraction at the tool is the best way to stop it spreading, and OSHA calls local exhaust ventilation, which removes dust at or near its source, the primary way to control wood dust.
My setup at a glance
| Part | What I use | Notes |
|---|---|---|
| Shop vac | Ryobi wet & dry vac, about 15 years old | A budget buy at the time. Has an auto-start power socket (more on that below). |
| Cyclone separator | PEMEDOR 2.5″ dual cyclone dust separator (check price on Amazon) | Sized for 2.5-inch (63.5 mm) shop vac hoses. Comes with a 1 m hose. The bucket isn’t included. |
| Dust bin | Plywood box I built, about 14 inches square and 16 inches high (350 × 350 × 410 mm) | Just big enough to fit a bucket inside. Joints sealed with silicone. |
| Tools it serves | Ryobi random orbital sander, Ozito track saw | The whole thing lives under my saw bench when it’s not in use. |
| PPE | Respirator, ear muffs, safety glasses | Worn every time, extraction or not. |
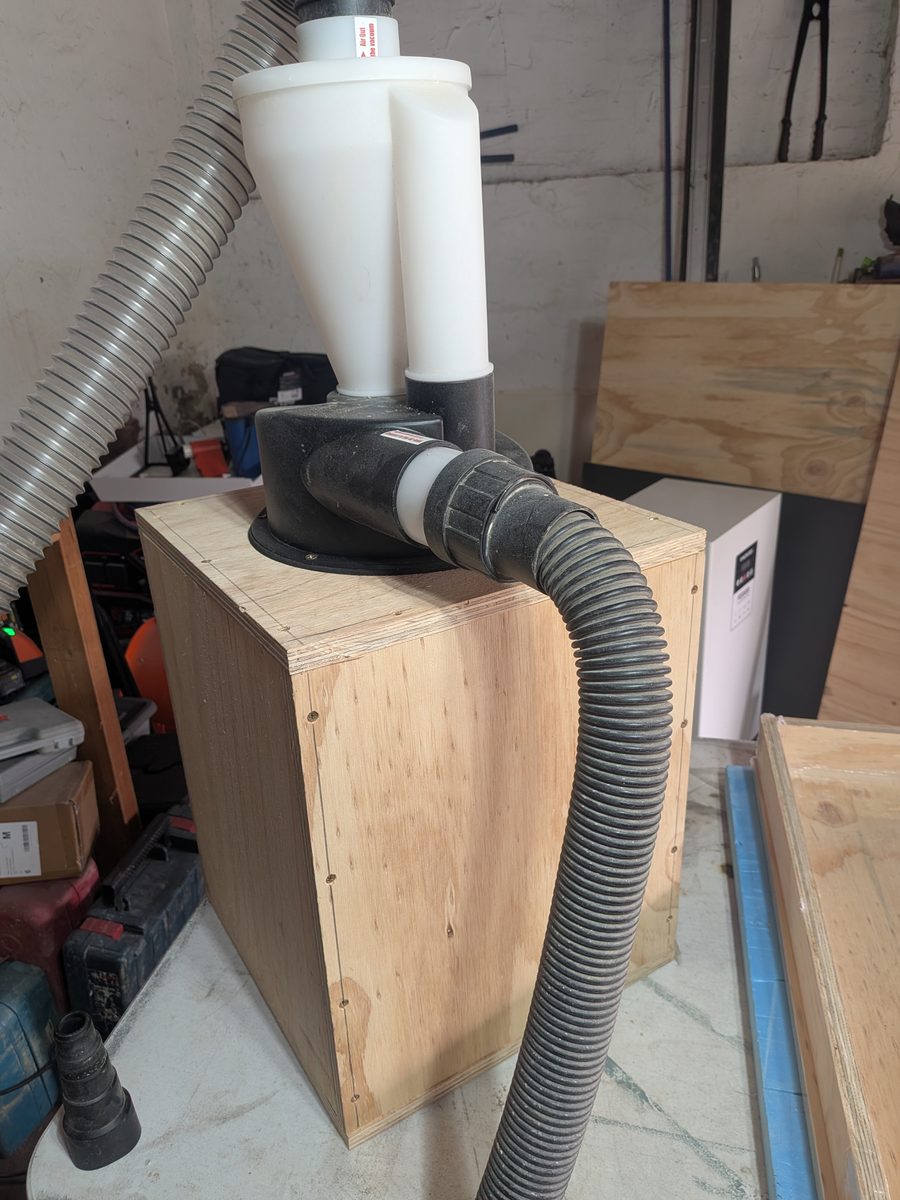
The hose runs from the tool to the cyclone’s inlet, then from the cyclone’s outlet on top to the shop vac. Dust drops out in the bin, and cleaner air carries on to the vac.
How a cyclone separator works (in plain English)
A cyclone separator sits in the hose between your tool and your vacuum. Air comes in through the side inlet and spins around inside the cone. The heavier dust and chips get flung outwards, lose speed and fall down into the bin underneath. The air then turns and leaves through the pipe in the middle of the top, on its way to the vacuum.
The result is that most of the dust never reaches your vacuum’s filter. That’s the whole point: a clogged filter is what kills suction, and filters cost money.
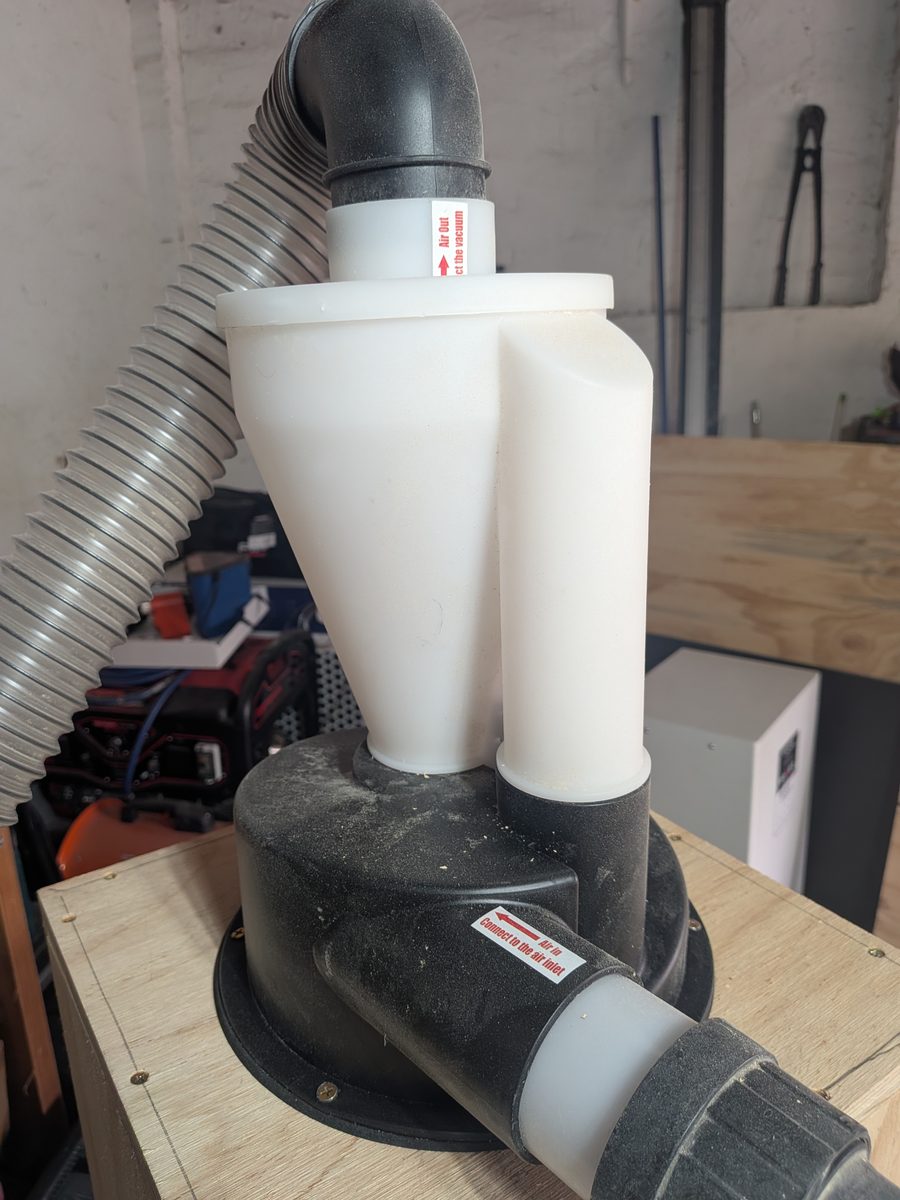
Tip: check the labels before you connect anything. If you swap the two hoses, the cyclone can’t spin the air properly and dust goes straight through to the vac.
Why I swapped the bucket for a plywood box
I started out the way most people do, with the cyclone sitting on a bare 5-gallon bucket. It worked, until the vacuum pulled hard enough to suck the bucket’s walls in. It happened more than once. A thin plastic bucket just isn’t built to hold a vacuum.
So I built a simple plywood box instead:
- Sized to hold a bucket. About 14 inches square and 16 inches high (350 × 410 mm), just big enough for a bucket to sit inside. The dust falls into the bucket, so emptying it is easy: lift the bucket out and tip it.
- Sealed. The box joints are siliconed, and there’s a seal between the cyclone and the lid. I don’t use a gasket on the lid itself. The screws pull it down tight enough to seal.
- The cyclone mounts through the lid, so the box itself becomes the vacuum chamber.
That last point is why the bucket doesn’t collapse any more. The whole box is under vacuum, so the air pressure inside and outside the bucket is the same. The box takes the load, and a rigid plywood box doesn’t buckle.
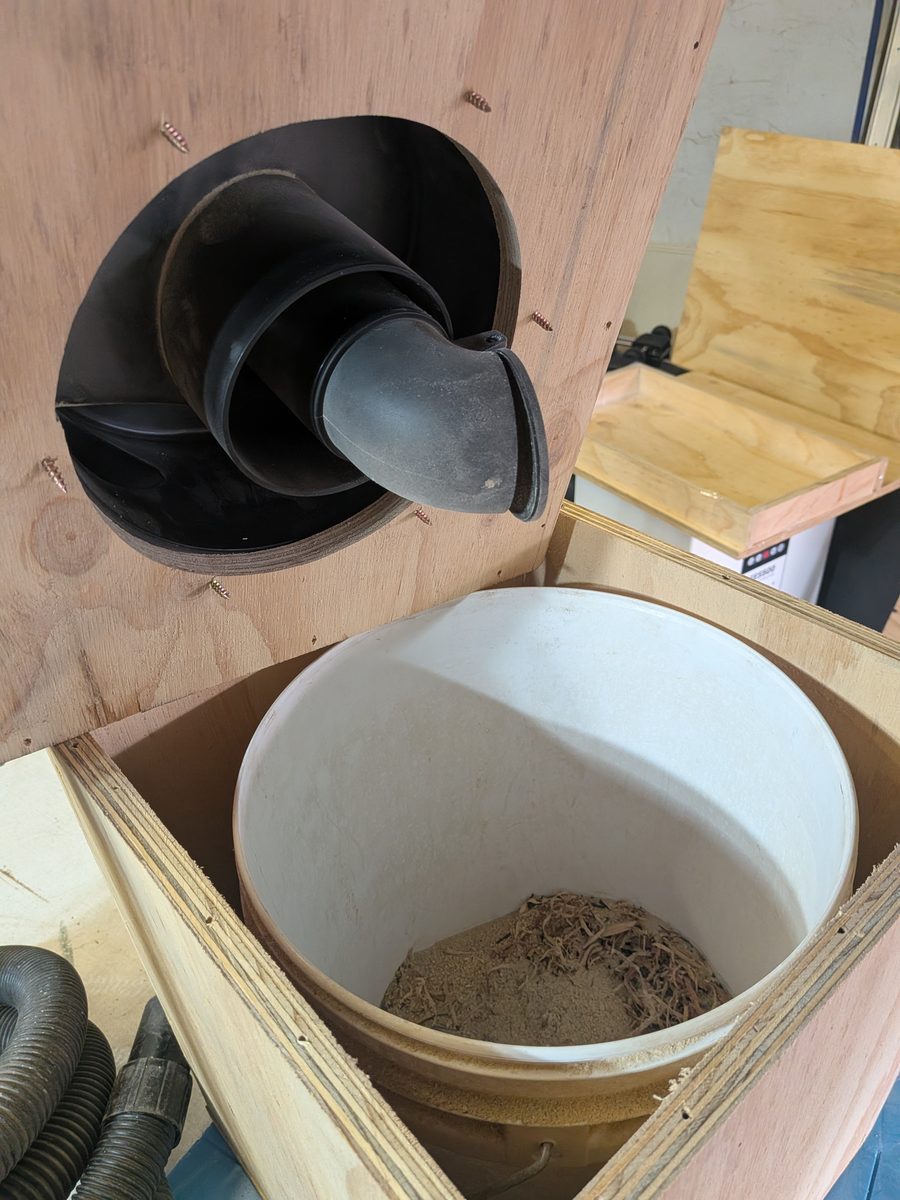
Sealing matters more than it looks. Any air leak in the box lets air in that doesn’t come from your tool. That means less suction at the sander, and some dust can bypass the cyclone and head for your vac filter.
One honest downside: my lid is screwed on, so emptying the bucket means unscrewing it. The screw tips also poke through the underside of the lid, so mind your fingers. Shorter screws would fix that.
What it catches (and what it doesn’t)
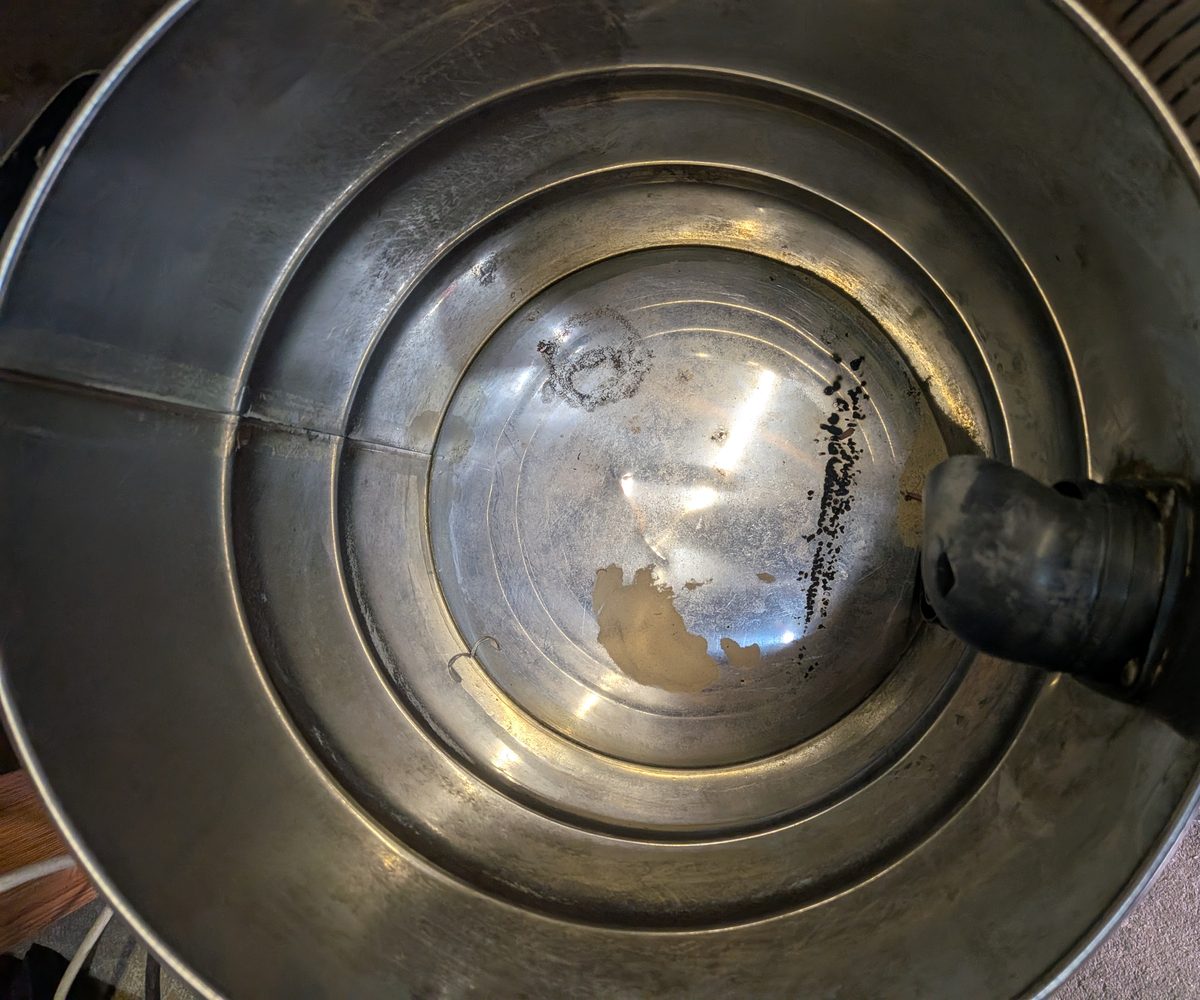
The best evidence is inside the vacuum. This is the drum of my shop vac after use with the cyclone fitted:
And this is where the dust went instead, into the bucket inside the box. There’s fine sanding dust and bigger shavings together:
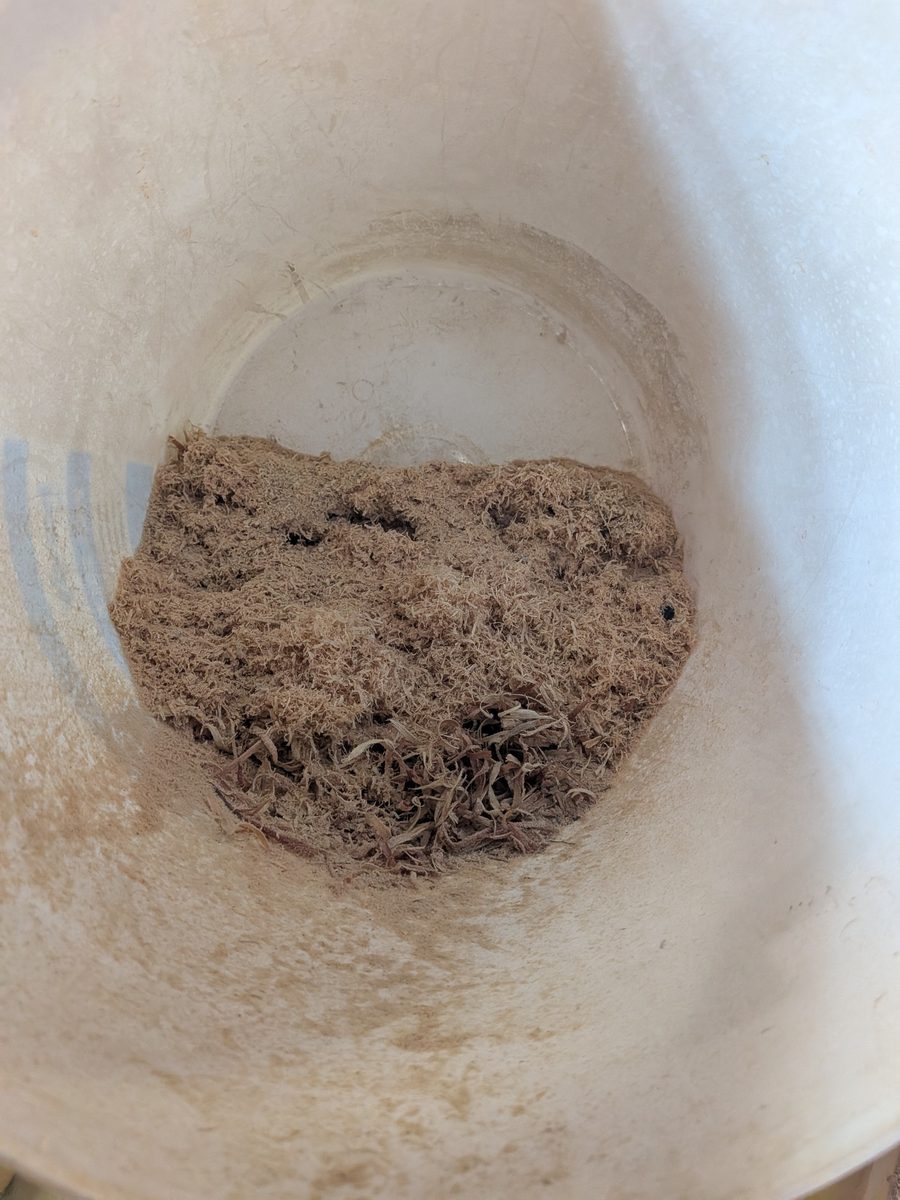
Because so little reaches the vac, the filter needs replacing far less often than it did before. That alone was worth the price of the cyclone.
But it doesn’t catch everything. Here’s the inside of the box with the bucket lifted out. See the faint ring where the bucket sat? A little fine dust ends up in the box around the bucket, and some of the very finest dust gets past the cyclone altogether.
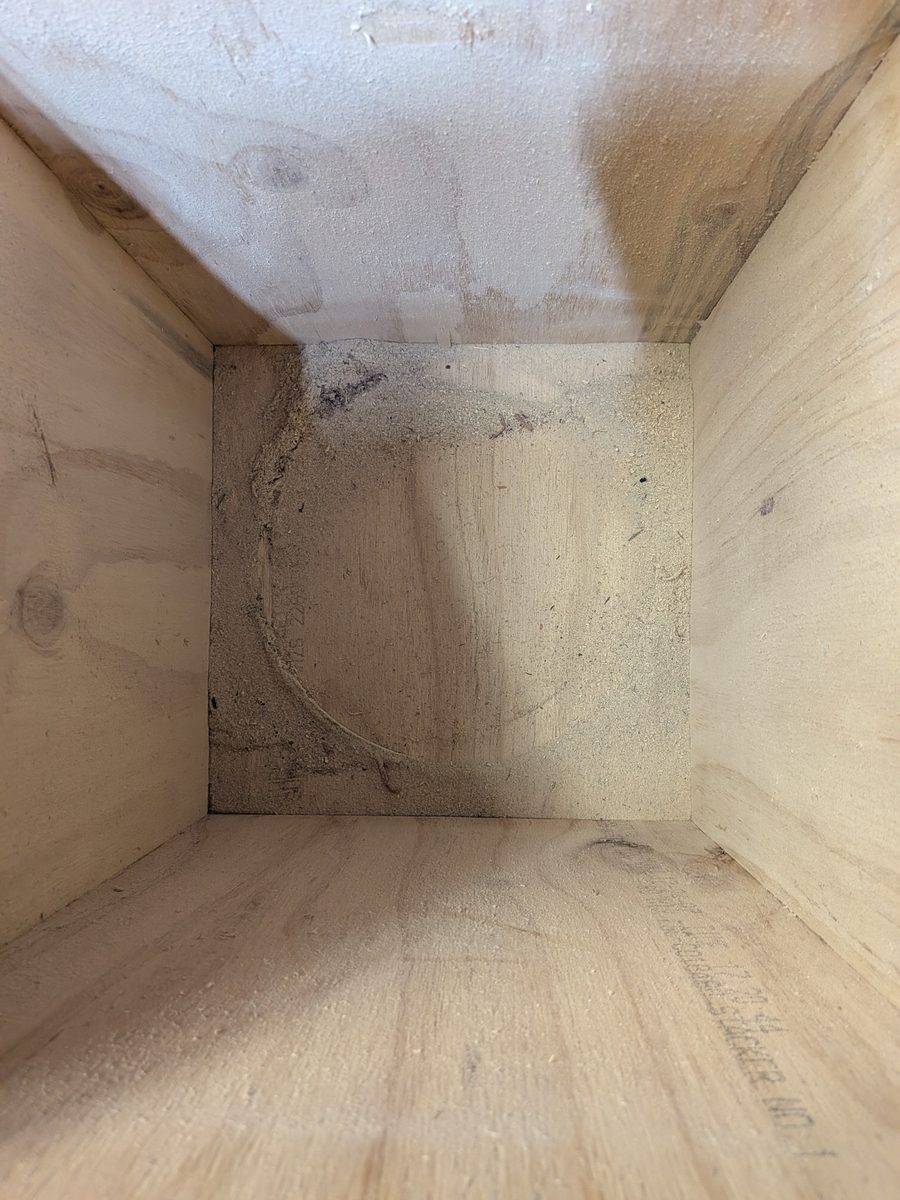
My setup catches the bulk of the dust so it isn’t all over my workshop. It doesn’t make the air clean. That’s the job of your respirator.
The shop vac: old, cheap and still going
My vac is a Ryobi wet and dry vacuum, about 15 years old. It was a budget option when I bought it and it simply hasn’t died. I’ve given it a hiding over the years. I once ran it with no filter at all while sanding a boat hull outdoors. Please don’t copy that one: without a filter, the finest dust goes straight through the motor and out of the exhaust.
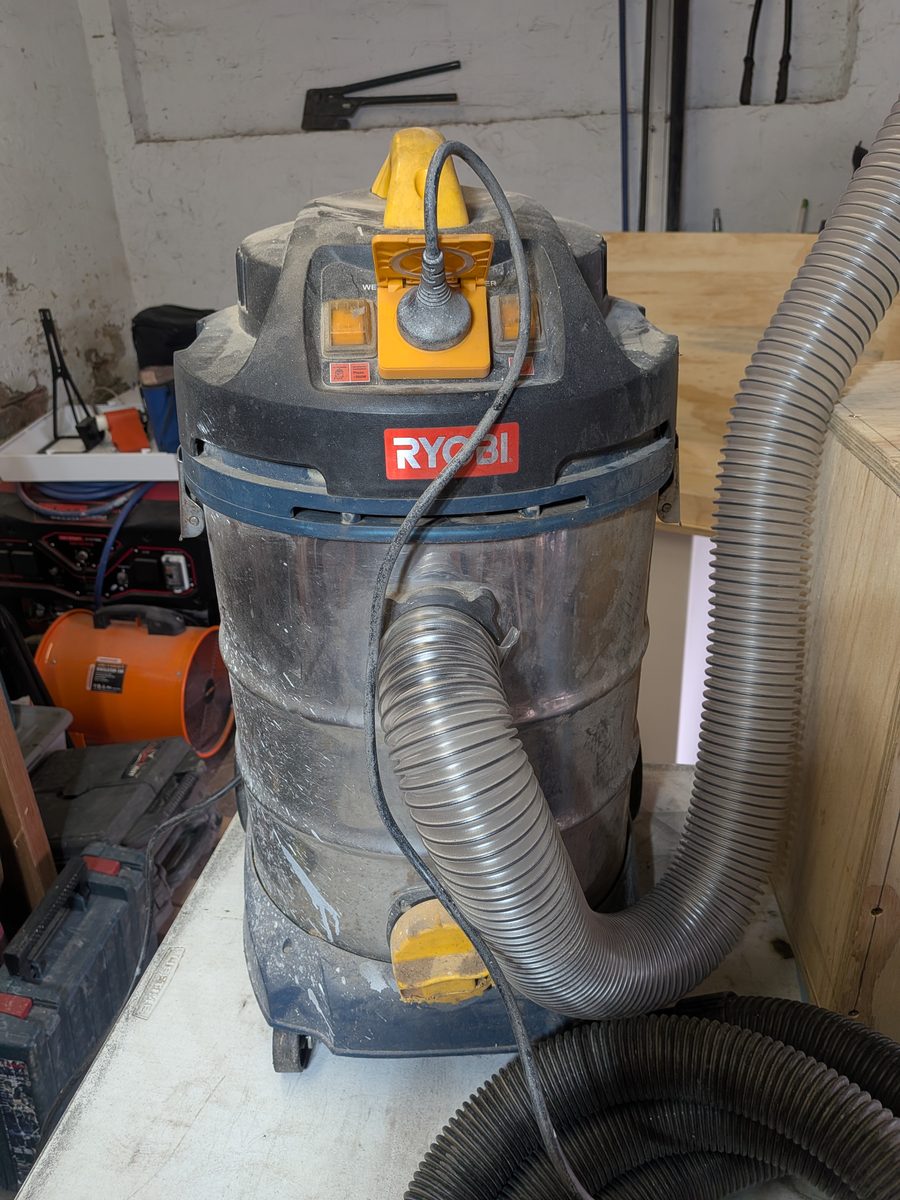
The most useful feature on it is the auto-start socket. The sander (or saw) plugs into the vac, so the vac switches on when the tool starts and off when it stops. You never forget to turn on extraction, and you’re not sanding for ten seconds before you reach the switch.
What I’d look for in a shop vac today
- A fine-dust or HEPA-rated filter. A cyclone protects the filter, but the filter is still what stops the finest dust being blown back into your room.
- An auto-start socket, for the reason above.
- A hose size that matches your cyclone. Mine is made for 2.5-inch (63.5 mm) shop vac hoses. Check yours before you buy, or plan on adaptors.
There are much better shop vacs and cyclone systems on the market now. Mine started as a test to see whether a cyclone would work at all, and it did.
What dust collection doesn’t do: fumes
This is the part people get wrong. A shop vac and cyclone deal with particles. They do nothing about vapors.
| Stage | Main hazard | What protects you |
|---|---|---|
| Mixing, pouring and curing | Vapors (fumes) | Good ventilation plus an organic-vapor (OV) cartridge respirator |
| Sanding fully cured resin | Fine dust | Extraction at the tool plus a particulate respirator, N95 or better |
| Sanding resin that isn’t fully cured | Reactive dust | Don’t. Wait out the full cure time. |
I also run a fume extractor near my resin bench to help reduce fumes while I work, but that’s a separate tool for a separate problem. It doesn’t replace ventilation or the respirator either.
A few dust habits that go with the setup
- Respirator on before the sander starts, and keep it on while you clean up. Clean-up stirs dust back into the air.
- Vacuum, don’t blow. Oregon OSHA’s wood dust guidance says not to use compressed air to clean work surfaces. It just blows the dust back into the air.
- Empty the bucket before it’s full. If the dust builds up to the bottom of the cyclone, it starts getting pulled through to the vac.
- Empty it outside or into a bag, gently, with your respirator still on.
- Hook up every tool, every time. My track saw photos are what happens when you forget.
How to set up your own (the short version)
- Pick a cyclone that fits your vac’s hose size. Most hobby cyclones are made for standard shop vac hoses. Check before you buy.
- Give it a rigid bin. Build a box (or use a rigid drum) that won’t collapse under vacuum. If you want a bucket inside for easy emptying, size the box around the bucket.
- Seal everything. Silicone the box joints, seal the cyclone to the lid, and make sure the lid closes tight.
- Connect it the right way round. Tool hose to “Air in”, vacuum to “Air out”.
- Test it. Turn the vac on and listen for air leaks around the lid and joints. Then do a short sanding run and check the vac drum afterwards.
If I ever get round to it, my next upgrade is a hinged lid, or some kind of drawer or tray, so I don’t have to unscrew the lid to empty the bucket.
Where this fits in your resin projects
If you’re sanding anything bigger than a keychain, this kind of setup earns its place. It makes the most difference on projects with a lot of sanding:
For the full picture on protecting yourself, see is epoxy resin safe? and the Resin Safety Hub.
Frequently Asked Questions
Do I still need a respirator if I use dust extraction?
Yes. Extraction catches most of the dust at the tool, but not all of it, and the finest dust is the part you can’t see. Wear a particulate respirator rated N95 or better whenever you sand.
Can I sand epoxy resin before it is fully cured?
No. Epoxy stays chemically reactive until it has fully cured, and WEST SYSTEM warns that breathing the dust of partially cured epoxy can cause serious health problems. Wait out the full cure time on your resin’s label.
Does a shop vac or cyclone separator remove resin fumes?
No. They only deal with dust particles. Fumes come from mixing, pouring and curing, and need ventilation plus an organic-vapor cartridge respirator.
Why did my bucket collapse under the cyclone?
A thin plastic bucket can’t hold a vacuum, so strong suction pulls its walls in. Use a rigid, sealed bin instead, or put the bucket inside a sealed box so the pressure is equal on both sides of the bucket.
Will a cyclone separator work with any shop vac?
Most hobby cyclones are made for standard shop vac hoses. Mine is sized for 2.5-inch (63.5 mm) hoses. Check your vac’s hose size before you buy, or plan on adaptors.
Sources
- WEST SYSTEM, Health Effects From Overexposure to Epoxy: partially cured sanding dust, contact dermatitis, sensitization.
- WEST SYSTEM, Preventing Overexposure: N95-or-better protection for epoxy and wood dust, organic-vapor respirators, ventilation.
- OSHA, Wood Dust: Hazards: IARC Group 1 (carcinogenic to humans) and NTP “known to be a human carcinogen” classifications.
- OSHA, Woodworking eTool: Wood Dust: health effects (dermatitis, asthma and other respiratory effects, cancer) and local exhaust ventilation as the primary control.
- Oregon OSHA, Wood Dust fact sheet: don’t use compressed air to clean work surfaces; sweep or vacuum instead.
- PEMEDOR 2.5″ Dual Cyclone Dust Separator, Amazon listing: hose size, included hose, bucket not included.
Get new guides in your inbox
For step-by-step tutorials, safety reminders and honest gear recommendations as we publish, join the Resin Affairs newsletter →
This guide is general information for hobby use, not professional occupational-health advice. Always follow the Safety Data Sheet for your resin, the instructions for your tools and respirator, and your local workplace-safety guidance.
Enjoyed this guide? Join the Resin Affairs newsletter for new tutorials, safety tips, and project ideas straight to your inbox.