How to Fix Resin That Didn’t Cure (Step-by-Step)
Disclosure: This article contains affiliate links. If you purchase through these links, we may earn a small commission at no extra cost to you. We only link to gear we would use ourselves.
As an Amazon Associate I earn from qualifying purchases.
Two days ago you poured what should have been a coaster, a pendant, or a tabletop coat. This morning you tipped the mold slightly and the resin moved. It’s still liquid, or it has gone to a wobbly gel, or it demolded into something with the consistency of a gummy candy. If your resin didn’t cure, it’s easy to feel like the whole project, and maybe the mold, is a lost cause.
It usually isn’t. A non-cure feels like a bigger disaster than a tacky surface, but it’s actually a simpler problem to diagnose, because there are only a few things that can stop epoxy from curing at all. Below: how to confirm it’s a non-cure and not just stickiness, the four root causes, what to do right now, and how to save the mold.
Non-cure is one of five things that can go wrong with a resin pour. Our full resin troubleshooting guide covers the others (stickiness, bubbles, soft spots, cracks) and is the best starting point if you’re not sure which one you have.
Quick answer: Resin that is still liquid or gel-like after 48 hours in a room at 70°F (21°C) or warmer will not cure, no matter how long you wait or how much heat you add. If the room was cold (below about 65°F/18°C), move it somewhere at 75–80°F for another 24–48 hours before you give up. The cause is almost always a badly wrong ratio, resin and hardener from two different products, or expired hardener. Scrape out the uncured resin, clean the mold or surface with isopropyl alcohol, and pour a fresh, correctly measured batch.
“Didn’t Cure” vs. “Sticky”: Which One Do You Have?
A lot of people search “resin didn’t cure” when what they have is a sticky surface, and vice versa. The two need different fixes, so take ten seconds to check. Press a gloved fingertip into the resin:
| What happens | What you have | Where to go |
|---|---|---|
| It holds its shape; your finger comes away with a slight tug, like tape, or one patch is gummy | Sticky resin (mostly cured) | Our guide to why resin is sticky and 5 fixes. Warmth, a heat gun, or a sand-and-recoat will usually save it. |
| Your finger sinks in; it’s liquid, syrupy, or a soft gel all the way through; it can’t be demolded or collapses when it is | Resin that didn’t cure | You’re in the right place. Keep reading. |
| Hard on top but liquid or gummy underneath in one area | A soft spot (localized under-mixing) | The soft-spots section of the troubleshooting guide: excavate and refill. |
The dividing line is 48 hours. A standard craft epoxy that’s still liquid or gel at 48 hours in a warm room isn’t slow, it’s stopped. (A few deep-pour casting resins are rated for 72-hour or longer cures at cool temperatures, so check your label’s full-cure time before you give up on one of those.)
Why Resin Doesn’t Cure at All: The 4 Root Causes
Stickiness has a long list of possible causes, because it only takes a small shortfall in the reaction. A total non-cure needs something to go badly wrong, and that narrows the field to four things.
1. The ratio was off by a wide margin
A ratio that’s 10% off leaves a sticky surface. A ratio that’s 50% off, or has half the hardener missing, leaves liquid. This happens more often than you’d think, and almost always for one of these reasons: measuring a 2:1 resin as 1:1 because that’s what the last kit used; reading the ratio backwards and adding two parts hardener to one part resin; measuring a mix-by-weight resin in volume cups (resin and hardener have different densities, so equal volumes are not equal weights); or losing track partway through and topping up one bottle twice. The label on your kit is the only source of truth, and our mixing guide covers how to read it.
2. Resin and hardener from two different products
This is the cause nobody warns beginners about. Hardeners are formulated for a specific resin: the ratio, the chemistry, and the cure time are all designed as a matched pair. Part B from one brand won’t reliably cure Part A from another, and neither will the hardener from a deep-pour kit paired with a coating resin from the same brand. If you ran low on one bottle and topped up from a different kit, or you have two half-used kits on the shelf and grabbed one bottle from each, this is very likely what happened. Mixed-product batches frequently never set at all.
3. Expired or degraded resin or hardener
Hardener absorbs moisture from the air once opened, and over months it darkens, thickens, and loses the ability to react fully. A slightly degraded hardener gives you sticky resin; a badly degraded one, or one stored open in a humid garage for a year, can leave the batch liquid. Resin (Part A) is hardier, but it can crystallize in the cold, and crystallized resin that hasn’t been warmed back to clear won’t measure or react properly either. Stand the capped bottle in a warm-water bath until it turns clear again, then stir it before you measure. If either bottle is more than about a year past opening, or has thickened, gone cloudy or crystallized, treat it as a suspect. A yellow or amber tint alone is normal oxidation and usually still cures, though it can tint white or pale pieces.
4. The hardener was diluted, substituted, or contaminated
Less common, but it happens: alcohol or water in the mixing cup from cleaning, a big splash of alcohol ink or a water-based colorant, a large volume of a wet additive like fresh flowers or a damp pigment paste, or a mixing cup that still had a different product in it. Anything that adds liquid to the mix without adding reactive hardener throws the ratio off, and enough of it stops the cure. Keep colorants to a small percentage of the batch (most manufacturers say no more than about 5–6% by volume), and never mix in a cup that’s been washed and is still wet.
Notice what’s not on this list: temperature and under-mixing. A cold room slows epoxy down and makes it sticky or bendy, and in a cold garage it can stall altogether, but a correctly measured batch that stalled in the cold usually finishes curing once it is warmed up. Under-mixing leaves soft spots in a mostly hard piece. If your resin is liquid at 48 hours, look at the four causes above first.
🧰 Recommended Kit for This Project
- Digital Scale for Resin (Precise to 0.1g) — the only reliable way to measure a mix-by-weight resin, and a good cross-check for any ratio
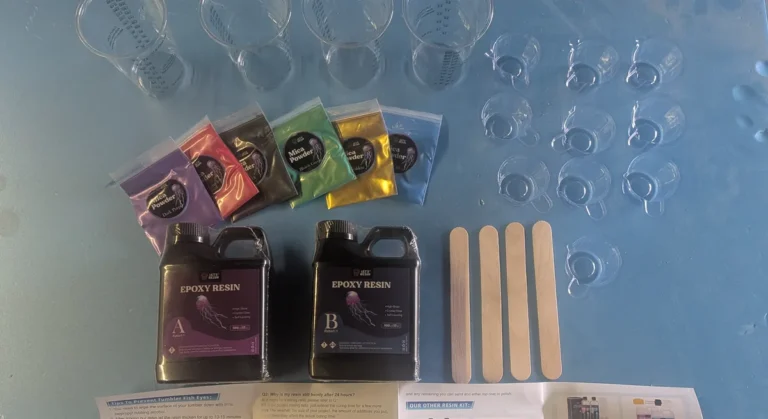
- LET’S RESIN Epoxy Resin Kit with Sphere & Pyramid Molds — a fresh, matched resin-and-hardener pair to rule out an old or mismatched bottle
- Heat Mat for Resin Curing — keeps the repour at a steady cure temperature so the next attempt has every advantage
- Nitrile Gloves — uncured resin is a skin sensitizer; you’ll be handling a lot of it during the clean-up below
What to Do Right Now
Pick the row that matches what’s in front of you. The answer changes depending on how far the resin got.
Still fully liquid after 48 hours
If it sat somewhere cold, warm it first (see the quick answer). If it cured in a warm room, don’t wait longer, and don’t add heat or more hardener: neither will start a reaction that has nothing to react with. Put on nitrile gloves, pour the liquid resin out of the mold or off the surface into a disposable cup or a lined container, and wipe out what’s left with paper towels. This is the easiest state to clean up. Then jump to the mold-salvage section below.
Partially gelled, but soft all the way through
A gel that holds a wobble but never firms up is a batch that got partway and stalled. It won’t finish. Scrape it out with a plastic scraper, an old spoon, or a wooden stir stick, working from the edges in. Gel comes out in rubbery lumps rather than pouring, so this takes a little longer, but it doesn’t bond to silicone and lifts cleanly. On a coated surface (a tabletop or tray), use a plastic putty knife and expect to sand the substrate afterward.
Already demolded, and it’s collapsing or won’t hold its shape
You’ve lost this piece, and that’s fine. Set it on plastic sheeting or in a silicone cup somewhere warm and let it go as far as it will over a few days so it’s easier to dispose of as a solid. Meanwhile, the mold is empty and just needs cleaning, so skip straight to the salvage steps. Trying to “finish” a collapsed cast with a fresh layer of resin over the top doesn’t work: the new layer bonds to nothing and you end up with two failures.
A coated surface (tray, tabletop, tumbler) that never set
Scrape off as much as possible, then wipe the surface repeatedly with 91%+ isopropyl alcohol on paper towels, changing towels often, until no residue transfers. Let it dry completely. Lightly sand wood or a previously coated surface with 120–220 grit to give the repour something to grip, wipe the dust, and recoat. For a tumbler, take it off the turner, wipe it down the same way, and let it dry fully before the second attempt.
Pro tip: Save a sample. Before you clean everything, put a spoonful of the failed resin in a small cup and set it aside. If it’s still liquid a week later, you know for certain the chemistry was wrong, not the temperature, which tells you exactly what to change next time.
How to Save a Mold Full of Uncured Resin
Beginners often assume a mold with liquid resin in it is ruined. Silicone molds are far tougher than that, and a cast piece is where non-cures happen most, so here’s the full process:
- Pour or scoop out everything you can. Tip liquid resin into a disposable cup. Scrape gel out with a wooden stir stick or a plastic spoon. Don’t use anything metal or sharp on silicone; a nick in the mold becomes a permanent flaw in every future piece.
- Wipe out the residue. Uncured resin is oily and clings. Wipe with paper towels, then with paper towels dampened with 91%+ isopropyl alcohol, and keep going until a fresh towel comes away clean. Get into every corner and detail with a cotton swab.
- Wash if needed. A little warm water and dish soap is fine for silicone. Rinse thoroughly, because soap film left in a mold is itself a cause of tacky resin.
- Dry it completely. This is the step people skip. Air-dry the mold upside down for several hours, or use a hair dryer on cool. A mold that’s still damp inside will cloud or stall the next pour at the surface.
- Check it before you reuse it. Hold it up to the light. It should be clean, dry, and un-nicked. If there’s a faint tacky film you can’t shift, a final alcohol wipe usually gets it.
- Pour the replacement with fresh, matched, correctly measured resin. Not the same batch, not the same suspect bottles. Mix a small test amount first if you have any doubt about the kit, and let it cure in a scrap cup overnight before committing to the real pour.
For flat pours on a plastic or acrylic surface, the same steps apply. For raw wood, the uncured resin will have soaked in a little; scrape, wipe with alcohol, let it dry for a day, and sand before recoating.
Disposing of the failed resin
Never pour uncured resin down a sink or onto the ground. Leave it in a disposable cup or on plastic sheeting somewhere warm and ventilated. An off-ratio batch may firm up enough over a few days to throw away once it’s solid, but it will never reach a usable cure. If it stays liquid, take it to your local household-hazardous-waste drop-off. Keep it away from children and pets in the meantime.
📋 Get the Free Resin Safety & Prep Checklist
A one-page printable checklist covering PPE, ventilation, and workspace setup — so you’re not hunting through this guide mid-pour. Enter your email and we’ll send it straight over.
Free. We only email when there’s something useful, never more than twice a month, and you can unsubscribe anytime. Privacy Policy
How to Avoid This Happening Again
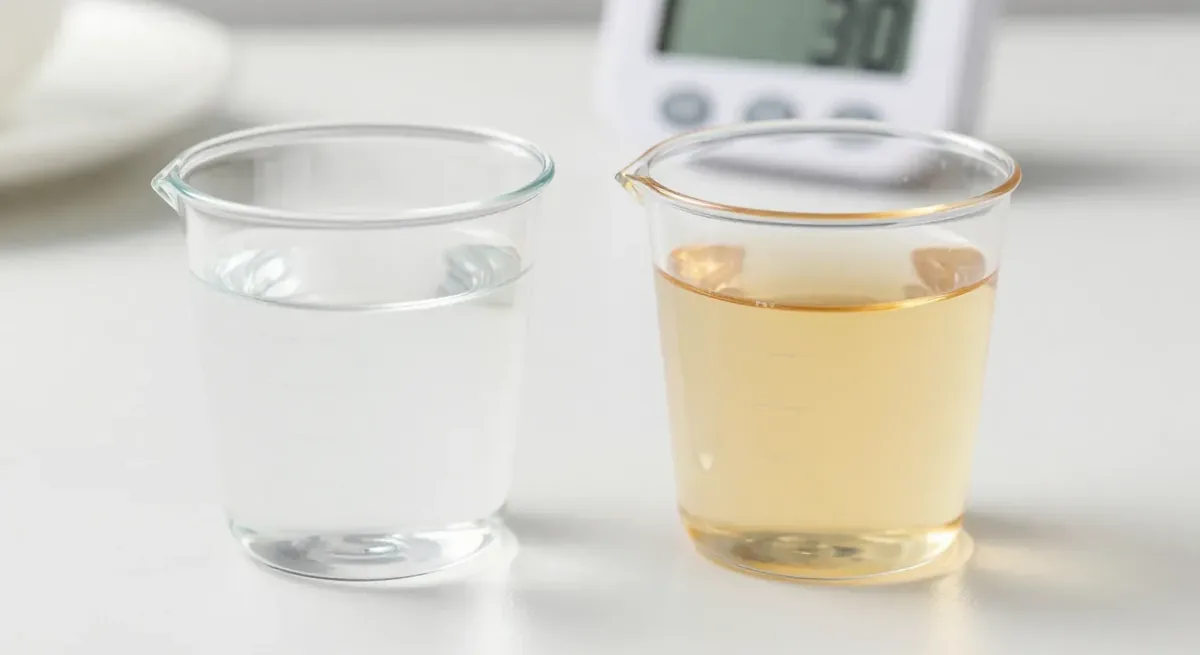
Every cause of a total non-cure is a measuring or bottle problem, which is good news: they’re all preventable with habits rather than skill.
- Read the label every single time, even on a kit you’ve used before. Ratios differ between brands and between products from the same brand, and a 2:1 casting resin sits on the shelf looking exactly like a 1:1 coating resin.
- Never eyeball a ratio. Marked cups for volume, a digital scale for weight, and never the wrong one. Measure Part A and Part B into separate containers before combining if you’re unsure.
- Never mix bottles from two different kits. Not two brands, and not two products from the same brand. If you run out of hardener mid-project, stop and buy the matching one.
- Date your bottles when you open them, cap them tightly, and store them somewhere cool and dry. Replace hardener that’s gone thick, cloudy or crystallized (a yellow tint alone is usually just oxidation).
- Keep additives small (a few percent of the batch) and keep water and alcohol out of the mixing cup.
- Mix a test cup whenever you open a new kit or haven’t used one in months. A tablespoon of resin cured overnight in a scrap cup costs nothing and tells you the kit is good before you commit a mold full.
- Then pour it right. Once the chemistry is sorted, the pour technique and the two-cup mixing method take care of the rest.
Frequently Asked Questions
Why didn’t my resin cure at all?
Resin that stays liquid or gel-like almost always has a chemistry problem rather than a technique problem: the ratio was badly wrong (for example, a 2:1 resin measured as 1:1, or a mix-by-weight resin measured by volume), the resin and hardener came from two different products, one bottle was expired or moisture-damaged, or a large amount of water, alcohol, or colorant diluted the mix. Cold rooms and under-mixing cause sticky resin and soft spots, but rarely a total non-cure.
Can resin cure after 48 hours?
If it’s still liquid or a soft gel at 48 hours in a warm room, no. The reaction has stopped because part of the mix has nothing left to react with, and neither more time nor heat will restart it. The exception is a slow-cure deep-pour casting resin, some of which are rated for 72 hours or more at cool temperatures; check the full-cure time on your label. Resin that is hard but slightly tacky at 48 hours is a different problem and can often be finished with warmth or a sand-and-recoat.
What happens if you mix the wrong resin ratio?
A small error (around 10%) leaves the surface sticky or the piece bendy. A large error, such as using half the hardener or reversing the ratio, leaves unreacted resin with nothing to cure it, and the batch stays liquid or gels and stalls. Adding more hardener afterward doesn’t fix it, because the extra hardener can’t mix evenly into a batch that has already started to react. The only fix is to remove it and pour a fresh, correctly measured batch.
Can I save a resin mold that didn’t set?
Yes, nearly always. Pour or scoop out the uncured resin, wipe the mold with paper towels and then with 91%+ isopropyl alcohol until a fresh towel comes away clean, wash it with warm soapy water if needed, rinse thoroughly, and let it dry completely before reusing. Avoid metal tools, which can nick silicone. A clean, dry mold will cast perfectly again with a fresh batch.
Can you mix two different brands of resin and hardener?
No. Hardeners are formulated for a specific resin, and the ratio and chemistry only work as a matched pair. Combining Part A from one product with Part B from another, even from the same brand, is one of the most common causes of resin that never sets. If you run out of one bottle, buy the matching replacement rather than topping up from a different kit.
Will uncured resin ever harden if I leave it?
Sometimes it firms up slowly over days or weeks as the small amount of reaction that can happen finishes, but it will never reach a proper hard cure and shouldn’t be used as a finished piece. Leaving it somewhere warm on plastic sheeting is a good way to get it solid enough to dispose of in household waste. Never pour liquid resin down a drain.
Sources
- OSHA, Hazard Communication: the label, Safety Data Sheet and technical data sheet give your product’s exact ratio, whether it mixes by volume or weight, and which hardener it pairs with.
- WEST SYSTEM, Epoxy Shelf Life & Storage: how moisture gets into opened containers, and how resin that crystallized in the cold is warmed until clear before use.
- WEST SYSTEM, Health Effects From Overexposure to Epoxy: uncured epoxy is a skin sensitizer, and you can become sensitized after many exposures or just one, so the whole clean-up happens in nitrile gloves.
- NIOSH (CDC), Epoxies and resins: wear the right gloves, increase ventilation, and wash skin as soon as possible after contact.
- WEST SYSTEM, Preventing Overexposure: gloves, ventilation and skin cleanup (waterless hand cleaner, then soap and warm water; never solvents on skin).
- EPA, Household Hazardous Waste (HHW): why leftover liquid resin goes to a household hazardous waste drop-off, never down a drain or onto the ground.
The Short Version
Liquid or gel at 48 hours means the chemistry was wrong, not that you need to wait longer. Scrape it out, clean the mold or surface with alcohol, let it dry, and pour again with fresh, matched, carefully measured resin. The mold is almost certainly fine, and so is the project. If what you actually have is a hard piece with a tacky surface, the gentler fixes in our sticky resin guide will do, and for anything else that went wrong with the pour, the full troubleshooting guide has it covered.
Keep Learning on ResinAffairs.com
A non-cure is the most dramatic resin problem, but not the only one. Here’s where to go next:
- 🛠️ Common Resin Problems and How to Fix Them → — the full troubleshooting guide: stickiness, bubbles, soft spots, cracks and fissures.
- 🍯 Why Is My Resin Sticky? 5 Fixes → — for resin that’s hard but tacky, the milder problem with gentler fixes.
- 🥄 How to Mix Epoxy Resin → — reading the ratio, measuring by volume vs. weight, and the two-cup method.
- 🧪 Choosing the Right Resin for Your Project → — so you’re never pouring a coating resin where a casting resin belongs.
- 🧤 Resin Safety Hub → — uncured resin can still off-gas and irritate skin, so review the full safety and PPE basics before troubleshooting a bad cure.
- How long does resin take to cure → — the normal timeline, so you know when to stop waiting.
Enjoyed this guide? Join the Resin Affairs newsletter for new tutorials, safety tips, and project ideas straight to your inbox.