How to Color Resin: Mica Powder, Alcohol Ink & Pigments
Resin Affairs is reader-supported. If you buy through links on this page, we may earn a small commission at no extra cost to you. We only link to gear we would use ourselves — prices and availability change, so check the current listing. Always follow your resin product’s label and Safety Data Sheet.
As an Amazon Associate I earn from qualifying purchases.
Clear resin is the blank canvas. Every ocean-wave coaster, galaxy keychain and marbled trinket dish you have saved on Pinterest started as the same water-clear liquid with something stirred into it. Color is where most beginners fall in love with resin. It is also where a lot of first projects quietly go wrong, because the wrong colorant, or too much of the right one, can leave you with a piece that stays soft for weeks.
The good news is that coloring resin is not complicated once you know three things: what each colorant does, how much of it to add, and what to keep well away from your mixing cup. This guide covers mica powder, alcohol ink, liquid dye, pigment paste, glitter and glow powder, plus the household products that ruin a cure and five easy techniques to try on your first colored pour.
Quick answer: Mix resin and hardener together first, then add colorant a little at a time — no more than about 5–6% of the total volume. Use mica powder for shimmer, alcohol ink for translucent color, and liquid resin dye or pigment paste for solid color. Skip water-based paints and food coloring; they stop resin from curing properly.
⚠️ Safety first: work in a well-ventilated space, wear nitrile gloves and eye protection, and keep uncured resin off your skin. New to resin safety? Start with Is Epoxy Resin Safe? and Resin PPE for Beginners.
The Golden Rules of Coloring Resin
Every colorant in this guide follows the same handful of rules. Learn them once and the rest is just choosing a look.
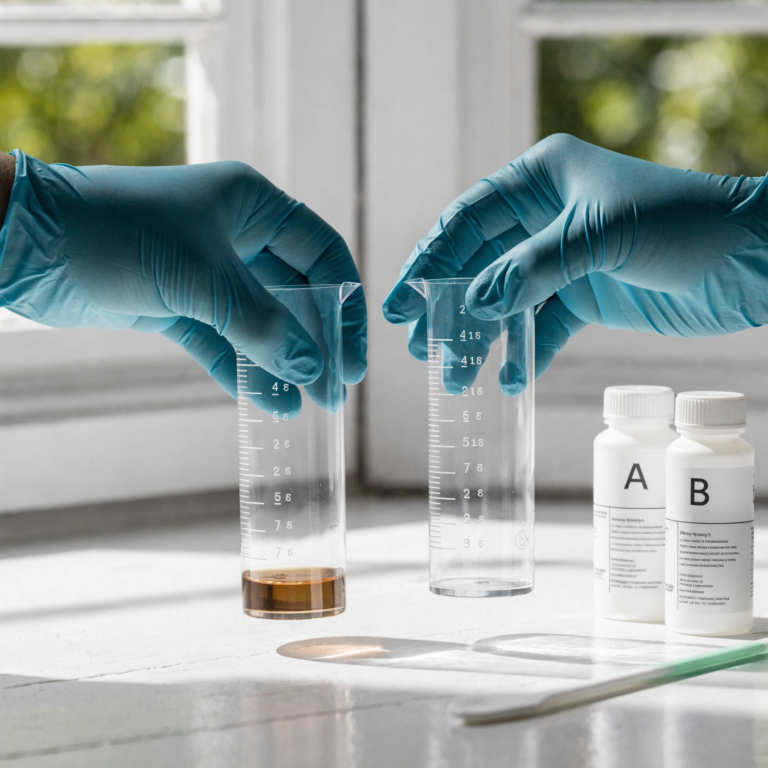
Mix first, color second. Measure and stir Part A and Part B together completely before any color goes in. Adding colorant to one part changes the volume of that part, which throws off the ratio, and an off-ratio mix is one of the most common reasons a colored piece never hardens. Mix the clear resin until it is streak-free (the full routine is in how to mix epoxy resin), then add your color.
Stay under 5–6% colorant by volume. That is the ceiling most resin makers give, and it is a ceiling, not a target. In a 4 oz cup of mixed resin, 5% is a little over a teaspoon. Most colorants give you a rich color at a small fraction of that.
Start with a pinch or a drop, then build. You can always stir in more color. You cannot take it back out. Add a little, stir, look, and add again only if you need to.
The cup always looks darker than the cast. A few ounces of colored resin in a cup is a deep column of color; a coaster or a pendant is a thin slice of it. Judge the real shade by lifting your stir stick and looking at the thin film on it, or by tilting the cup so a shallow layer runs up the side.
Opaque or translucent is a choice you make with the colorant, not the amount. Piling in more alcohol ink never makes it opaque; it just makes it darker and starts to soften the cure. For solid color, reach for pigment paste or a loaded dose of mica. For see-through color, use ink or a light dose of liquid dye.
Water-based anything is the enemy of a cure. Epoxy and water do not get along. Acrylic paint, food coloring, watercolor and glitter glue all carry water, and water leaves resin cloudy, soft or sticky. If a colored pour never set at all, here’s how to fix resin that didn’t cure.
Stir until streak-free, unless streaks are the point. For a solid color, scrape the sides and bottom of the cup and keep going until the color is even all the way through. For marbling and swirls, stop early on purpose.
Here is how the main colorants compare before we look at each one in detail.
| Colorant | Look | Starting amount (per 4 oz mixed resin) | Best for |
|---|---|---|---|
| Mica powder | Shimmer, pearl, metallic | About 1/4 teaspoon | Coasters, geodes, waves, dishes |
| Alcohol ink | Translucent jewel tones | 1–2 drops | Petri effects, tinted pendants |
| Liquid resin dye | Even color, light to deep | 1 drop at a time | Keychains, letters, phone stands |
| Pigment paste | Fully opaque, flat color | A small dab at a time | Solid-color pieces |
| Glitter | Sparkle | A pinch, then adjust | Accents and top layers |
| Glow powder | Glows in the dark after charging | Heavy dose, check the label | Clear or white pieces |
🧰 Recommended Kit
- LET’S RESIN 36-Color Mica Powder Pigment Set — a wide spread of shimmer and metallic shades, so you can try light translucent doses and loaded opaque ones without buying jars one at a time.
- LET’S RESIN 48-Color Concentrated Alcohol Ink Set — concentrated inks for translucent tints and petri-dish pours, where a drop or two colors a whole cup.
- LET’S RESIN Liquid Resin Dye Set — the most predictable colorant in this guide, made for resin, with no cure risk at normal doses.
- 40-Color Holographic Glitter Set — holographic glitter for suspending in clear layers or dusting over a top coat for that rainbow flash.
- Glow-in-the-Dark Resin Pigment Powder — a glow pigment that charges under light and works best against clear or white resin for night-time keychains and dishes.
Mica Powder: Shimmer and Metallics
Mica powder is the colorant you see in most resin projects, and it is the easiest place to start. It is made of tiny mineral flakes coated to give them color, and those flakes are what produce the pearl and metallic shimmer that dye alone cannot. Because it is a dry powder, it adds no liquid to your mix, so as long as you stay under the colorant ceiling it has very little effect on the cure.
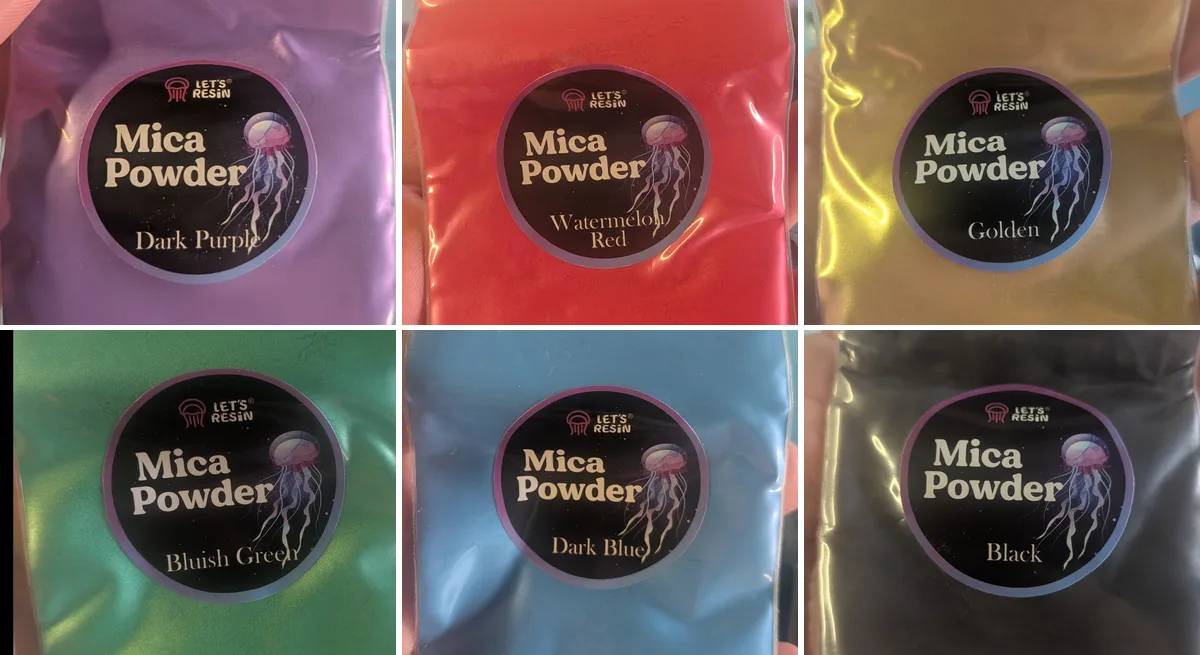
How much to use. About 1/4 teaspoon per 4 oz of mixed resin is a sensible starting point. At that dose most micas are translucent with a soft shimmer, and light still passes through the piece. Keep adding and the color builds toward opaque; a loaded dose gives a solid metallic finish that hides whatever is behind it. Stir slowly and scrape the cup, because dry powder clings to the sides and bottom.
Expect some settling. Heavier metallic micas, especially golds, bronzes and coppers, sink to the bottom of the cup while you work. Give the cup one more stir right before you pour. In a deep cast, some sinking is normal: the bottom face of the mold ends up richer than the top. Either plan for that (the mold bottom is usually the front of the finished piece anyway) or pour in thinner layers so each one sets before the mica has time to drop.
Where it shines. Mica is the go-to for resin coasters, geode edges, ocean-wave pours and trinket dishes. Metallic gold on a black or white base is the classic geode look; a pearl white over deep blue makes convincing wave foam.
The float-a-pinch trick. Once a piece is poured, tap a small pinch of mica onto the wet surface and leave it, or drag it lightly with a toothpick. It sits in a shimmering veil on top instead of blending in, and it is the fastest way to add depth to a solid-color pour. A pinch is all you need; more makes a gritty skin.
Mica is a fine dust, so scoop it gently, wear gloves and avoid breathing it in. A dust mask is a good idea if you are opening several jars at once.
Alcohol Ink: Translucent Color and Petri Effects
Alcohol ink is dye carried in alcohol, and it is highly concentrated: a drop or two colors a whole cup of resin. The result is a clear, jewel-tone translucency that looks like stained glass when light passes through it. That makes ink the natural choice for pendants, suncatchers, domes and anything meant to be held up to a window.
How much to use. Start with one drop in a 4 oz cup, stir, and add a second only if you want it deeper. Because the color is so strong it is easy to overshoot, and the cup-versus-cast rule applies double here: a drop that looks pale in the cup can be plenty in a thin pendant.
The petri-dish technique. This is the effect most people picture when they think of alcohol ink in resin. Pour clear mixed resin into a mold with some depth, such as a half-sphere, a coaster or a small dome. Drop your colored inks onto the surface, then add a few drops of white alcohol ink. The white sinks through the resin and pushes the color down ahead of it into tendrils, blooms and cloud shapes. Leave it alone to cure; every tilt or stir blurs the pattern. Petri pieces look best from the side, so pick a mold with height rather than a flat slab.
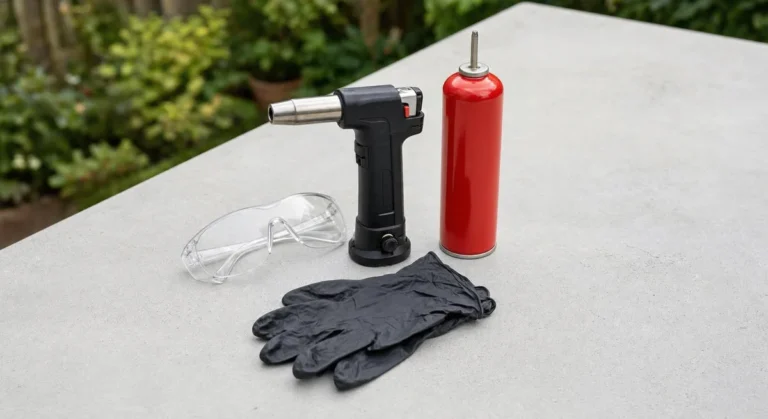
It is flammable, so no torch. The alcohol that carries the dye is still in your resin after mixing, and alcohol burns. Never pass a butane torch or a lighter over an alcohol-ink piece to pop bubbles. Use a heat gun on its lowest setting, keep it moving a few inches above the surface, cap the ink bottles before you start, and work in a well-ventilated room away from any open flame.
Too much dulls the finish. Overloading resin with ink takes the gloss off the surface and can leave the cure soft. If a finished ink piece looks slightly matte or stays tacky on top, that is the sign you used too much. Stay in the few-drops range and let the translucency do the work.
Ink fades faster than pigment. Alcohol inks are dyes, and dyes lose color in sunlight faster than mineral pigments like mica. Keep petri pieces and ink-tinted pendants off a sunny windowsill, and use a UV-resistant resin so the base does not yellow around them. For anything that will live outdoors or in direct sun, choose mica or pigment paste instead.
Liquid Resin Dye and Pigment Paste: Solid, Even Color
If you want the most predictable result with the least guesswork, use a colorant that was made for resin. Liquid resin dye and pigment paste are formulated to mix cleanly into epoxy without upsetting the cure at normal doses, and they give an even, consistent color that does not settle, streak or fade the way inks and micas can.
Liquid resin dye. Add it a drop at a time. One drop in a 4 oz cup gives a light, translucent tint; a few more drops take it to a deep, nearly solid color. Because it is a liquid, it spreads through the cup in a couple of stirs with no clumps and no dust. It is the easiest colorant to control if you are trying to match a shade or repeat a color across several pieces.
Pigment paste. Paste is concentrated pigment in a thick, resin-compatible base, and it is the answer when you need fully opaque color. A small dab stirred in gives a flat, solid finish that hides the mold behind it completely, which is exactly what you want for letters, numbers and anything with a plain colored face. Scrape it off the stick against the side of the cup and stir until no thick streaks remain.
Best uses. Dye and paste are the colorants for resin keychains, alphabet letters, phone stands and any piece that needs one clean color from edge to edge. They also make a good base for other effects: a solid dye base with a pinch of mica floated on top gives depth without losing the even color underneath.
Glitter, Glow Powder and Other Add-Ins
Not everything you put in resin is a colorant. These add-ins sit inside the resin rather than tinting it, and each has one thing to know before you use it.
Glitter. Fine glitter stays suspended through the resin and gives an even sparkle. Chunky glitter sinks to the bottom of the mold before the resin sets. If you want chunky glitter spread through a piece, pour in thin layers and add it to each one, or wait until the resin has started to thicken into a honey-like gel and add it then, when there is something to hold it up. Holographic glitter gives the rainbow flash you see in most keychains and phone grips. A pinch goes a long way; too much turns the mix into a paste and traps air.
Glow-in-the-dark powder. Glow pigment needs a much heavier dose than mica to glow brightly, so plan for it: lean toward the upper end of what your resin allows and check the powder’s own label. It charges under sunlight or a lamp and releases that light in the dark. It works best against clear or white resin, because a dark background swallows the glow, and in daylight most glow powders look pale, so decide the daytime look separately.
Gold leaf and foil flakes. These sit wherever you place them, so set them with tweezers onto a tacky gelled layer, or press them into the top surface after pouring, rather than stirring them in. A little goes a long way against a dark or solid base.
Dried flowers and botanicals. Flowers are an add-in, not a colorant, but they follow the same rules: fully dry, placed on a gelled layer so they do not float, and covered with a second pour. The resin bookmarks tutorial walks through pressed flowers step by step.
See glow powder in action: our Halloween Resin Crafts for Beginners guide uses it for glow-in-the-dark ghost charms, alongside black-and-orange marbling and a witch’s-brew alcohol-ink swirl.
What NOT to Use to Color Resin (and Why)
Resin forums are full of people asking why their piece stayed soft, and the answer is very often something from this list. None of these are made for resin, and most of them interfere with the chemistry that makes it harden.
- Acrylic craft paint. It is water-based. A single drop will tint a cup and probably cure fine, but more than a few percent means soft, dull or uncured resin. It is the most common cause of a sticky first project.
- Food coloring. Also water-based, so it carries the same cure risk, and it is not lightfast: the color fades in weeks.
- Oil paint. It clumps in resin and refuses to mix evenly, leaving blobs and smears instead of color.
- Eyeshadow. It looks like mica, but the binders that hold a pressed shadow together leave specks and a cloudy haze in the resin.
- Nail polish and spray paint. Both are solvent-based and flammable, and the solvents can react with the resin and stop it curing.
- Latex or house paint. Water-based and heavy on binders; it turns the mix slimy and kills the cure outright.
- Chalk, spices and coffee grounds. Grainy, cloudy and prone to fading. They look charming in the cup and disappointing in the cast.
If you have already poured with one of these and the piece is soft or cloudy, the resin troubleshooting guide will help you decide whether it can be saved.
5 Beginner Color Techniques
Each of these uses only what is covered above, and each one is a good first colored project.
- Solid color. Mix a cup of resin, add pigment paste or a loaded dose of mica or dye, stir until streak-free, and pour. The whole trick is patience with the stirring: stop early and you get faint streaks in the finished piece. Try it on a single-color keychain or letter first.
- Translucent tint. One drop of alcohol ink or liquid dye in a cup of clear resin, stirred through. The piece stays see-through with a wash of color, like tinted glass. It works well for pendants, suncatchers and anything with light behind it. Remember that the thin cast will read lighter than the cup.
- Marbling and swirls. Mix two or three colors in separate cups, pour them into the mold at the same time from different sides so they meet in the middle, then drag a stir stick through once. Only once. A second pass turns marble into mud. Contrasting colors, such as white and navy or black and gold mica, show the pattern best.
- Ombré and gradient. Mix a light and a dark version of the same color. Pour the first as a thin layer and let it gel until it is tacky but no longer flowing, then pour the next shade on top and repeat. Letting each layer gel keeps the bands crisp; pouring wet-on-wet lets them blend into a softer fade, which you can also do on purpose.
- Cells and dirty pours. Pour your colored resin into the mold, then add a drop or two of white alcohol ink on top. The white sinks and pushes the color aside, opening up cells and lacy edges. For a “dirty pour,” stack several colors into one cup without stirring and pour them out together, then add the white. Heat gun only for bubbles on these; the alcohol makes the surface flammable.
One rule covers all layered color in molds: whenever you want two colors to sit next to each other instead of blending, let the first layer gel before you add the second. Gelled resin holds its shape; wet resin does not.
Common Coloring Mistakes
- Adding color before Part A and Part B are mixed. Color goes in after the clear resin is fully combined, every time. Mixing colorant into one part first throws off the ratio.
- Too much colorant. Anything past about 5–6% by volume risks a soft or sticky cure, and water-based colorants cause trouble well below that. If a piece has stayed tacky, why is my resin sticky explains what happened and what to do.
- Expecting the cup color in the finished piece. The cast is thinner and lighter. Check the shade on a stir stick before you commit.
- Mica sinking in a deep pour. Heavy metallics settle. Stir again right before pouring and use thinner layers for deep molds.
- Torching alcohol ink. The alcohol is flammable. Heat gun on low, no open flame.
- Dark colors hiding bubbles. You cannot see trapped air in a black or navy pour until it has cured and you are looking at pits on the surface. Mix slowly, pour low, and heat-gun a dark pour more carefully than you would a clear one.
- Forgetting that yellowing shifts pale colors. All epoxy yellows a little over time, and it shows first in whites, pastels and pale blues, which drift toward cream and green. Use a UV-resistant resin and keep finished pieces out of direct sun.
Frequently Asked Questions
What can I use to color resin?
The safest colorants are the ones made for resin: mica powder for shimmer and metallics, alcohol ink for translucent jewel tones, and liquid resin dye or pigment paste for solid, even color. Glitter and glow-in-the-dark powder are add-ins that work well too. Avoid water-based products like acrylic paint and food coloring, and solvent-based ones like nail polish, because they interfere with the cure.
How much colorant do you add to resin?
Keep colorant under about 5–6% of the total mixed volume, and treat that as a ceiling rather than a target. In practice, start with a pinch of mica (about 1/4 teaspoon per 4 oz of resin) or a single drop of ink or dye, stir, and add more only if you need it. Remember that the cup always looks darker than the thinner finished cast.
Can you use acrylic paint to color resin?
A single drop of acrylic paint will tint a cup of resin and usually still cure, but it is water-based, and more than a few percent leaves resin soft, dull or sticky. It is one of the most common causes of a first project that never hardens. Liquid resin dye or pigment paste gives the same solid color with no cure risk at normal doses.
Can I use food coloring in resin?
It is not a good idea. Food coloring is water-based, and water interferes with the epoxy cure, leaving resin cloudy, soft or tacky. It is also not lightfast, so the color fades within weeks. If you want a translucent tint, use alcohol ink or a drop of liquid resin dye instead; both are made for resin and hold their color.
What is the difference between mica powder and pigment for resin?
Mica powder is made of coated mineral flakes, so it gives shimmer, pearl and metallic effects, and heavier shades can settle in deep pours. Pigment, whether liquid resin dye or pigment paste, is a flat colorant with no sparkle that gives even, solid color and stays suspended. Use mica for coasters, geodes and waves; use pigment for keychains, letters and anything that needs one consistent color.
Do you add color before or after mixing resin?
After. Measure and mix Part A and Part B together until the clear resin is streak-free, then stir in your colorant a little at a time. Adding color to one part before mixing changes that part’s volume, throws off the ratio, and is a common reason a colored piece stays soft or never cures at all.
Keep Learning on ResinAffairs.com
Now that you know your colorants, put them to work with these guides and projects.
- How to mix epoxy resin properly →
- How to make epoxy resin coasters →
- Resin trinket dishes and phone stands →
- How to make resin keychains →
- UV resin for beginners →
- Common resin problems and how to fix them →
- How to preserve flowers in resin →
Enjoyed this guide? Join the Resin Affairs newsletter for new tutorials, safety tips, and project ideas straight to your inbox.