Resin Ocean Wave Art for Beginners: Step-by-Step Tutorial
Resin Affairs is reader-supported. If you buy through links on this page, we may earn a small commission at no extra cost to you. We only link to gear we would use ourselves. Prices and availability change, so check the current listing. Always follow your resin product’s label and Safety Data Sheet.
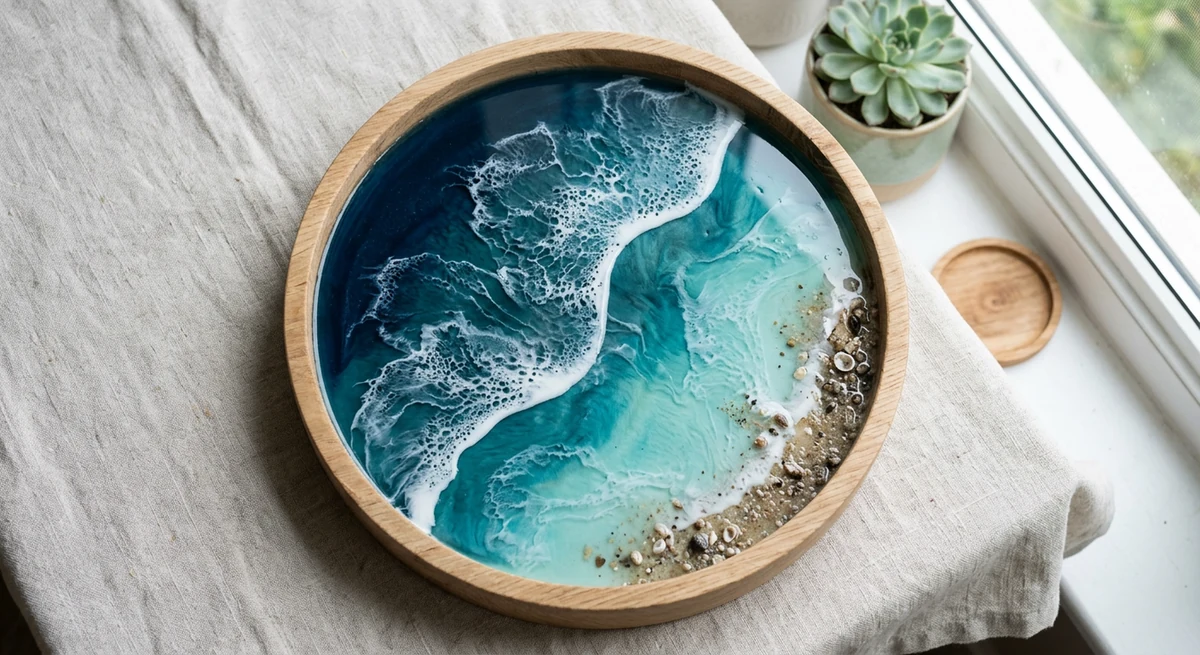
Quick answer: To make resin ocean wave art, seal a small tray, pour a thin clear or pale aqua base layer, then pour bands of navy, teal and aqua without fully blending them. Drag a skewer along the color boundary to shape a loose wave line, drizzle a thin line of white-tinted resin along it, and gently blow it back with a heat gun on low to create lacy foam. Let it cure fully: usable at about 72 hours, full hardness at about 7 days.
Ocean resin art is a Pinterest favorite, and it’s more forgiving than it looks. The “mistakes” (an uneven wave line, a little extra white) often just read as more realistic water. If you can color resin and pour a simple flood coat, you already have most of what this project needs. The one new skill is layering blues and pushing white resin into foam, which this guide walks through step by step.
This tutorial uses a small round or rectangular tray (8–12 inches) as the base. It’s big enough to show real depth and movement, and small enough to finish in an afternoon.
Safety first: you’ll be using a heat gun close to wet resin. Wear nitrile gloves and an organic-vapor respirator (a surgical or charcoal mask won’t stop vapors), work in a ventilated room, and review Resin PPE for Beginners and the Resin Safety Hub before you start. Alcohol ink is flammable, so use a heat gun rather than a torch on any layer with fresh ink in it.
Materials and tools
- Clear coating epoxy. A standard beginner kit works for a shallow decorative pour. See How to Mix Epoxy Resin if you haven’t mixed a batch before. Coating resin goes on about ⅛–¼ inch per layer; for anything deeper, see Casting Resin vs. Coating Resin.
- A round or rectangular wooden tray, panel or silicone tray mold. See Best Resin Molds for Beginners for tray options.
- Blue and teal alcohol ink or liquid resin dye. Two or three shades give you real depth: a dark navy, a mid teal and a pale aqua. Keep total colorant under 6% of the mix.
- An opaque white resin dye or white resin pigment for the foam. Pearlescent white mica can be added on top for shimmer.
- Graduated mixing cups and stir sticks. Measure exactly the way your label says (most beginner kits are 1:1 by volume). Only use a scale if your resin gives a weight ratio.
- A heat gun (a hair dryer on a cool, low setting also works for pushing foam).
- A thin skewer or stick for dragging the wave line.
- Nitrile gloves, an organic-vapor respirator and a ventilated workspace.
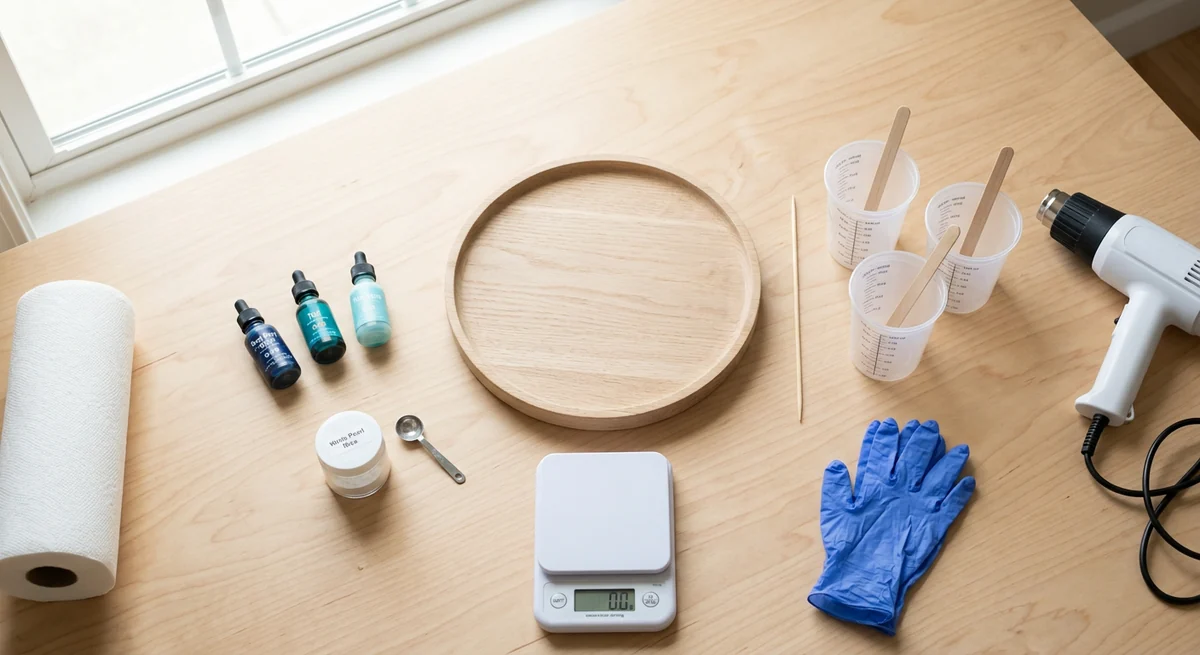
🌊 Ocean Palette
- LET’S RESIN 48-Color Concentrated Alcohol Ink Set — plenty of navy, teal and aqua shades for the water; add it a drop at a time.
- LET’S RESIN Liquid Resin Dye Set — includes an opaque white, which is what makes the lacy foam.
- LET’S RESIN 36-Color Mica Powder Pigment Set — optional pearlescent white for shimmer on the foam.
Step-by-step: making resin ocean wave art
Step 1: Seal and prep your tray
If your tray is raw wood, brush on a thin seal coat of resin first. It stops air in the wood grain from bubbling up into your finished piece. Let it reach the stage your label calls the recoat window (usually tacky but firm) before you pour. Skip this step if your tray is already sealed or finished.
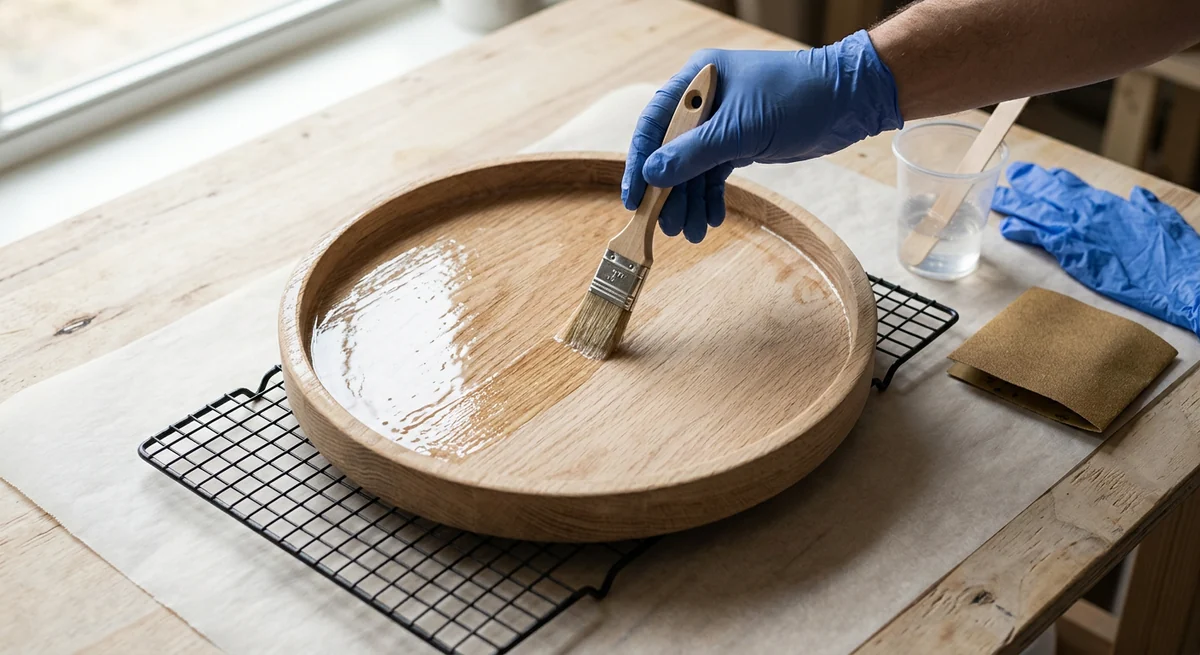
Step 2: Mix and pour your base layer
Mix a clear batch at your kit’s ratio and stir for at least 3 minutes, scraping the sides and bottom. Pour about half of it, clear or very lightly tinted pale aqua, as your base “water” layer, about ⅛ inch deep. Let it level, then pop bubbles with quick passes of a heat gun held about 6–8 inches away.
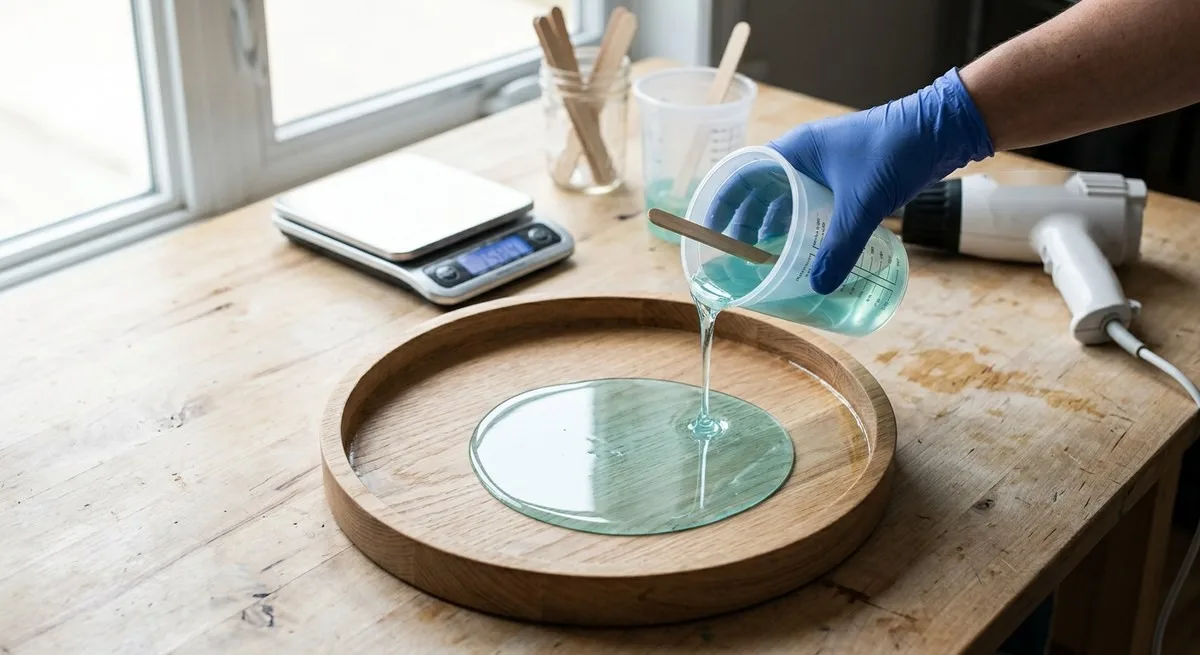
Step 3: Layer your blues
Split the rest of your resin into three cups and tint each one: dark navy for the deep-water edge, mid teal for the middle and pale aqua near where your “shore” will be. Add color a drop at a time. Let the tinted cups sit about 15 minutes to thicken; thicker resin holds its shape instead of sinking into the layer below. Pour the darkest shade first, farthest from the shoreline, then work toward the lighter shades. Don’t fully blend the colors where they meet. A visible gradient looks more like real water than a smooth blend.
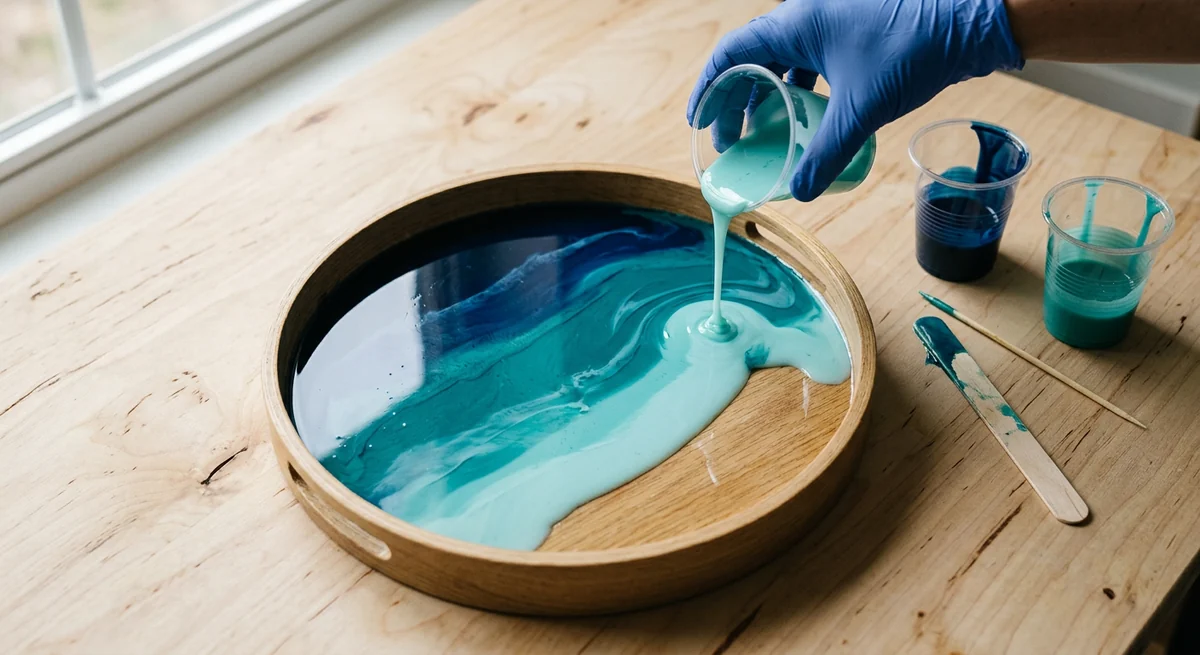
Step 4: Shape the wave line
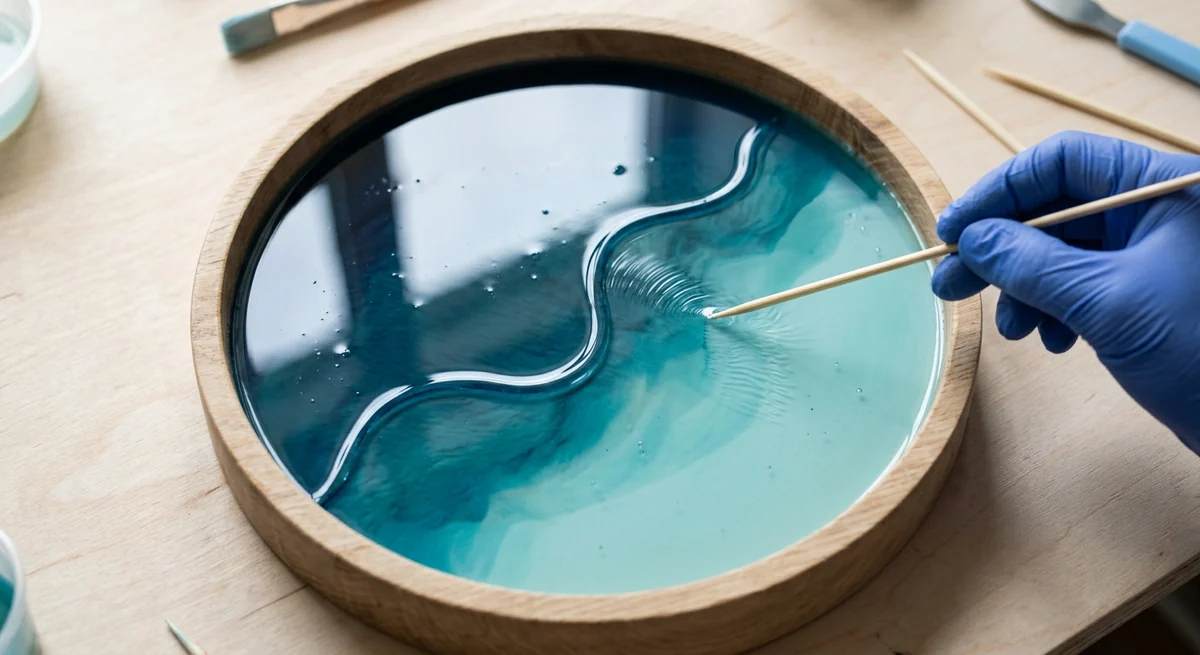
While the resin is still well within its working time, drag a skewer back and forth along the boundary between your darkest blue and the lighter shades in a loose, curved line. Think of a lazy “S” or a gentle zigzag, not a straight edge. Real waves aren’t symmetrical, so an uneven line looks more convincing than a careful one.
Step 5: Add the foam and whitecaps
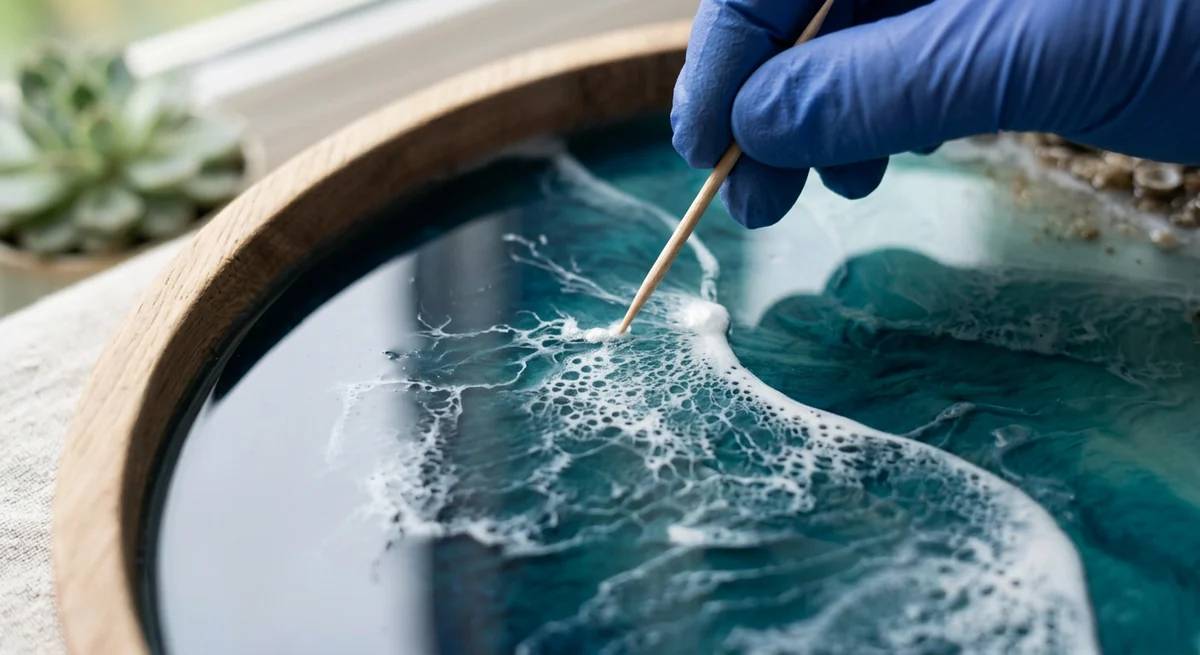
Tint a small cup of resin with opaque white. Drizzle a thin line of it along your wave line, right where the water meets the “shore”. Then hold a heat gun on its lowest setting about 6–8 inches away and gently push the white back toward the deeper water in short passes. The white thins out and breaks into lacy cells that look like sea foam. Stop as soon as you like the pattern; more heat makes it smear. Dust a pinch of pearlescent mica over the foam if you want shimmer.
Want more depth? Let this layer gel for a few hours, then repeat Steps 3–5 with a second, thinner layer. Layered foam is what gives the best ocean pieces their 3-D look.
Step 6: Cure and finish
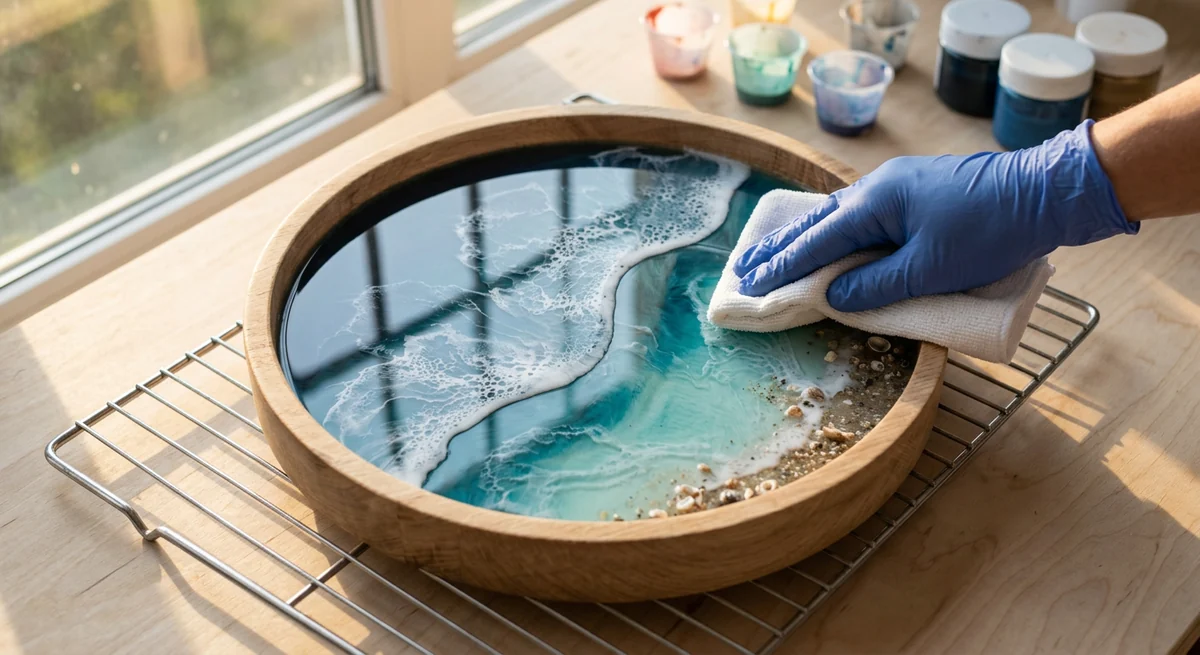
Cover the piece loosely to keep dust off and leave it level at room temperature, around 70–80°F (21–27°C). Most coating epoxies can be handled after 24–48 hours, are usable at about 72 hours and reach full hardness at about 7 days. Check your label and How Long Does Resin Take to Cure. Once it’s hard, wipe it with a lint-free cloth. A properly leveled pour needs no sanding or extra finish.
Common beginner mistakes
Overmixing the colors. This is the most common mistake on this project. Stir your blues together too thoroughly and you get a flat, muddy color instead of layered depth. Pour, then use a light touch: drag and swirl, don’t stir.
Working too slowly. Resin thickens as it approaches gel, and a wave line or foam pushed too late drags instead of flowing. Have every color mixed before you start Step 3.
Too much white, too early. White added before the blues have settled sinks and blends instead of sitting on top like foam. Add it last, in a thin line.
Holding the heat gun too close or too long. The same tool that pops bubbles can blow delicate foam into a smeared blob. Use the lowest setting and short passes from about 6–8 inches. See How to Get Bubbles Out of Resin for general heat-gun technique, and Common Resin Problems if something goes wrong.
Frequently Asked Questions
What colors do I need for realistic ocean resin art?
At minimum, a dark navy or deep teal, a mid-tone teal or turquoise, and an opaque white for the foam. A pale aqua as a fourth shade adds depth near the “shore”, but three colors are enough for a convincing first attempt.
Can I use craft acrylic paint instead of resin dye?
A tiny amount can work, but acrylic paint contains water, and too much can cloud the resin or leave it soft. Resin-specific dyes, alcohol inks and mica are more predictable. Whatever you use, keep total colorant under 6% of the mix.
Can I use a hair dryer for the foam?
Yes, this is the one job where a hair dryer on a cool, low setting works well, because you’re pushing the resin rather than heating it. For popping bubbles, a heat gun works better (a torch only on a layer with no alcohol ink in it, since the ink is flammable).
Do I need a deep tray?
No. A shallow tray (under ½ inch deep) is easier for a first attempt, because you can use standard coating resin in thin layers. See Casting Resin vs. Coating Resin if you want to scale up to a deeper piece later.
How long does the foam technique take to learn?
Most beginners get a result they’re happy with on the first or second try. The technique itself takes seconds. The skill is working confidently inside your resin’s working time, which comes with one or two practice pours.
Sources
- ArtResin, How to make ocean resin art: darkest shade far from the shore, hair dryer on low to push the white, muddy if blended, let the tints thicken
- ArtResin, How to create lacing and cells in resin: blown white gives lacing; cells need silicone oil
- ArtResin, How to color clear epoxy resin: the 6% colorant rule; acrylic paint is water-based; mica handling
- ArtResin FAQ: 24-hour and 72-hour cure, alcohol ink is flammable when torched, the 3–5 hour gel stage
- ArtResin, What’s the cure time?: hard to the touch at 24 hours, fully cured at 72
- ArtResin, Why use a torch?: a hair dryer is poor for bubbles; blowers are used for flow art
- ArtResin, How to resin on wood: trapped air in wood becomes bubbles
- ArtResin, Should I seal my artwork before I resin?: a thin coat of resin as the sealer
- ArtResin, How does moisture affect epoxy?: water-based colorants; soft, cloudy cures
- TotalBoat TableTop Epoxy TDS: seal coat first, ⅛–¼ inch per coat, 70–80°F, heat from 6–8 inches, light use at 24–48 hours, full cure at 5–7 days
- TotalBoat support, Recoating uncured epoxy: the recoat window runs from thumbprint-tacky to fingernail-hard
- Jacquard Piñata alcohol ink SDS: highly flammable; flash point under 70°F
- WEST SYSTEM, Preventing overexposure: organic-vapor respirator, ventilation, gloves
- CDC NIOSH, Understanding the difference (surgical masks and respirators): surgical masks leak at the edges; only a cartridge respirator handles vapors
Related guides
- How to Color Resin
- Epoxy River Table for Beginners
- How to Make an Epoxy Serving Tray
- Best Resin Molds for Beginners
Get new guides in your inbox
For step-by-step tutorials, safety reminders and honest gear recommendations as we publish, join the Resin Affairs newsletter →
Enjoyed this guide? Join the Resin Affairs newsletter for new tutorials, safety tips, and project ideas straight to your inbox.