Best Resin Molds for Beginners: How to Choose Your First Mold

You’ve done the homework on which resin to actually buy — epoxy for coasters, maybe UV resin for quick jewelry. So you’re set, right?
Not quite. The mold matters just as much as the resin: it decides how cleanly a piece releases, how crisp the details come out, and whether the mold survives to be reused. Pick the wrong resin mold type and even a perfectly mixed pour can end up sticky, cloudy, or stuck forever.
The good news: the best resin molds for beginners all come from one short list. By the end of this guide, you’ll know exactly which to buy for coasters, jewelry, trays, ornaments — or whether you need a mold at all.
Quick Comparison: Resin Mold Materials at a Glance
Here’s the at-a-glance difference between the mold types you’ll see online:
| Feature | Silicone (platinum-cure) | Silicone (tin-cure / budget) | Rigid Plastic (PET) | Metal / Wood | DIY Silicone |
|---|---|---|---|---|---|
| Flexibility | Excellent — flexes to release | Good, softens sooner | None — rigid | None | Depends on the rubber |
| Release ease | Very easy | Easy, occasionally sticky | Hard — needs release | N/A — piece stays put | Good once cured |
| Reusability | 20–50+ pours with care | 10–20 pours | Often single-use | A base, not a mold | 10–30 pours |
| Detail capture | Excellent | Good | Sharp on straight edges | N/A | Good, with practice |
| Heat resistance | High (no torching) | Moderate — ages faster | Low — can warp | High — seal raw wood | High |
| Food-safe options | Yes — food-grade silicone | Rarely labeled | No | Depends on resin, not mold | Only food-grade rubber |
| Cost | $$ | $ | $ | $$–$$$ | $$ (one kit, many molds) |
| Best for | Coasters, jewelry, ornaments (default pick) | Practice, one-offs | Sharp geometric pieces | Trays, boards, river pours | Custom shapes, later |
The short version: if you buy one thing, make it a platinum-cure silicone mold. The rest are specialty tools or later-level upgrades. Now the details.
Deep Dive: Silicone Molds — The Beginner Default

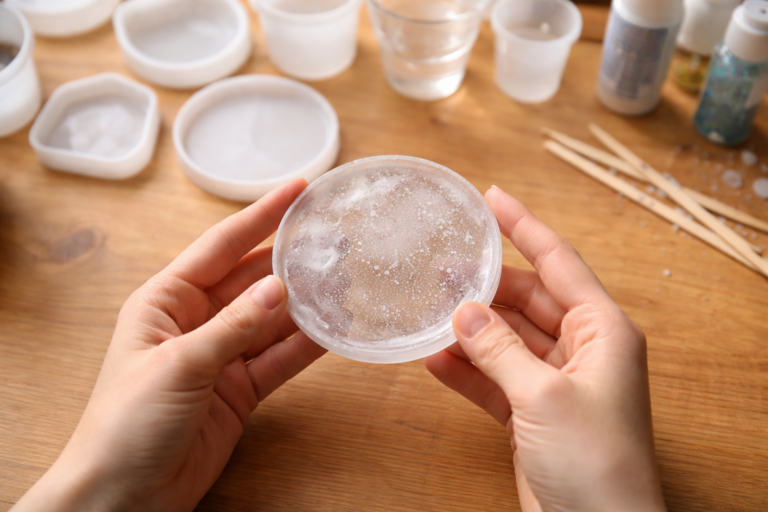
What it is: A flexible, rubbery pre-made mold — the flexible mold for resin that makes the whole hobby forgiving. If you’ve seen someone peel a glossy coaster out of a floppy white cup, this is it.
What actually separates a good mold from a cheap one: Silicone molds are made from either platinum-cure or tin-cure silicone, and both work with epoxy. Platinum-cure is also the type usually sold as food-grade, but those two labels mean different things, and most mass-produced molds don’t say which they are. What you can judge is the build: cheaper molds are often thinner and softer, tear sooner, and can have a matte or textured cavity that transfers to your piece. Look for thick walls and a glossy cavity. If a piece comes out tacky only where it touched the mold, suspect residue, moisture or a mold that doesn’t suit your resin (especially with UV resin), and do a small test pour.
Strengths:
- Flexible release — flex the mold and the piece pops out
- Reusable dozens of times with basic care
- Huge shape variety: rounds, hexagons, pendants, snowflakes, stars, keychains
- Cheap to buy pre-made
- Glossy finish straight out of a good-quality mold
Weaknesses:
- Degrade over time with UV exposure, harsh cleaning, and repeated hot, deep pours
- Cheap tin-cure molds can inhibit surface cure on some resin brands (see the FAQ)
- Fine detail and sharp corners come out slightly rounded
When to choose silicone:
- ✅ Coasters — 4-inch rounds or hexagons are the classic first mold (full walkthrough).
- ✅ Jewelry — pendant, stud, and teardrop cavities, ideally with hole bosses (covered here).
- ✅ Ornaments — snowflakes, baubles, and stars with hanging-hole bosses (see this guide).
- ✅ Small dishes — shallow silicone tray molds work; a real serving tray you pour on the tray itself (below).
- ❌ Avoid silicone when: you need perfectly rigid, sharp-cornered geometry, or you’re attempting a tabletop-scale structural pour — that’s a framed flat pour, not a mold job.
Pro tip: The best silicone molds for epoxy resin say “platinum-cure” or “food-grade silicone” in the listing. If a listing only says “silicone” and costs less than lunch, treat it as practice gear and do a test pour first.
Resin Affairs is reader-supported. If you buy through the links below, we may earn a small commission at no extra cost to you.
As an Amazon Associate I earn from qualifying purchases.
Mold sets we’d actually start with: an 4-pack of round coaster molds with a faceted edge for the coaster pick below, and a LET’S RESIN irregular-shapes pendant mold with built-in holes for pendants, studs, and keychain charms. Both have glossy cavities, the style used in our coaster and jewelry tutorials.
Deep Dive: Rigid Plastic / PET Molds

What it is: Pre-formed rigid plastic cavities — usually clear PET. Think disposable packaging that happens to make great resin shapes.
Strengths:
- Crisp edges and true geometric corners — sharper than silicone
- Cheap enough to treat as single-use
- Transparent walls let you spot bubbles from the side
Weaknesses:
- Genuinely harder release — cured epoxy grips plastic, so you need mold release spray or a warm-water soak, and prying cracks pieces
- Often single-use; even careful demolding deforms them
- Limited shape variety compared to the silicone aisle
When to choose rigid plastic:
- ✅ Geometric coasters and angular decor — where razor-sharp edges are the whole design
- ✅ Straight-sided blocks and small trays — anywhere “flat and square” is the point
- ❌ Avoid rigid plastic when: you want to reuse the same shape, or you haven’t learned demolding feel yet — a ruined release is a demoralizing first lesson.
Deep Dive: Metal & Wood “Molds” (Trays, Frames, and Dams)

What it is: Not a mold in the traditional sense — you pour resin directly onto a real object: a tray, a board, a framed panel. The object’s own edges (or painter’s tape, or a wooden dam) act as the mold wall. It’s the method behind every resin serving tray: seal, tape, pour — the resin becomes the surface. No demolding at all.
Strengths:
- No demolding — the pour is the finished piece
- Natural materials like wood grain show through the resin
- The right approach for large flat pours — no silicone mold exists at that size
Weaknesses:
- Raw wood must be sealed first, or air escaping the grain craters your pour
- Not reusable in the mold sense — each project is its own object
- Edges need taping and trimming; drips need managing
When to choose a tray/board pour:
- ✅ Serving trays — the full method is in How to Make an Epoxy Serving Tray
- ✅ Boards and butcher block — the same flat-pour logic scaled up in The Ultimate Guide to Epoxy Butcher Block, and the core skill behind river-style pours
- ❌ Avoid this method when: you need a free-standing 3D object at the end — a tray pour gives you a coated surface, not a cast piece.
Pro tip: The ratio never changes, but a large batch builds more heat and sets faster than a small one. A tray-sized batch behaves differently from a pendant-sized one — re-read How to Mix Epoxy Resin before scaling up.
Deep Dive: Making Your Own Silicone Mold (A Later-Level Skill, Briefly)

You can make your own flexible molds for resin at home: suspend an object in a cup, pour two-part liquid silicone around it, wait, and demold the master — it’s how you get a mold for a shape nobody sells.
But it’s a “level up later” skill, not a starting point — the same way we treat sculptural casting. Learn pouring, bubbles, and demolding on a store-bought mold first, and make your own once you know what “good” feels like.
(And if you’re drawn to chunky 3D casting — figures, spheres, paperweights — read Casting Sculptures with Epoxy Resin after your first flat pour; that guide is written for the step after this one.)
Project-Specific Recommendations (The Decision Guide)
Same format as our resin guide — find your project, buy the right mold, skip the rest.
For Coasters
- Best choice: Platinum-cure silicone, round or hexagon, ~4 in (10 cm), multiple cavities
- Why: Deep cavities pour a substantial coaster, walls release cleanly, and multi-cavity molds do a whole set in one mix
- Avoid: Rigid plastic coaster molds for a first set, and ultra-thin cavities
- Tutorial: How to Make Epoxy Resin Coasters
For Jewelry
- Best choice: Small platinum-cure silicone pendant/stud molds with hole bosses (built-in posts that form the hanging hole)
- Why: Small cavities cure fast, and bosses give you clean hanging holes without learning to drill fragile resin
- Avoid: Giant “200-cavity” kits — mostly filler you’ll never pour
- Tutorial: Resin Jewelry for Beginners
For Serving Trays
- Best choice: No mold at all — a wood or acrylic tray blank plus edge tape
- Why: The tray is the form. Seal, tape, pour, finish — nothing to demold
- Avoid: “Silicone tray molds” that produce a resin shape — nice, but not the same project
- Tutorial: How to Make an Epoxy Serving Tray
For Ornaments
- Best choice: Small silicone snowflake, bauble, and star molds with hanging-hole bosses
- Why: Small pours cure quickly, and the boss forms a clean ribbon hole without drilling fragile pieces
- Avoid: Oversized ornament cavities early on — thick resin sections hold heat and can warp the mold
- Tutorial: DIY Resin Christmas Ornaments
Seasonal pieces: the same small pendant, keychain and dish molds work for spooky projects too. See Halloween Resin Crafts for Beginners for six ideas that don’t need any Halloween-specific molds.
For Sculptural Casting (Later)
- Best choice: Not a beginner purchase — start with deep-pour knowledge first
- Why: 3D casting adds exotherm heat management flat pours never face — it’s the step after your first coasters
- Read when ready: Casting Sculptures with Epoxy Resin
Mold Care & Beginner Mistakes
Silicone molds last for years if you treat them like cookware — and die in a month if you don’t:

- Clean with mild soap and lukewarm water, never solvents. Acetone and alcohol age silicone fast — cured residue peels off a flexible mold once the piece is out.
- Dust molds right before pouring. Every speck becomes a pit in the finish — a lint-free wipe or a pass with packing tape lifts it off. Cover the pour while it cures (same rule as mixing day).
- Push, don’t twist. Demold by flexing the mold and pushing from the back — yanking corners tears thin molds and snaps delicate pieces.
- Test pour cheap molds. If resin cures sticky only where it touched the mold, the mold (or residue on it) is the likely cause, not your mixing. Wash and fully dry it, try again, and switch molds if it keeps happening.
- Store flat, cool, and dark. A mold crushed under a supply box warps; one on a sunny windowsill ages in weeks.
FAQ
Can I reuse a silicone mold? How many times?
Yes — a quality platinum-cure mold is good for roughly 20–50+ pours. Lifespan depends on how deep and hot your pours run and how you store the mold. Budget tin-cure molds manage closer to 10–20 before they soften, tear, or release poorly.
Do I need mold release spray for silicone molds?
Usually no. Good platinum-cure silicone releases epoxy on its own — flexing the mold does the work. You do need it for rigid plastic molds; some makers also recommend a light coat to extend mold life. If you use one, test pour first — some sprays dull the surface.
Why didn’t my resin cure in this mold?
That’s cure inhibition — the mold material or its residue interfered with the epoxy’s cure, leaving the touching surface tacky. It’s most common with cheap tin-cure molds. First rule yourself out: re-check your measuring and mixing. If the rest of the piece cured hard and only the mold-facing skin stayed tacky, the mold is the culprit — switch to platinum-cure. Full troubleshooting: Common Resin Problems and How to Fix Them.
Are silicone resin molds food safe?
Two questions are hiding here. A mold labeled food-grade silicone is fine to have resin in contact with. But the finished piece is only as food safe as the resin itself — most epoxies aren’t food-contact safe once cured; only formulations specifically labeled FDA-compliant qualify. So “food safe resin molds” are real, but a food-safe mold plus regular resin still doesn’t make a cutting board. This matters most for trays and boards — food-safe notes in The Ultimate Guide to Epoxy Butcher Block.
Can I make my own silicone mold at home?
Yes, with a two-part liquid silicone kit — genuinely useful for custom shapes. But it’s a second skill on top of pouring, with its own failure modes (bubbles, inhibited cure). Treat it as level two: learn on pre-made molds first, as above.
What size mold should a beginner start with?
Small and shallow: a 4-inch coaster or a pendant cavity. Small volumes mix predictably, cure without dangerous heat buildup, and release easily — and a failed piece costs a few dollars of resin, not a whole batch. Save deep, large molds for later.
Quick Pick Guide
| If you want… | Choose this mold |
|---|---|
| A first mold ever | Platinum-cure round coaster silicone (~4 in) |
| Crisp geometric coasters | Rigid PET plastic (with release spray) |
| Pendants and earrings | Silicone jewelry molds with hole bosses |
| A resin serving tray | No mold — tray blank + edge tape |
| Christmas ornaments | Small silicone snowflake/bauble/star molds |
| Food-safe serving pieces | Food-grade silicone mold + FDA-compliant resin (check both labels) |
| A large flat pour | A frame or dam, not a mold |
| A shape nobody sells | DIY silicone mold kit — after your first flat pour |
| 3D sculptural casting | Read the casting guide first — not the beginner step |
Keep Learning on ResinAffairs.com
Got your first mold? Here’s where to go next:
- 🌊 Resin Ocean Wave Art for Beginners → — a step-by-step beginner project to try next.
- 🚀 How to Start Resin Crafting → — the beginner roadmap: what to buy first, what to skip, and the easiest first project.
- 🎁 Resin Gift Ideas for Beginners → — easy, giftable projects with full tutorials, plus packaging and per-gift costs.
- 🩹 Common Resin Problems and How to Fix Them → — fixes for stickiness, bubbles, soft spots and cracks on any resin project.
- 🧤 Resin Safety Hub → — releasing resin from molds means direct handling before it’s fully cured; a quick safety refresher first.
- How to preserve flowers in resin →
- 🎁 Gifts for Resin Artists 2026 → — kits, molds and safety gear by budget, for anyone buying for a resin crafter.
Enjoyed this guide? Join the Resin Affairs newsletter for new tutorials, safety tips, and project ideas straight to your inbox.