Resin Tumblers for Beginners: How to Wrap Your First Epoxy Tumbler Without the Drips
Resin Affairs is reader-supported. If you buy through links on this page, we may earn a small commission at no extra cost to you. We only link to gear we would use ourselves — prices and availability change, so check the current listing. Always follow your resin product’s label and Safety Data Sheet.
As an Amazon Associate I earn from qualifying purchases.
If you’ve searched for a resin tumbler for beginners guide that tells you the one tool you actually need before you waste a coat of epoxy, this is it.
🧰 Recommended Kit for This Project
- Suteck Cup Turner for Crafts — Cuptisserie Kit with Rotisserie Motor — keeps the tumbler spinning evenly while the resin cures — the fix for drips and pooling
- LET’S RESIN Epoxy Resin Crafting Kit with Dyes & Accessories (1 gallon) — a 1:1 epoxy kit with dyes and mixing tools included
- HASLE OUTFITTERS 20 oz Powder-Coated Stainless Tumbler Blanks, 12-Pack — the blank this guide wraps
📋 Get the Free Resin Safety & Prep Checklist
A one-page printable checklist covering PPE, ventilation, and workspace setup — so you’re not hunting through this guide mid-pour. Enter your email and we’ll send it straight over.
Free. We only email when there’s something useful, never more than twice a month, and you can unsubscribe anytime. Privacy Policy
Key Takeaways
- A resin tumbler is the one project on this site that uses no mold and no flat pour — you’re coating a vertical, curved object, which changes almost every rule you learned from coasters and trays.
- The technique is genuinely beginner-friendly, but it requires one tool you probably don’t own: a tumbler turner. Hand-rotating won’t get you through a cure cycle.
- The most common failure is resin pooling at the base — caused by stopping the turner too early, or by a turner that isn’t level.
- Plan on two thin coats, not one thick one, plus about 7 days of curing to full hardness before the tumbler holds a drink.
- The food-safety question matters more here than on any other project we cover, because this is a drinking vessel. Read section 2 before you pour.
1. Why Tumblers Are Different From Every Other Project on This Site
Here’s the honest split on how to epoxy a tumbler properly. The technique is easy, and the equipment is not optional.
Every other project in our Resin Projects hub shares the same physics. Coasters, trays, ornaments and jewelry all pour resin into something that holds it, or onto something flat, so gravity works for you. A tumbler inverts that completely:
- No mold, no flat surface. Resin is applied to a vertical, curved object with nothing holding the material in place.
- It must stay evenly distributed while curing. The moment the tumbler stops, gravity pulls every gram toward the lowest point — the base.
- The design layer usually isn’t resin. Most tumblers get glitter, alcohol ink, or a vinyl decal applied first, then sealed under a clear coat.
That second point is the whole ballgame, and it’s why a tumbler turner isn’t a nice-to-have. It’s the difference between a glass-smooth cup and a lopsided one with a fat resin lip around the bottom.
⚠️ New to resin? Start here instead. This guide assumes you’ve mixed epoxy successfully at least once. If you haven’t, our Beginner Resin Guides hub and How to Mix Epoxy Resin are the right first stop.
2. The Honest Drink-Safety Answer
We’d rather tell you this upfront than have you work it out after you’ve poured resin inside a cup you drink from.
Standard epoxy resin is not automatically food-contact safe, and the distinction we make in our butcher block guide applies here just as directly. Even resins marketed as “food safe” generally mean the cured, undamaged surface is acceptable for food contact — not that a piece you coated at home carries a food-contact certification.
For a tumbler specifically:
- 🚫 Never coat the interior or the drinking rim. This is why masking matters so much below.
- ✅ Coat the exterior only, leaving a clean band of bare stainless at the rim and base.
- 🧼 Hand-wash only. No dishwasher — heat, humidity and detergent are a worst case for cured epoxy.
- 🔥 Keep it away from very hot liquids. Many craft epoxies start to soften around 120°F (50°C), and freshly poured coffee sits above that.
- 🔍 Inspect for chips and scratches. Once the cured surface is damaged, that reasoning no longer holds.
⚠️ Heads up: Always check the manufacturer’s data sheet for your resin’s food-contact rating. A coated interior is a different project requiring a resin explicitly rated for it. For the wider picture, see Is Epoxy Resin Safe? and the Resin Safety Hub.
3. Materials and Tools You’ll Need
Everything from Essential Resin Tools Every Beginner Needs carries over — gloves, respirator, goggles, silicone mat, graduated mixing cups, a digital scale and stir sticks. Then add the tumbler-specific items:
| Item | Why You Need It | Beginner Tip |
|---|---|---|
| Stainless steel tumbler blank (20 oz is ideal) | Gives you a straight, predictable cylinder to learn on | Powder-coated holds resin far better than bare metal — see note below |
| Tumbler turner | Rotates the cup through the whole cure window so resin can’t pool | The one non-negotiable buy — look for slow-spin, ~3–6 RPM |
| Clear top-coat epoxy | Tumblers need a coating resin, not a deep-pour casting resin | Check the label says it’s suitable for coating/topcoat work |
| Glitter, alcohol ink, or vinyl decal | The design layer sealed under the clear coat | Apply and let it fully set before any resin touches it |
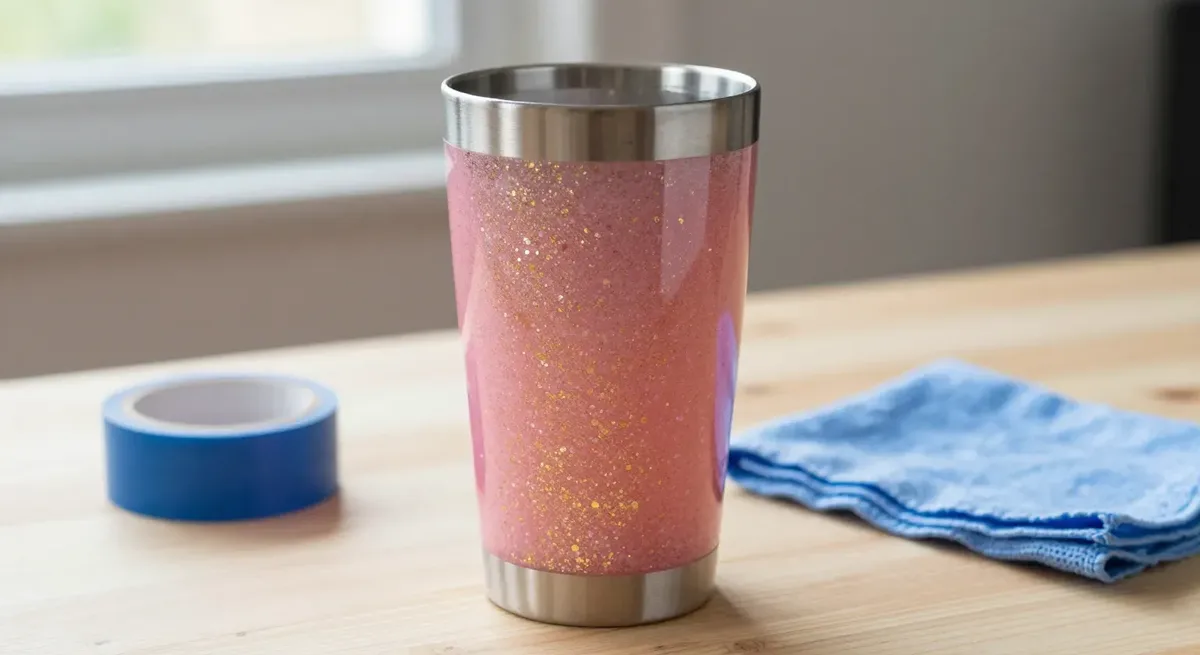
| Painter’s tape | Masks the rim and base so resin never reaches the drinking surface | Two layers at the rim — that’s your safety line |
| Foam brush or clean gloved hand | Spreading resin evenly over a curved surface | A gloved hand gives more control than a brush on a cylinder |
| Cardboard box or foil tray | Catches the drips you will get under the turner | Put it down before you mix, not after |
| Heat gun or torch | Popping surface bubbles in the first 30 minutes | Short, gentle passes — you’re working on a vertical surface |
Powder-coated vs. bare stainless steel — the adhesion question: resin grips a powder-coated tumbler far more reliably, because the coating gives it a toothy surface to bond to. Bare polished stainless is about the hardest surface you could pick; resin beads, crawls, or peels away entirely. If bare metal is all you have, scuff it with fine sandpaper and wipe it down thoroughly first. For a first project, buy a powder-coated blank and remove a whole failure mode.
👉 Recommended:
Suteck Cup Turner for Crafts — Cuptisserie Kit with Rotisserie Motor — the turner we mean when we say “non-negotiable.” Confirm it’s a slow-spin model in the roughly 3–6 RPM range for your tumbler size before you buy.
LET’S RESIN Epoxy Resin Crafting Kit with Dyes & Accessories (1 gallon) — a 1:1 epoxy, and the same kit we link for coasters.
Digital Scale for Resin (Precise to 0.1g)
HASLE OUTFITTERS 20 oz Powder-Coated Stainless Tumbler Blanks, 12-Pack — a bulk pack of the powder-coated blanks this guide recommends starting on, so you have spares for a second or third attempt.
4. Step-by-Step: Wrapping Your First Tumbler
Step 1: Clean and prep the tumbler
Wipe the whole exterior with isopropyl alcohol on a lint-free cloth, then let it dry completely. Adhesion fails on an oily surface, and fingerprint oils are invisible. This is the same contamination logic behind the fisheye problems in Common Resin Problems — except here a failed bond means your whole coat slides off a curved surface instead of sitting in a mold.
Step 2: Mask the rim and base with painter’s tape
Tape off the top inch of the rim and the base. Press the edges down firmly with a craft stick so resin can’t creep underneath. The rim is your hard safety line — nothing goes above it.
Step 3: Apply your design layer
Glitter, alcohol ink, or a vinyl decal, applied to the bare tumbler. Whatever you choose, let it fully set before resin touches it. Wet paint or freshly-laid vinyl under a resin coat is the fastest route to a smeared, shifted design.
Step 4: Mix your resin
Follow the same disciplined approach from our full mixing guide — accurate ratio, slow thorough stir, scrape the sides and the bottom.
How much? A useful rule of thumb for a coating project is roughly 0.05 fl oz (1.5 ml) of mixed resin per ounce of tumbler capacity per coat — about 1 fl oz (30 ml) for a 20 oz cup, split evenly between Part A and Part B on a 1:1 product. You’ll lose some to drips, which is normal; don’t over-mix to compensate, because a thick coat is its own problem.
Step 5: Apply the resin evenly
With a gloved hand or foam brush, spread a thin coat over the design layer, working top to bottom. Thin beats thick every time — a thick first pass sags, and drags your design layer with it. Pass a heat gun or torch by in short sweeps to pop surface bubbles while the resin is still fluid.
Step 6: Get it on the turner immediately
This step cannot be skipped, shortened, or done “in a minute.” The moment your coat is on, the tumbler goes on the turner and the motor goes on. Seat it straight and centered on the foam first — an off-center or tilted cup produces exactly the same lopsided result as a stopped motor.
Step 7: Rotate through the full tacky-to-firm window
Here’s where we have to be precise rather than give you a single number, because the right answer depends entirely on your resin.
The tumbler keeps turning until the resin has passed through its liquid stage and reached a firm, non-sagging gel. On most hobby coating resins that’s roughly 4 to 8 hours of continuous rotation, but your product’s pot life and gel time are the only figures that actually apply — read the technical data sheet for your specific resin. A fast-set resin might be safe in three hours; a slow one could need overnight. Stopping early is the most common way to end up with a thick lip of resin around the base.

Step 8: Second coat, remove tape, and cure fully
Most tumblers look best with two thin coats. Once the first is touch-dry, repeat Steps 4–7. After the final coat cures, peel the tape, then check the base for drips — carefully scrape or sand any away with fine grit. Give it the full cure to maximum hardness (typically about 7 days; check your label) before it touches a drink, and hand-wash only.

5. Troubleshooting Tumbler-Specific Problems
Tumblers fail in their own particular ways. For stickiness, bubble or cloudiness issues not listed here, the general cause-and-fix logic lives in Common Resin Problems and How to Fix Them.
| Problem | Likely Cause | Fix |
|---|---|---|
| Drips or a fat lip at the base | Turner stopped too early, or wasn’t level | Run the full gel window; confirm the turner is level and the cup centered each coat |
| Fisheye or crawling | Surface contamination — oils, wax, or a slick bare-metal surface | Clean with isopropyl alcohol before every coat; scuff bare stainless first |
| Design layer shifted or smeared | Resin applied too soon, or first coat too thick | Let the design layer fully set; always apply thin and build up |
| Cloudy or uneven finish | Cold room or high humidity | Same causes as the stickiness section in Common Resin Problems — warm the resin, dry the air |
| Coat peeling away in sheets | Bare polished stainless with no mechanical grip | Scuff the surface, re-clean, and use a powder-coated blank next time |
💡 Pro tip: Put a cardboard box or foil tray under the turner before you open the resin. Every tumbler drips — the only question is whether it drips onto foil or onto your table.
6. FAQ
Q1: Do I really need a tumbler turner, or can I rotate by hand?
You need the turner. Hand-rotating works for the thirty seconds you’re standing there, but the resin keeps moving for hours while it gels. You can’t hold a cup for six hours, and certainly not evenly. This is the one project on the site where the specialized tool earns its price.
Q2: What kind of tumbler works best — powder-coated or bare stainless steel?
Powder-coated, without hesitation. The texture gives resin something to grip. Bare polished stainless is close to the worst surface you can coat; resin beads and crawls on it, and adhesion stays unreliable even after scuffing. Buy a powder-coated blank first.
Q3: How long does a tumbler need to stay on the turner?
Long enough to pass fully through its liquid stage into a firm gel — commonly 4 to 8 hours for hobby coating resins, but your resin’s data sheet is the real answer. Check its gel time, not someone else’s tutorial. Then let it cure off the turner to full hardness (typically about 7 days) before it holds a drink.
Q4: Is resin on a tumbler food-safe or drink-safe?
Not automatically — and we’d rather be blunt about it. Cured, undamaged epoxy from a product rated for food contact is generally acceptable for incidental contact, but a tumbler you coated yourself carries no food-contact certification. The safe approach is the one in this guide: coat the exterior only, keep resin away from the rim and interior, hand-wash only, and keep it away from very hot liquids. See section 2 and Is Epoxy Resin Safe?.
Q5: Can I use leftover resin from another project on a tumbler?
Only if it’s still within its pot life and it’s a coating resin, not a deep-pour casting resin. Partially-mixed resin left in a cup has already started exotherming and behaves unpredictably on a vertical surface. Mix fresh for each coat.
Sources
- FDA, 21 CFR 175.300: Resinous and polymeric coatings: the US rule for coatings meant to touch food. A coating you mix and apply at home has no certification under it, which is why this guide keeps resin off the rim and interior.
- ArtResin, What Is ArtResin’s Heat Resistance?: the maker rates cured resin to about 120°F (50°C) and says it can soften above that, which is why hot coffee is a problem.
- NIOSH (CDC), Epoxies and resins: skin and breathing hazards of uncured epoxy, and why gloves and ventilation matter while you coat.
- OSHA, Hazard Communication: why every resin comes with a Safety Data Sheet. Check it, and the maker’s Technical Data Sheet, for your product’s gel time (how long the turner runs), full-cure time and PPE.
7. Where to Go Next
A tumbler teaches you something no flat pour can: how to control resin on a surface that’s actively trying to shed it.
If your first tumbler came out lopsided, that’s data, not a verdict. Fix the leveling, read your resin’s gel time properly, and pour again.
📚 Keep Learning
- Casting Sculptures With Epoxy Resin — the natural next skill once you’ve got a tumbler down
- Common Resin Problems and How to Fix Them — bubbles, tackiness, and cloudiness, sitewide
- How to Mix Epoxy Resin — revisit the fundamentals if any step here felt shaky
- Resin Gift Ideas for Beginners — turn a finished tumbler into a ready-to-wrap holiday gift, plus more gift-ready project picks

Alex is not a chemist or engineer; for food-safety, structural, or health questions specific to your project or materials, consult the manufacturer’s data sheet or a qualified professional.
Enjoyed this guide? Join the Resin Affairs newsletter for new tutorials, safety tips, and project ideas straight to your inbox.