Valentine’s Resin Jewelry: Heart Pendants, Earrings & Gifts Worth Pouring
Resin Affairs is reader-supported. If you buy through links on this page, we may earn a small commission at no extra cost to you. We only link to gear we would use ourselves — prices and availability change, so check the current listing. Always follow your resin product’s label and Safety Data Sheet.
As an Amazon Associate I earn from qualifying purchases.
Introduction
Few gifting windows of the year beat Valentine’s Day for jewelry — and few materials beat resin for making it yourself. A resin heart pendant costs pennies in materials, pours in an afternoon, and can carry something no store-bought piece ever will: a dried rose from an actual date, a handwritten initial, a tiny photo, a pinch of your partner’s favorite shade of pink. Glitter, foil flakes, flowers, names — they all go right into the pour and come out sealed under glass-clear resin forever.
That’s what makes Valentine’s resin jewelry such a strong seasonal project: it’s fast, cheap per piece, and personal in a way a boxed necklace from a department store isn’t.
Here’s what’s below: the heart-shaped molds and red/pink/gold palettes worth buying, the embeds that make a piece feel like your Valentine’s, five complete project ideas from keepsake pendant to budget keychain, and the packaging and cure-time planning that gets your gift fully hardened and beautifully wrapped well before February 14.
Before You Start: What This Post Assumes
This is a seasonal idea-and-inspiration post, not a from-scratch technique guide — on purpose. The pouring, curing, demolding, and finishing skills behind every piece below are covered in full in Resin Jewelry for Beginners: Pendants, Earrings & Charms. If you’ve never poured jewelry before, start there and come back — everything here builds directly on it, including the single most valuable trick in that guide: placing your jump-ring hole while the resin is still tacky, which is the difference between a clean pendant and a cracked one.

Three quick references before you buy anything:
- Molds. The buying logic — platinum-cure silicone, sturdy walls, and hole bosses or a plan for tacky-stage pinning — lives in our Best Resin Molds for Beginners guide. For Valentine’s work, simply add three seasonal cavity shapes to that checklist: hearts (solid and deep-cavity), X-and-O sets, and lip shapes. A multi-cavity heart tray is the workhorse of this whole post — our pick is this 3-pack mixed-size heart silicone mold set: 75 cavities across three molds, from mini stud-size hearts up to pendant-size, so one purchase covers every project below.
- Resin type. Tiny, thin jewelry pieces are exactly where UV resin shines — minutes under a lamp instead of days on a shelf (the same fast-cure UV resin we use for ornaments) — while epoxy is the better pick for anything deeper than about a quarter-inch, like the ring dish below. Our Epoxy Resin vs. UV Resin comparison walks through the trade-offs, and How to Mix Epoxy Resin covers ratios and mixing if you go the epoxy route.
- Findings. Every pendant needs a jump ring and a chain clasp, so buy them once in bulk. This gold-and-silver jump ring and lobster clasp kit comes with its own pliers and lasts for years of projects.
Safety note: Small pours are low-fuss, but the basics still apply — nitrile gloves, a ventilated room, and a protected, level surface. Skim the Resin Safety Hub before your first pour if you’re new here.
Color and Embed Ideas for Valentine’s Pieces

💗 The Classic Valentine Palette
Red and pink resin jewelry lives or dies on pigment discipline. The Valentine workhorses are four: a true red, a blush pink, a pearl white, and gold — one mica powder set like this covers all four in a single purchase. Mix them and you cover almost every romantic look:
- Classic red + gold — opaque red mica with gold foil flakes; bold, jewelry-store glossy.
- Blush + pearl white swirl — two drops of each, swirled once with a toothpick; soft and romantic.
- Stained-glass pink — a whisper of pink dye in clear resin (use a UV-compatible tint if you’re working in UV; alcohol ink is for epoxy); translucent, lets light through dried flowers behind it.
- White + red ombré or marble — the “candy heart” look, perfect for studs and keychains.
The rule from our jewelry guide doubles here: start with less pigment than you think you need. Mica disperses further in a 3-gram pendant cavity than in a coaster pour, and an over-pigmented heart cures cloudy or tacky. Mix a test swatch first — it costs one drop of resin and saves a ruined batch.
🌹 Embeds That Say Something
- Dried roses and baby’s breath. The romantic classic. The same caution we give for every floral embed applies: the flowers must be fully dried — any moisture left in a petal clouds the resin around it and can trap bubbles. Press and dry them a week before you pour, or buy pre-dried (these pressed red roses are resin-ready straight out of the pack).
- Fine red or gold glitter. Suspends beautifully in small pours; add it to the resin in the cup, not on the surface, so it spreads through the piece instead of sinking to one face.
- Gold foil flakes. A few flakes in a clear heart read as “expensive” for about two cents of material. This gold, silver and copper flake kit comes with tweezers for placing them, and the gold and copper flakes both suit a red-and-pink palette.
- A tiny handwritten note or initials. Cut a word, a date, or an initial small enough to fit the cavity, and seal it under a clear pour. Paper must be thin and fully dry; seal porous paper with a quick clear coat first if it darkens too much in wet resin.
🌌 The Level-Up: Ombré and Galaxy Hearts
Want one piece that looks genuinely advanced? Pour a layered gradient heart: fill the bottom third with deep red, let it set to tacky, add a red-pink blend to the middle, then blush pink on top — the tacky layers blend into a smooth red-to-pink fade instead of hard stripes. For a galaxy heart, swirl deep red and pink with a toothpick, then tap in fine gold glitter so it suspends mid-piece rather than sinking. Both are the same basic pour with patience added between layers.

Five Valentine’s Resin Project Ideas

These are idea briefs, not full tutorials — each one uses the exact process in the jewelry guide, just pointed at a Valentine’s mold.
1. 💌 A Heart Pendant with an Initial or Tiny Photo
The flagship. A resin heart pendant in red or stained-glass pink, with a handwritten initial — or a photo printed small on thin paper and sealed first, so the ink doesn’t bleed — under a clear top layer. Pour the colored base, set it tacky, lay the initial in, then dome with clear resin. On a delicate gold chain it’s indistinguishable from boutique work. Best for: partners, best friends, moms. Time: one evening plus cure.
2. 💞 Matching Heart Stud Earrings
Pour two identical blush or pearl-swirl hearts in a small stud mold, sand and buff the seams, and glue in stud posts. A matching pair of heart resin jewelry doubles the “you made us something” impact for barely more resin than a single pendant. Keep the pigment light so the pair cures identical. Best for: friends and siblings who do everything together. Time: one short session.
3. ✉️ The “Love Letter” Bookmark
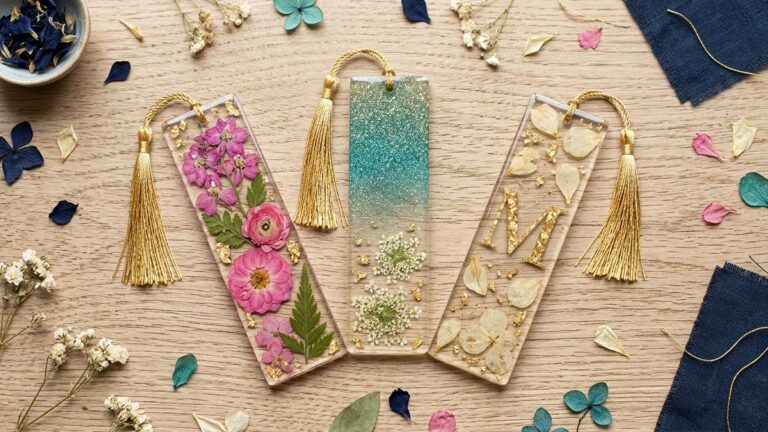
A clear rectangular pour over a handwritten line — one sentence, your handwriting, trimmed to fit — with dried petals floating around the edges and a ribbon or tassel at the top. It’s the project for the person who says they don’t want jewelry but reads three books a month. Best for: readers, long-distance partners. Time: one evening.
4. 💍 A Heart-Shaped Ring Dish
The home-decor tier: a small heart trinket dish in blush pink with gold flecks swirled through it. Deeper than jewelry, so this one’s an epoxy pour (or two thin UV layers) that needs about 72 hours before it’s usable and about 7 days to reach full hardness. It’s the gift that sits on their dresser and gets used every single day. Best for: someone who wears their rings everywhere but one place. Time: one pour plus a patient cure.
5. 🔑 Keychain Hearts — the Budget Tier
Red or candy-marble hearts on a key ring, made a dozen at a time in a multi-cavity mold. A bulk pack of split key rings with short chains keeps the cost per keychain tiny. This is your classroom-valentine, coworker, and craft-fair tier: pennies per piece, five minutes of hands-on time each, and still unmistakably handmade. Best for: bulk gifting and craft-fair tables. Time: one batch session.
Gifting and Packaging Tips

Before you gift anything worn against skin: make sure it has no tack at all (give UV pieces an extra cure on both sides) and use hypoallergenic findings. Under-cured UV resin is a known skin sensitizer, so if the wearer gets itching or redness, they should stop wearing it.
Handmade resin already looks boutique — packaging is what makes it feel boutique. The kit is cheap: a small kraft or blush gift box, tissue paper so the piece doesn’t rattle, a handwritten card, and a one-line care tag (“Hand-wash only, keep out of direct sun and heat — with a little care this piece will last for years”). For jewelry specifically, a tiny box with a padded insert or a soft pouch keeps chains untangled and pendants scratch-free. More packaging patterns live in our Resin Gift Ideas for Beginners guide.
The tip that actually saves Valentine’s gifts, though, is calendar math. Epoxy is usable after about 72 hours but takes about 7 days to reach full hardness — and “surface-hard” is not cured. A pendant that’s still slightly soft on February 13 will dent in its box and arrive with a fingerprint in the gloss. So work backwards:
- Early Feb: pour your main pieces (earlier if you’re making several or mailing any).
- By ~Feb 10 at the latest: everything out of the mold, sanded, buffed, findings attached.
- Feb 11–13: box, tag, and write the card — calmly, not at midnight.
If you’re shipping a Valentine’s gift, add transit time after full cure — never ship a soft piece. And if February sneaks up on you, UV resin’s minutes-not-days cure is your forgiveness window; it’s exactly why we keep a bottle on the shelf every gift season.
FAQ
What’s the best resin for small Valentine’s jewelry pieces — epoxy or UV resin?
For pendants, studs, and keychains, UV resin is usually the better pick: thin cavities cure in 2–10 minutes under a lamp, which makes batch-gifting genuinely relaxed. Choose epoxy for anything deeper than about a quarter-inch (like the ring dish) or when you want long working time for swirls and ombré layers, since UV light can’t fully cure thick pours. The full trade-off breakdown is in our Epoxy vs. UV Resin guide.
Can I put a real flower or rose petal in resin jewelry?
Yes — as long as it’s completely dry. Moisture left inside a petal clouds the surrounding resin and traps bubbles, so press and dry flowers for at least a week (or buy pre-dried) before they go near a pour. Dried roses and baby’s breath are the Valentine classics; lay them in on a partly cured layer so they sit where you want them instead of floating.
How far in advance should I make resin jewelry as a Valentine’s gift?
Pour at least a week before you need the gift in hand — more if you’re making several or shipping. Epoxy pieces need about 72 hours before sanding and finishing, and about 7 days to reach full hardness before they’re boxed and worn. A buffer covers the occasional re-pour. A good rhythm: pour the first week of February, finish and package by the 10th–13th. UV resin compresses this to a day or two if you’re behind.
What molds do I need for heart-shaped resin pieces?
One multi-cavity heart silicone mold covers pendants, earrings, and keychains in a single batch — look for sturdy, clear silicone with a mix of cavity sizes, like this 3-pack heart set. Add a small stud mold for earrings, a rectangle bookmark mold, and a deeper heart trinket-dish mold if you’re making the full five-project set above. The shape-agnostic buying checklist (silicone quality, wall stiffness, hole bosses) is in our Best Resin Molds for Beginners guide.
Sources
- NIOSH (CDC), Epoxies and resins: wear the right gloves, increase ventilation, and wash skin as soon as possible after contact.
- MDedge, Acrylates Named Contact Allergen of the Year: the American Contact Dermatitis Society’s 2012 pick. Acrylates are the chemistry behind most UV resins, so under-cured UV pieces shouldn’t sit against skin.
- WEST SYSTEM, Health Effects From Overexposure to Epoxy: how skin sensitization builds with repeated contact, and why gloves matter even on tiny pours.
Ready to Pour Something Sentimental?
Valentine’s resin jewelry is the rare gift that costs almost nothing and can’t be bought: your handwriting, your flowers, your colors, sealed under glass. Give yourself cure time, keep the pigment light, and box it like you mean it.
Planning ahead? Save this guide to your Valentine’s board so it’s there when February comes around.

Keep Learning on ResinAffairs.com
That covers Valentine’s resin jewelry from palette to gift box. Here’s where to go next:
- 💍 Resin Jewelry for Beginners → — the full pendant, earring and charm technique every project above is built on.
- 🎁 Resin Gift Ideas for Beginners → — more handmade gift projects and packaging ideas for birthdays, holidays and thank-yous.
- 🎄 DIY Resin Christmas Ornaments → — the other big gifting season, using the same small molds and UV resin.
- 🩹 Common Resin Problems and How to Fix Them → — for cloudy, tacky or bubbly hearts, and how to stop them happening next time.
Enjoyed this guide? Join the Resin Affairs newsletter for new tutorials, safety tips, and project ideas straight to your inbox.