How to Make Resin Keychains: A Beginner’s Guide
Disclosure: This article contains affiliate links. If you make a purchase through one of these links, we may earn a small commission at no extra cost to you. We only link to gear we would use ourselves.
As an Amazon Associate I earn from qualifying purchases.
If you’ve been curious about resin but haven’t wanted to commit to a big project, a keychain is the place to start. It’s the smallest, cheapest, and least intimidating thing you can make with resin. One small mold, a little resin, and a handful of embeds is all it takes. There’s no big pour to worry about, no table to level, and no expensive supplies to buy before you know whether you’ll even enjoy it.
Keychains also happen to make great gifts. They’re personal, they’re useful, and a batch of them costs very little to produce. If you go the UV resin route, you can have a finished keychain in your hand within the hour. Even with standard epoxy, the whole project is a single evening of work plus a wait for it to cure.
To make a resin keychain, fill a small silicone keychain mold with UV or epoxy resin, add embeds like dried flowers or glitter, let it cure (minutes under a UV lamp, or about a day for epoxy), then demold it and attach a jump ring and clasp.
⚠️ Safety first: work in a well-ventilated space, wear nitrile gloves and eye protection, and keep uncured resin off your skin. New to resin safety? Start with Is Epoxy Resin Safe? and Resin PPE for Beginners.
Supplies You’ll Need
The good news about keychains is that they’re small enough that either type of resin works. Here’s how the two options compare so you can pick whichever makes sense for you.
UV resin is a single-part resin that cures in about 2–4 minutes per thin layer under a UV lamp. There’s no mixing and no measuring, and it’s best for shallow pieces cured in thin layers of about 1/16 inch (2 mm), so a typical 1/4-inch (5–6 mm) keychain mold gets filled and cured in three layers. If you want to sit down after dinner and have a finished keychain before bed, this is the way to go. One thing to know: UV resin needs an actual UV lamp in the 365–405 nm range. An ordinary nail-curing lamp works fine, but sunlight is not a reliable substitute, so don’t count on a windowsill to do the job.
Standard epoxy resin is a two-part product (resin plus hardener) that you mix together at an exact ratio, then pour. Most epoxies can be demolded after about 24 hours, are ready to use after about 72 hours, and reach full hardness in about 7 days. It requires more care with measuring, but if you already have some on hand from another project, there’s no reason to buy UV resin just for this. Keychains are a perfectly good use for it.
Beyond the resin itself, you’ll want a few other things:
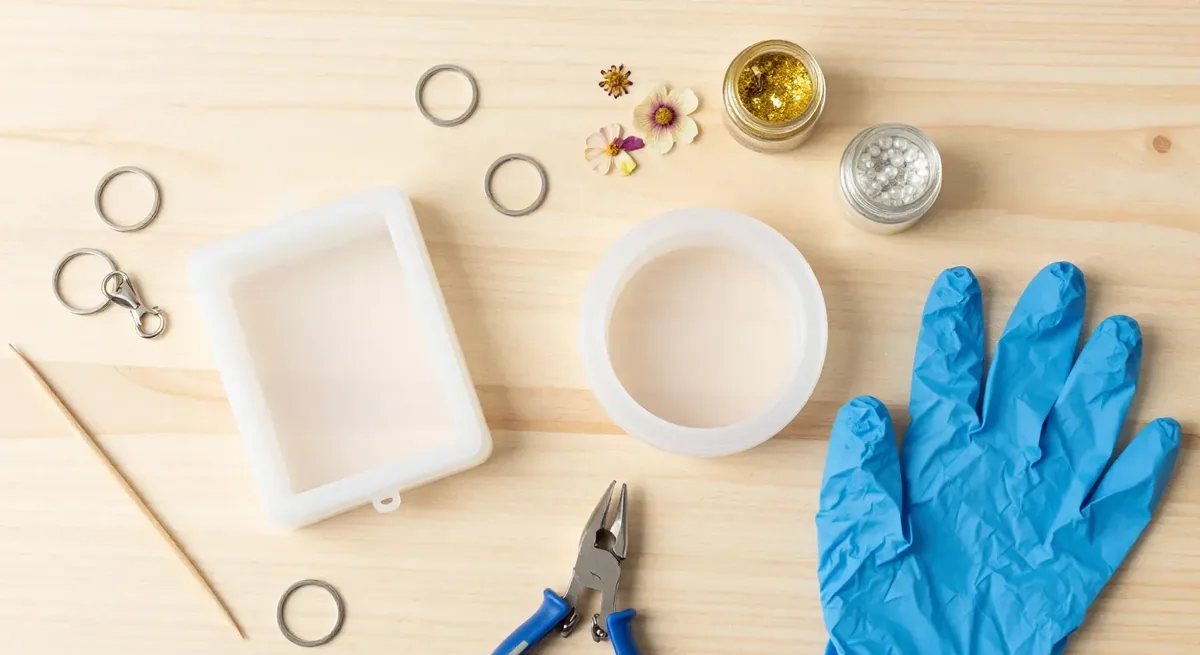
- A silicone keychain mold or blank. Silicone molds come in every shape you can imagine (rectangles, circles, hearts, initials, animals). A “blank” is a pre-made clear or colored keychain shape you decorate on top of rather than fill. Molds are the more common choice for beginners because they give you a smooth, glossy piece with no extra finishing. If you’re not sure which mold to buy, the site’s guide to choosing resin molds covers what to look for.
- Embeds. This just means anything you put inside the resin. Dried flowers, glitter, mica powder or liquid pigment for color, and tiny charms are the classic choices.
- Hardware. A jump ring (a small metal ring that opens and closes) to attach the keychain piece to a clasp, and a keychain clasp or split ring to hold your keys. You’ll also want a small pair of pliers to open and close the jump ring, though tweezers work in a pinch.
- Basics. Gloves, something to protect your work surface, a toothpick or silicone stir stick, and eye protection.
🧰 Recommended Kit
- LET’S RESIN UV Resin with Light, Upgraded 200g Starter Kit for Jewelry — This is the fast-cure option. The kit includes the lamp, so you’re not sourcing one separately, and it’s the pick if you want a finished keychain the same day you start.
- Let’s Resin 16oz Epoxy Resin Kit & Molds Complete Set — If you’d rather work with epoxy, this set includes silicone molds, pigment, and dried flowers along with the resin, so you get the embeds and molds in one box rather than hunting them down separately.
- NoCry Clear Anti-Fog Safety Goggles (ANSI Z87) — Basic eye protection. Resin splashes are rare on a project this small, but they’re not impossible, and this is worth having no matter which resin you use.
- LEOBRO Lobster Clasp & Key Ring Keychain Hardware Kit (100pc) — 50 lobster clasps and 50 split key rings so you’re not hunting down hardware piece by piece; enough for dozens of keychains.
📋 Get the Free Resin Safety & Prep Checklist
A one-page printable checklist covering PPE, ventilation, and workspace setup — so you’re not hunting through this guide mid-pour. Enter your email and we’ll send it straight over.
Free. We only email when there’s something useful, never more than twice a month, and you can unsubscribe anytime. Privacy Policy
Step-by-Step: Making a Resin Keychain
Here’s the whole process from empty mold to finished keychain. The steps are the same whether you use UV resin or epoxy, with two spots where the paths split. Both branches are clearly marked.
1. Prep your mold and workspace
Make sure your mold is clean and completely dry. Even a small speck of dust or a fingerprint inside the cavity will end up permanently sealed in your keychain. A quick wipe with a lint-free cloth is usually enough. If the mold is brand new, wash it with warm soapy water and let it dry fully first.
Set the mold on a flat, level surface. Keychain molds are shallow, so a tilt that wouldn’t matter on a thicker piece can leave you with a keychain that’s thin on one edge and thick on the other. A small level or even a phone app is handy for checking.
Put on your gloves and goggles now, before you open anything.
2. Prepare the resin
This is the first place the two paths split.
If you’re using UV resin: There’s nothing to mix. It is an acrylate, though, and a strong skin sensitizer before it cures, so wear nitrile gloves (acrylates pass through latex and vinyl within minutes), wipe up spills straight away, and never handle a tacky, under-cured piece bare-handed. Just have your bottle ready and your lamp plugged in nearby. UV resin cures whenever UV light hits it, so keep the bottle capped between pours and avoid working directly in a sunny window. If you’re brand new to UV resin, read the site’s UV resin starter guide before you begin. It covers how to handle the resin, how long to cure it, and how to avoid the sticky-surface problem beginners often run into.
If you’re using epoxy resin: Measure the resin and hardener carefully at the exact ratio your product specifies, either by volume or by weight, and mix slowly and thoroughly. A keychain needs only a small amount, but the ratio matters just as much on a tiny batch as it does on a big one. Follow the epoxy mixing guide for the full method, including how to avoid bubbles and how long to stir. If you’re adding color to the whole piece, mix your pigment in now.
3. Add your embeds
You have a choice here: put the embeds in the empty mold first and pour resin over them, or pour a thin base layer of resin, place the embeds on top, and then fill the rest. The second method gives you more control over where things end up, and it’s the one most people settle on after a keychain or two.
Use a toothpick or tweezers to position dried flowers, charms, or glitter. Press flowers gently so they sit flat and don’t trap air underneath. Keep in mind that the bottom of the mold is the front of your finished keychain, so whatever you place face-down against the mold is what you’ll see first.
4. Pour or fill the mold
Pour slowly, starting in the center and letting the resin spread out on its own. Fill to just below the rim, not above it. Overfilling creates a lip around the edge that you’ll have to sand off later.
Check for bubbles. On a piece this small, a toothpick will pop most of them. For epoxy, a quick pass with a heat gun on low (6–8 inches away) or a torch (4–6 inches away) handles the rest. Keep it moving, and never use a lighter. For UV resin, stick with the toothpick.
Look at your embeds one more time. Resin moves things around as it flows, so nudge anything that drifted back into place.
5. Cure
This is the second place the paths split.
UV resin: Slide the mold under your UV lamp and cure for about 2–4 minutes per thin layer, depending on the resin and your lamp. If you’re layering (a base layer, then embeds, then a top layer), cure each layer before adding the next. When you think it’s done, touch the surface with a gloved fingertip. If it’s tacky, give it a few more minutes. The UV resin guide has more on judging cure times.
Epoxy resin: Cover the mold loosely to keep dust off and leave it alone for at least 24 hours, or the demold time on your label. Resist the urge to poke it. Demolding early is the most common way beginners ruin an otherwise perfect piece, because the resin dents, bends, or stays permanently soft. Check your product’s stated cure time and wait for the whole thing. Once it’s out, give it about 72 hours before it goes on a key ring; it reaches full hardness in about 7 days.
6. Demold
Don’t rush this step. Even fully cured resin can scratch or chip if you pry at it. Start at one corner and gently peel the silicone away from the resin, working around the edges. Flex the mold, not the piece. The keychain should release with a little pop once enough of the mold has been pulled back from it. If it’s resisting, that’s usually a sign it needs more cure time, especially with epoxy.
Once it’s out, check the edges. If you overfilled slightly, you might have a thin ridge of resin around the rim. You can trim it with a craft knife or smooth it with fine sandpaper.
7. Attach the hardware
Most keychain molds have a small hole already built in, near the top of the shape. If yours doesn’t, you can drill one with a pin vise or a rotary tool on low speed, going slowly. Wear safety glasses and an N95 mask while you drill, since it makes fine resin dust.
Open a jump ring by twisting the ends sideways with pliers (twist, don’t pull apart, or it won’t close cleanly). Thread it through the hole in your resin piece, add your keychain clasp or split ring, then twist the jump ring closed. Give it a gentle tug to make sure it’s secure. That’s it. Your keychain is finished and ready for a set of keys or a gift bag.
Design Ideas for Resin Keychains
Once you’ve made one plain keychain and seen how the process works, the fun part is deciding what to put in the next one. Here are a few ideas that work well at this size.
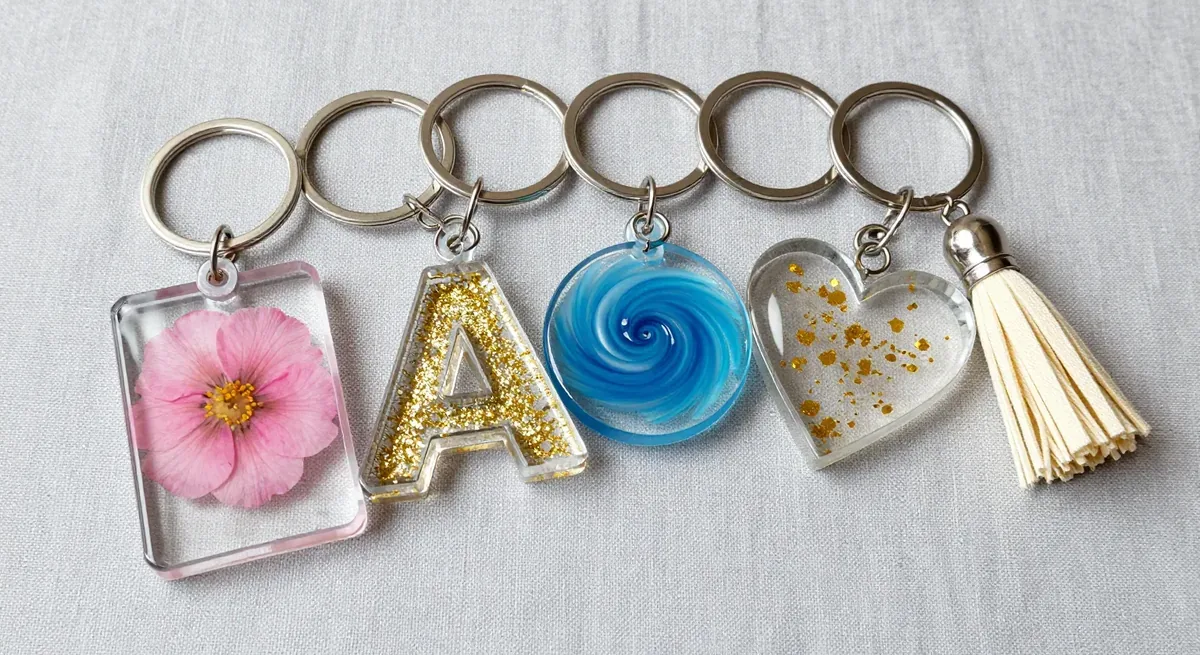
Birth-flower keychains. Every month has a traditional birth flower (daisies for April, roses for June, and so on). Press a small dried version of the recipient’s flower into a clear keychain and you’ve got a gift that feels thoughtful without much extra work. These are one of the most popular items in the site’s resin gift ideas post for a reason.
Initial or monogram keychains. Use a letter-shaped mold, or place a small metal or vinyl letter inside a standard rectangle. A single initial with a bit of gold flake or fine glitter behind it looks polished and takes no design skill at all.
Color-block keychains. Pour two or three solid colors side by side or in layers. With UV resin, you can cure each color before adding the next, which gives you crisp, clean edges between them. With epoxy, pour the colors at the same time and let them meet for a softer blend.
Glitter ombre keychains. Sprinkle glitter heavily at one end of the mold and gradually thin it out toward the other end before pouring the resin. The result is a fade from dense sparkle to clear, and it looks far more advanced than it is.
Photo or paper keychains. A tiny printed photo, a scrap of patterned paper, or a ticket stub can be embedded, though paper needs to be sealed with a layer of glue or a clear sealant first so the resin doesn’t soak in and darken it.
Tiny-object keychains. Small seashells, a pinch of sand, sprinkles, or miniature charms all work. Just keep the embeds shallower than the mold so they end up fully covered.
Troubleshooting
A few sticky surfaces, cloudy spots, or stray bubbles are completely normal when you’re starting out, and a keychain is the cheapest possible place to make those mistakes. Most issues trace back to measuring, mixing, or cure time, and all of them are fixable. If something goes wrong with your piece, the site’s troubleshooting guide walks through the most common problems and how to fix each one.
Frequently Asked Questions
What resin is best for keychains?
Either UV resin or standard epoxy works well because keychains are small and shallow. UV resin is the faster and simpler option, curing in minutes under a lamp with no mixing required. Epoxy needs precise measuring and a longer wait (about 24 hours to demold, about 72 hours before it’s ready to use), but it’s a perfectly good choice if you already have some at home.
How long does it take to make a resin keychain?
With UV resin, the whole project takes under an hour, including a cure of roughly 2–4 minutes per layer under the lamp. With epoxy, the hands-on work is about the same, but you’ll need to wait about 24 hours (or your label’s demold time) before you can demold it, and about 72 hours before it’s ready for keys.
Can I use UV resin for keychains?
Yes, and it’s actually the ideal use for it. UV resin cures best in thin layers of about 1/16 inch (2 mm), so fill a typical 1/4-inch (5–6 mm) keychain mold in three layers, curing each one. You’ll need a UV lamp in the 365–405 nm range (a nail lamp works), since sunlight isn’t a reliable way to cure it. The UV resin starter guide covers everything you need to know.
What can I put inside a resin keychain?
Dried flowers, glitter, mica powder, liquid pigment, tiny charms, small shells, and even little printed photos all work. The main rules are that anything organic should be fully dry, paper should be sealed first, and embeds should sit lower than the rim of the mold so they end up completely covered in resin.
How do I attach hardware to a resin keychain?
Most keychain molds create a hole in the piece for you; if yours doesn’t, drill a small one near the top. Open a jump ring by twisting the ends sideways with pliers, thread it through the hole, add a keychain clasp or split ring, and twist the jump ring closed. You can find jump rings and clasps at any craft store or in a basic hardware multi-pack.
Do resin keychains need to be sealed?
Not usually. A keychain that comes out of a silicone mold fully cured will already have a glossy, durable surface and doesn’t need any topcoat. The only time you might add a thin clear layer is if you’ve sanded the edges and want to restore the shine, or if you decorated the top of a blank rather than filling a mold.
Sources
- NIOSH (CDC), Epoxies and resins: wear the right gloves, increase ventilation, and wash skin as soon as possible after contact.
- MDedge, Acrylates Named Contact Allergen of the Year: the American Contact Dermatitis Society’s 2012 pick. Acrylates are the chemistry behind most UV resins.
- WEST SYSTEM, Health Effects From Overexposure to Epoxy: how skin sensitization builds with repeated contact, so small, frequent projects still call for gloves.
- OSHA, Hazard Communication: how to read your resin’s Safety Data Sheet (SDS) and label for its demold and cure times.
Keep Learning on ResinAffairs.com
Ready for your next project, or want to go deeper on something from this guide? These posts are a good next step.
- 🎁 Resin Gift Ideas for Beginners — More small, giftable projects like keychains that you can make in a single session.
- 🔦 UV Resin for Beginners — The full starter guide to UV resin, including lamps, cure times, and how to avoid a sticky finish.
- 🧊 Best Resin Molds for Beginners — How to choose molds that release cleanly and give you a glossy finish every time.
- 🛠️ Common Resin Problems and How to Fix Them — The troubleshooting hub for sticky spots, bubbles, cloudiness, and everything else that can go sideways.
- 🔤 Personalized Name & Initial Resin Pieces → — the same letter-mold approach, applied to names and initials instead of shapes.
- How to color resin →
- Last-Minute Resin Gifts You Can Still Finish Before Christmas
- Resin Gift Wrapping & Pairing Ideas
- 🔖 How to Make Resin Bookmarks — The same skills on a flat pour, with no hardware.
Enjoyed this guide? Join the Resin Affairs newsletter for new tutorials, safety tips, and project ideas straight to your inbox.