Personalized Name & Initial Resin Pieces: Beginner Guide
Resin Affairs is reader-supported. If you buy through links on this page, we may earn a small commission at no extra cost to you. We only link to gear we would use ourselves — prices and availability change, so check the current listing. Always follow your resin product’s label and Safety Data Sheet.
As an Amazon Associate I earn from qualifying purchases.
A name or a single initial is the fastest way to make a resin piece feel like it was made for one specific person, not just made. Letter and alphabet silicone molds do almost all of the hard work — there’s no freehand cutting and no custom carving, just filling a cavity that’s already shaped like the letter you need.
This guide covers three ways to personalize a piece — spelling out a full name, a single monogram, or a custom shape with a decal — plus the small habits that keep tiny letter pours from trapping bubbles.
To make a personalized resin name piece: dry-lay letter mold cavities to check spacing, mix a small batch of resin (UV resin is the easier choice for thin letter pours), fill each letter carefully with a toothpick to avoid trapped air, cure, demold each letter, then join them into a word with cord, a backing plaque, or jump rings. Total hands-on time: about 20–30 minutes for a short name, plus curing.
⚠️ Safety first: work in a well-ventilated space, wear nitrile gloves and eye protection, and keep uncured resin off your skin. New to resin safety? Start with Is Epoxy Resin Safe? and Resin PPE for Beginners.
Three Ways to Personalize a Resin Piece
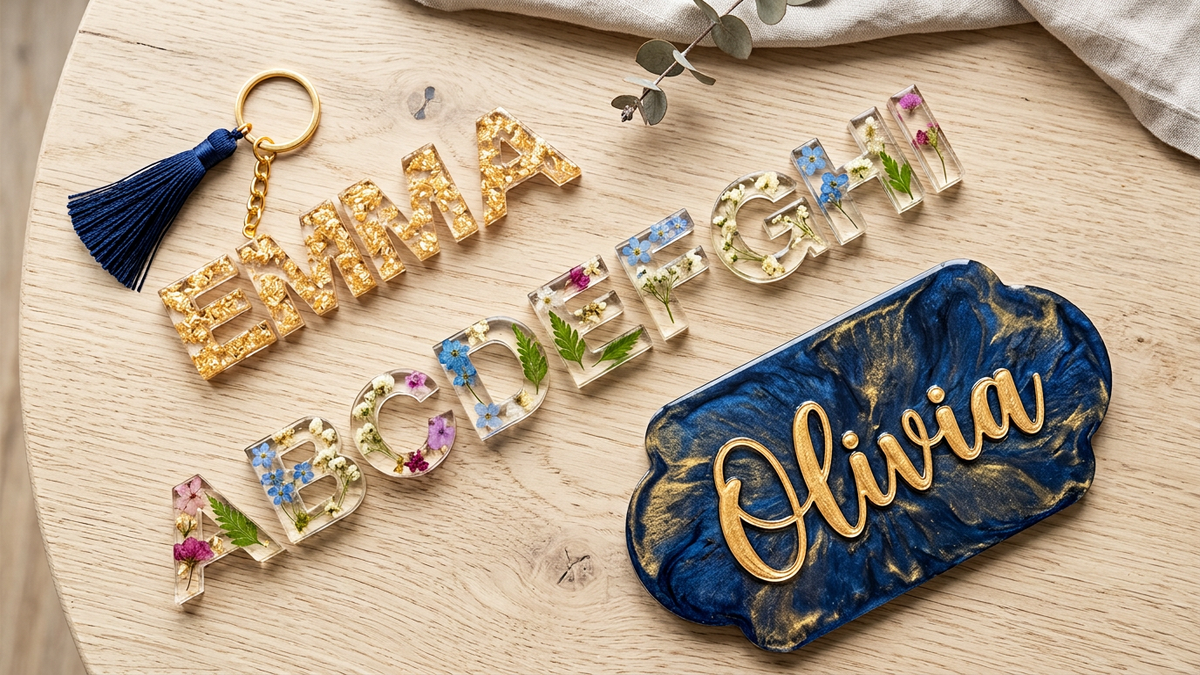
- Individual letter molds spelling a full name or word. Buy one alphabet mold set, pour each letter you need, then join them together once cured. This is the most flexible option and the one this guide focuses on.
- A single monogram or initial mold. The same idea, just one letter — works beautifully on its own as a pendant, keychain, or Christmas ornament, and it’s the lowest-effort version of this whole project.
- A custom shape with a hand-placed decal or stencil. For a specific font or a shape a generic letter mold can’t give you — a full name across one continuous plaque, or a house-shaped ornament with an address — cut a vinyl decal or stencil and place it in a blank mold before pouring, or press it onto the surface after a thin first layer sets. If you want a font that doesn’t come as a physical mold, a design-file marketplace like Creative Fabrica has downloadable name and monogram cut files for a home vinyl cutter — useful for this method, not needed for the first two.
Supplies You’ll Need
Once you have a letter mold set, this is one of the cheapest projects on the site to keep making — the mold is reusable for every name you’ll ever pour.
- An alphabet or letter silicone mold set. Buy once, reuse for every name. Look for one that includes a molded hole if you’re planning keychains or ornaments — it saves drilling later.
- Resin. UV resin is the better fit here: small, thin cavities, a fast cure between letters, and no big batch to mix and risk wasting. Epoxy works too if you’re pouring a full alphabet’s worth of letters at once and don’t mind the overnight wait — see our mixing guide either way.
- Glitter or mica powder to fill each letter with color. How to color resin covers how much to use.
- Jump rings or hardware if you’re making a keychain or ornament — check what your mold set includes first, since many alphabet molds already come with rings built in.
- A fine paintbrush or toothpick for settling resin into small letter cavities — the single most useful tool on this list.
🧰 Recommended Kit
- Letter mold set — LET’S RESIN Large Alphabet Mold with Hole, with 30 Jump Rings & 30 Key Rings — the hardware is already bundled in, so it’s all you need for a keychain project.
- UV resin — LET’S RESIN UV Resin with Light, 200g Starter Kit — the fast-cure option this guide recommends for small letter pours, lamp included.
- Color — Gold Leaf Flakes for Resin — a small pinch per letter goes a long way, and it pairs well with clear resin so the letter shape stays the star.
Step-by-Step: Making a Personalized Name Piece
- Plan the layout first. Lay the letters you need out in order — either dry-fit them against the mold cavities or just eyeball them — and check they’ll physically sit together once joined. Letter sizes can vary between mold brands, so mixing two different sets can look mismatched.
- Mix or prep your resin. UV resin needs no mixing at all — pour straight from the bottle and cure under the lamp. Epoxy needs accurate 1:1 (or your brand’s ratio) measuring even for a tiny batch, since a bad ratio shows up fast in something this small.
- Fill each letter cavity carefully. The biggest risk in small cavities is trapped air, especially in serifs and tight curves. Use a toothpick to drag resin into corners rather than pouring and hoping it settles on its own.
- Add color or glitter if you’re using it. A pinch per letter goes further than it looks — stir it into the resin before filling rather than sprinkling on top, for even coverage.
- Cure. UV resin: fill each letter in layers of about 1/16 inch (2 mm) and cure each layer for 2–3 minutes (longer with glitter or mica, and go easy on them, since heavy color blocks the UV light). Epoxy: usable at about 72 hours and fully hard at about 7 days; check your resin’s label. Uncured UV resin is a strong skin sensitizer, so wear nitrile gloves every time and never handle a tacky piece bare-handed.
- Demold each letter gently. Small pieces can be surprisingly delicate right out of the mold, even once they’re technically cured — give them a day or two before joining if they feel at all flexible.
- Join into a word. Three options: string the letters on cord or ribbon through a pre-molded hole, glue them to a backing plaque (wood or acrylic) with a resin-safe adhesive, or link them with jump rings if your mold already includes them.
- Finish the edges. A light sand on any seam lines, especially where letters will touch or overlap once joined. Wear gloves and an N95 mask when you sand; see how to collect resin sanding dust.
Design Ideas
- Birth-flower-filled initials. A single pressed flower matching someone’s birth month inside a monogram — a personal gift with almost no extra planning.
- Glitter ombre spelling a name. Graduate the glitter density letter to letter for a fade effect across the whole word.
- A single monogram pendant. One initial on a fine chain — the lowest-effort gift on this entire list. For February, the same pour works for Valentine’s heart pendants and studs.
- A family-name plaque. Each family member’s initial poured in a different color, then glued to one shared backing board.
- A nursery name sign. A full name in soft pastel colors with gold-fleck accents, mounted on a wood backing.
Common Mistakes
- Cramming letters too close together. Dry-lay the word first (see the step-by-step above) — a name that reads fine as separate cavities can look crowded or wrong once it’s strung or glued tight.
- Using resin that’s too viscous for tiny cavities. Thick resin traps air in serifs and curves. Warm the sealed bottles in a warm-water bath for 5–10 minutes before you measure, and dry them before you open them, or switch to UV resin for fussy, detailed fonts.
- Not checking mold orientation. Some letter molds are mirrored — filled from the back so the letter reads correctly once popped out the front. A quick test pour of one letter catches this before you’ve filled an entire alphabet the wrong way around.
Frequently Asked Questions
What’s the easiest way to make a resin name piece?
An alphabet silicone mold set paired with UV resin. There’s no mixing math to worry about, cure time per letter is only a few minutes, and you can build a full name in one sitting instead of waiting overnight between steps.
Can I use UV resin for letter molds?
Yes, and for small letter cavities it’s usually the better choice — epoxy needs precise mixing even for tiny batches, while UV resin pours straight from the bottle and cures in minutes under a lamp.
How do I stop bubbles in small resin letters?
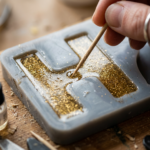
Fill slowly and use a toothpick to push resin into corners and serifs rather than pouring and letting it find its own way — that’s where air gets trapped in a name piece far more than in a larger flat pour.
Can I join resin letters into a keychain or necklace?
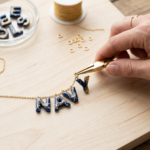
Yes — string them on cord through a pre-molded hole, glue them to a backing plaque, or link them with jump rings if your mold set includes pre-set holes, which many do.
Do letter molds come pre-spaced for a full name?
No — each cavity is separate, so spacing is up to how you join the letters afterward. Dry-lay them in order before gluing or stringing to check the word reads correctly and the letters sit close enough together.
What’s the best resin color for personalized gifts?
Clear resin with glitter or gold foil reads as the most finished for a name piece, since the letter shape does the personalizing and color just adds sparkle. Solid opaque colors work well too if you want each letter, or each initial in a family set, to be a different color.
Sources
- Let’s Resin UV resin product page: layer thickness (2 mm or less) and cure time per side, including longer times for dark colors.
- ArtResin FAQ: a coating epoxy is dry to the touch at about 24 hours and cured at 72 hours.
- MDedge Dermatology: acrylates, the chemistry behind UV resin, as a contact allergen.
- CDC NIOSH, Epoxies and Resins: gloves, ventilation and keeping uncured resin off skin.
- WEST SYSTEM, Preventing Overexposure: gloves and protection from sanding dust.
Keep Learning on ResinAffairs.com
A name piece pairs naturally with a few other beginner favorites on the site.
- 🎁 Resin Gift Ideas for Beginners → — a name piece is exactly the kind of gift this list is built around
- 🔑 How to Make Resin Keychains → — pairs naturally: add a monogram to a keychain blank
- ☀️ UV Resin for Beginners → — the fast-cure option this guide recommends for small letter pours
- 🧊 Best Resin Molds for Beginners → — how to choose a mold set that actually holds up
- 🛠️ Common Resin Problems and How to Fix Them → — bubbles and other troubleshooting
Enjoyed this guide? Join the Resin Affairs newsletter for new tutorials, safety tips, and project ideas straight to your inbox.