Resin Trinket Dishes & Phone Stands: A Beginner’s Guide
Resin Affairs is reader-supported. If you buy through links on this page, we may earn a small commission at no extra cost to you. We only link to gear we would use ourselves — prices and availability change, so check the current listing. Always follow your resin product’s label and Safety Data Sheet.
As an Amazon Associate I earn from qualifying purchases.
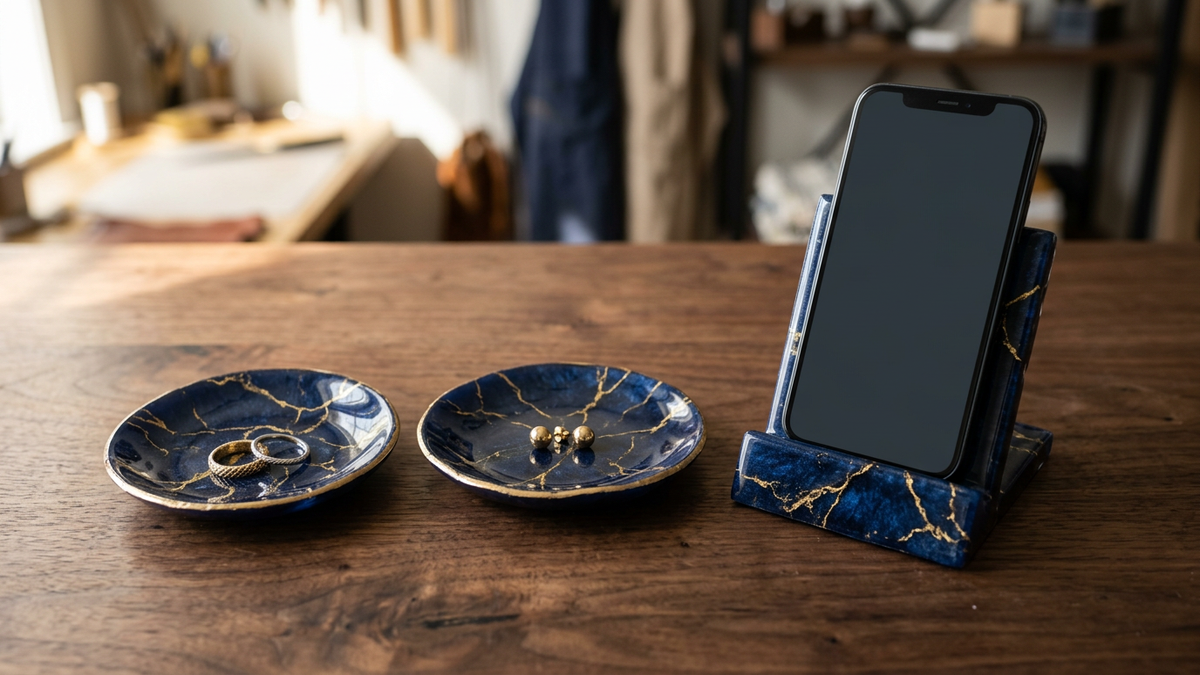
Trinket dishes and phone stands are the two projects that come up most once you’ve made a coaster or two and started wondering what else a shallow mold can do. Both use the same core skill — pouring resin into an open-face mold, adding color, and letting it level itself flat — but the shapes give you something genuinely useful rather than purely decorative. A trinket dish catches rings by the sink or keys by the door. A phone stand earns its spot on a nightstand or desk. Neither needs embedded hardware, glued-on parts, or a second pour, which makes this a relaxed, low-pressure project even if coasters or keychains felt fiddly.
This guide covers both projects together, since they share almost everything except the mold itself — pick whichever one you need first, or make one of each from the same batch of resin.
To make a resin trinket dish or phone stand: mix epoxy resin, add mica powder or foil for color, pour into a level, degreased trinket dish or phone stand silicone mold, pop any bubbles with a heat gun or torch, and let it cure fully — usually 24–72 hours depending on your resin’s label. Demold, then sand and polish any rough edges before use. Total hands-on time: about 20 minutes plus curing.
⚠️ Safety first: work in a well-ventilated space, wear nitrile gloves and eye protection, and keep uncured resin off your skin. New to resin safety? Start with Is Epoxy Resin Safe? and Resin PPE for Beginners.
Why Trinket Dishes and Phone Stands Are a Great Next Project
If coasters were your first resin project, this is the natural next step. The pour is still flat and forgiving — no deep cavities to overheat, no delicate hardware to seat — but the mold shapes do more of the design work for you, so even a simple solid-color pour looks intentional and finished.
Both projects are also genuinely functional, which matters more than it sounds. A coaster is nice; a dish that catches the rings someone takes off every night by the sink, or a stand that keeps a phone upright and charging without sliding off a nightstand, gets used every single day. That’s a big part of why they read as such a thoughtful gift for the effort involved.
They’re also a good way to use up resin. A trinket dish and a phone stand both take a small, predictable amount — usually well under what a single tabletop pour needs — so this is a natural project to reach for when you’ve got leftover resin from a bigger pour and don’t want to waste it.
Supplies You’ll Need
The shopping list here is short, and most of it doubles as gear you already own if you’ve made a coaster or a keychain.
- Resin. Standard 1:1 epoxy resin gives the glossiest, most level finish and is the easier choice for a phone stand, since it self-levels well even in an angled cavity. If you’re only making a trinket dish and want a same-day result, UV resin works too — check the depth of your mold first, since UV resin cures best in thin layers.
- A trinket dish mold and a phone stand mold. These are two separate molds — a trinket dish mold is usually a shallow round, oval, or novelty shape, while a phone stand mold is a deeper, angled cavity built to hold a phone’s weight upright. Don’t try to substitute a flat coaster mold for a phone stand; the angle is what makes it work.
- Color. Mica powder, alcohol ink, or gold foil flakes for a marbled or geode-style look — see the Color and Design Ideas section below for how each behaves.
- Mixing cups, stir sticks, and a heat gun or torch for the actual pour and bubble removal. See our essential resin tools guide if you’re starting from scratch.
🧰 Recommended Kit
- Trinket dish mold set — Gartful 3-Piece Dish Resin Molds (Flower, Heart & Square) — three shapes in one set, good for testing which style you like before committing to more.
- Phone stand mold — RESIN GO 2-Style Mobile Phone Stand Silicone Mold — two angled stand shapes in one mold.
- Epoxy resin — LET’S RESIN Crystal Clear Epoxy Resin Kit — the site’s go-to 1:1 beginner resin, used across most project posts here.
- Color — LET’S RESIN 36-Color Mica Powder Pigment Set — one set covers solid colors, marbling and geode-style veining.
Step-by-Step: Pouring a Resin Trinket Dish
- Set the mold on a level, dust-free surface. A kitchen counter or a self-leveling craft mat both work — avoid a towel, rug, or anything that can dip under the mold’s weight.
- Mix your resin. Most trinket dish cavities only need 1–2oz of mixed resin, so measure a small batch and follow your resin’s ratio exactly — see our full mixing guide if this is your first pour. Not sure what your mold holds? The resin calculator works it out.
- Add color. Stir in a few drops of mica powder, dye, or foil flakes until it’s evenly distributed — under-mixed color shows up as streaks once it cures.
- Pour slowly into the center of the mold and let the resin self-level out toward the rim. Fill to about 90% of the rim line rather than right to the edge — resin domes slightly as it settles, and overfilling causes drips down the outside of the mold.
- Pop bubbles. Hold a heat gun or butane torch a few inches above the surface and pass over it quickly — see our troubleshooting guide if bubbles keep surfacing after curing starts.
- Cover and cure. A box or plastic tent keeps dust off while it sets — usually 24–72 hours for epoxy, check your resin’s label for the exact window.
- Demold and finish. Flex the silicone gently away from the resin rather than pulling straight up. Sand any seam line with fine wet sandpaper (400–600 grit) and buff for a smooth rim.
Step-by-Step: Pouring a Resin Phone Stand
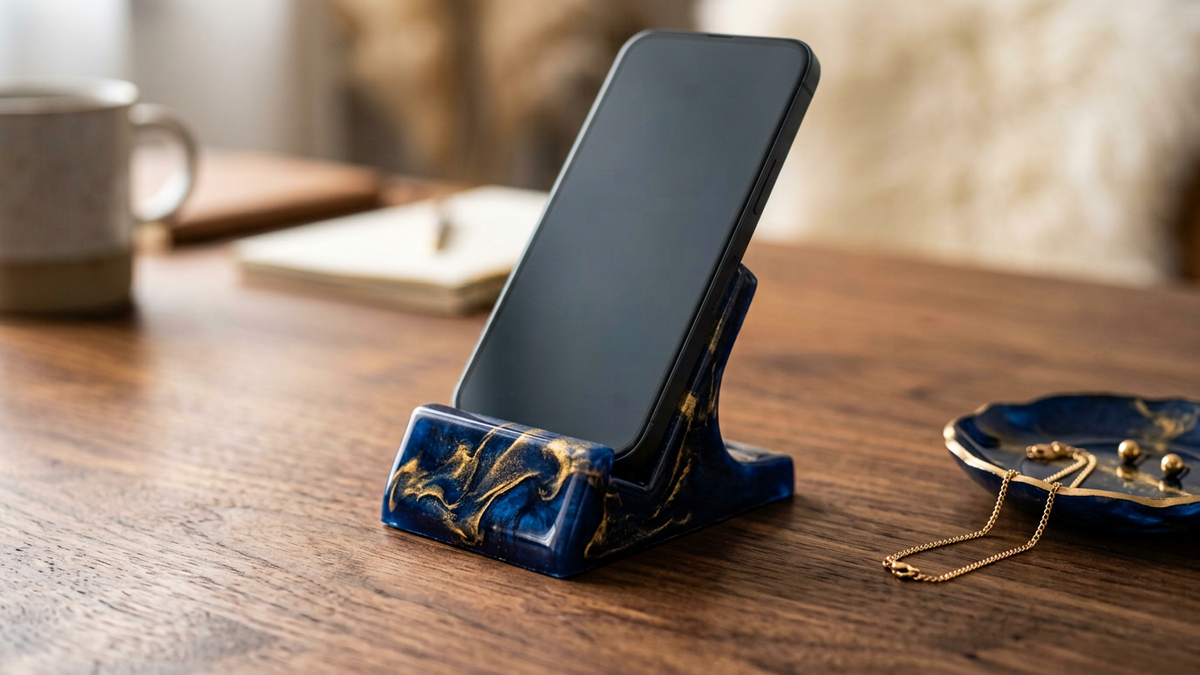
The steps are the same as above, with two differences that matter more here than on a flat dish.
- Leveling is non-negotiable. A trinket dish can tolerate a slightly uneven pour — a phone stand can’t. Even a small tilt while the resin sets shifts the top edge out of true, and the finished stand will lean or refuse to hold a phone upright. Check the mold with a level, or a phone’s own spirit-level app, before you walk away from it.
- Fill slowly to avoid trapped air in the angle. A phone stand mold’s cavity is deeper and angled rather than flat, which gives air more places to hide in the corners. Pour in a thin stream and tilt the mold slightly as you fill so resin flows into the lowest corner first, rather than pouring straight down the middle.
- Wait for full cure before testing weight. A phone stand can feel solid to the touch well before it’s actually cured through — that’s usually 24–72 hours, not the 6–8 hours it might feel tack-free. Resting a phone on it early risks a slow bend or a permanent dent.
- Test on a flat surface once demolded. Before it goes into daily use, set it down and check it sits flush with no rock — catch a leftover unevenness now rather than after it’s holding a phone.
Color and Design Ideas
- Marbled ocean-wave dish. Pour a base of white and two shades of blue, then drag a toothpick through the surface in loose swirls and finish with a scatter of gold foil flakes right before the resin starts to thicken.
- Geode-style with gold veining. Pour a dark base color first, paint thin gold-foil “cracks” across the surface once it’s tacky, then seal with a final thin clear layer.
- Solid pastel with a gold-leafed rim. Pour a single solid color, then brush a thin line of gold foil around just the outer edge after demolding for a finished, boutique look with almost no extra effort.
- Birthstone-color phone stands. Match the resin color to someone’s birth month for an easy, genuinely personal gift that needs zero extra mold work.
- His-and-hers matching sets. Pour a dish and a stand in the same color story and gift them as a pair.
Common Mistakes
- Overfilling a shallow mold. Trinket dish and phone stand molds both have a defined rim — pour past it and you get flashing that’s a pain to sand off, or resin dripping down the outside while it cures. Fill to about 90% of the rim and let it self-level.
- Not leveling the mold. The single most common reason a phone stand doesn’t stand straight, or a dish’s floor is thicker on one side than the other. A coin placed on the surface shouldn’t roll.
- Skipping the rim sand. Both pieces get handled daily — dish edges brushed by fingers, phone stand edges gripped while adjusting a phone — so a sharp demold seam is more than cosmetic. A quick pass of wet 400–600 grit sandpaper fixes it in under a minute.
Frequently Asked Questions
What resin is best for a trinket dish?
Standard 1:1 epoxy gives the glossiest, most level finish for either project. UV resin works for smaller trinket dishes if you want a same-day result, but check your phone stand mold’s depth first — most UV lamps only cure a few millimeters at a time, so a deep phone stand cavity may need several thin layers.
Can I use the same mold for a trinket dish and a coaster?
A shallow, flat trinket dish mold and a coaster mold are often close enough to use interchangeably. (Food safety depends on the resin, not the mold, and a mold used for resin shouldn’t go back to food use.) A phone stand mold is a different shape entirely and isn’t a substitute for either.
Why did my phone stand come out crooked?
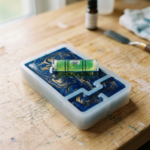
Almost always an unlevel curing surface. Even a slight tilt while the resin sets is enough to shift the top edge out of true. Set the mold on a flat table, not a towel or uneven counter, and check it with a level before you walk away.
How do I get a marbled effect in a resin dish?
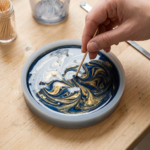
Pour your base color, then add a second color or gold foil flakes and drag a toothpick through the surface in gentle swirls right before the resin starts to thicken — timing matters more than technique, so work within the first 10–15 minutes after mixing.
Do resin trinket dishes need to be food-safe?
Only if you plan to put food or drink directly in one. For rings, keys, and small jewelry, a standard craft epoxy is fine — don’t repurpose the same dish for snacks unless the resin’s label specifically states it’s food-safe once cured.
How long before a resin phone stand can hold weight?
Wait for full cure, not just “tack-free” — usually 24–72 hours depending on your resin’s label, not the 6–8 hours it might feel solid to the touch. A phone stand under partial cure can slowly bend or dent under a phone’s weight.
Keep Learning on ResinAffairs.com
These two projects sit right alongside a few other beginner favorites on the site.
- 🎁 Resin Gift Ideas for Beginners → — useful gifts like these are exactly what this list is built around
- 🧼 How to Make Epoxy Resin Coasters → — the project these two build directly on
- 🧊 Best Resin Molds for Beginners → — how to choose molds that actually work for shapes like these
- 🛠️ Common Resin Problems and How to Fix Them → — bubbles, tackiness and other troubleshooting
- 🔑 How to Make Resin Keychains → — another low-commitment, functional project
- How to color resin →
Enjoyed this guide? Join the Resin Affairs newsletter for new tutorials, safety tips, and project ideas straight to your inbox.