UV Resin for Beginners: The Complete Starter Guide
Disclosure: This article contains affiliate links. If you make a purchase through one of these links, we may earn a small commission at no extra cost to you. We only link to gear we would use ourselves.
As an Amazon Associate I earn from qualifying purchases.
If you’ve been curious about resin but the idea of mixing two parts, waiting a full day, and airing out the garage puts you off, UV resin might be exactly what you’re looking for. It comes ready to use straight out of the bottle. You pour it, hold it under a small lamp, and in a matter of minutes you’re holding a hard, glossy finished piece. No mixing ratios, no overnight wait, and hardly any smell.
That makes it a very friendly place to start. You can make a pendant or a charm at your kitchen table in an evening, see how it turned out, and try again right away if you want to tweak something. Mistakes are cheap and small.
UV resin is a single-part, ready-to-use resin that stays liquid until you expose it to ultraviolet light, then hardens in minutes. It’s ideal for small, shallow projects like jewelry, charms, and doming.
What Is UV Resin? (And How It’s Different from Epoxy)
UV resin is a clear liquid that stays liquid until you shine ultraviolet (UV) light on it. Under a UV lamp it hardens in about 2–4 minutes per thin layer, depending on the resin and how strong your lamp is. Epoxy resin, the other kind you’ll see everywhere, works differently: you mix two parts together and a chemical reaction slowly hardens it over 24 hours or more. Epoxy can be poured deep and is the go-to for big or structural pieces; UV resin is for small, thin work. If you’re trying to decide between the two, we’ve laid the whole thing out in our epoxy vs. UV resin comparison. This post assumes you’ve picked UV and want to know how to use it.
What You Need to Get Started
One of the nicest things about UV resin is how short the shopping list is. You need four things to make a real project:
- UV resin. It comes in a bottle, usually with a pointed nozzle, and you use it as-is. No mixing, no measuring. A small bottle goes a long way when your projects are tiny.
- A UV lamp. This is the one non-negotiable. Look for a lamp in the 365 to 405 nanometer (nm) range, which is just the specific band of ultraviolet light that triggers the resin to harden. An ordinary nail-curing lamp, the kind sold for gel manicures, falls in this range and is perfectly sufficient for small projects.
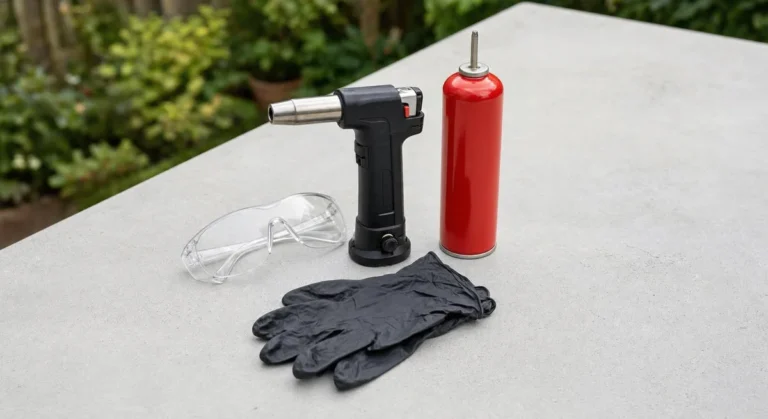
- Safety glasses. UV light is hard on your eyes, and you’ll be looking at that lamp more than you think. Basic wraparound safety glasses are enough.
- Silicone molds. Resin doesn’t stick to silicone, so cured pieces pop right out. Shallow molds (pendants, small shapes, flat charms) are the right fit for UV resin. Clear or translucent silicone works best because the light has to get through it.
Two things are not optional: nitrile gloves (uncured UV resin is a strong skin sensitizer, and a resin allergy can be permanent) and safety glasses whenever the lamp is on. A few optional extras make life easier: a toothpick or fine-tipped tool for nudging resin around and popping bubbles, and a silicone mat or parchment to protect your table. You don’t need a dedicated workshop, but follow your resin’s SDS on ventilation and work with a window open or a fan running.
A Note on UV Resin Allergies
UV resin feels like the “safe, easy” resin, but it carries its own skin risk. Most UV craft resins are acrylate-based, the same family of chemicals as gel nail polish. The American Contact Dermatitis Society named acrylates its Contact Allergen of the Year in 2012, and dermatologists now report hobby UV resins as a new source of acrylate allergy. It usually builds up over repeated small contacts, so it can show up after months of trouble-free crafting.
- Gloves every time. Wear nitrile gloves and swap them for a fresh pair as soon as resin gets on them.
- No bare-finger touch tests. Check the cure with a gloved finger or a toothpick.
- Cure fully before wearing. Jewelry sits against skin, so cure both sides until there’s no tack at all.
- Clean up drips while they’re wet. Wipe tools and your work surface so uncured resin doesn’t end up on your hands later.
- Know the warning signs. An itchy, red or cracked rash on your fingertips, hands or face after crafting is a reason to stop and see a doctor or dermatologist. If you’ve ever reacted to gel nails, talk to them before you start, since it’s the same chemistry.
More on gloves, eye protection and ventilation is in our Resin Safety Hub.
🧰 Recommended Kit
- LET’S RESIN UV Resin with Light, Upgraded 200g Starter Kit for Jewelry — If you have neither resin nor a lamp yet, this bundles both in one box, so there’s no guessing about whether the lamp and resin will work together.
- Let’s Resin Round UV Resin Light Pro (Foldable) — A standalone lamp for anyone who already has a bottle of UV resin and has been getting tacky, uneven results from a window sill. A proper lamp fixes that.
- NoCry Clear Anti-Fog Safety Goggles (ANSI Z87) — Simple, clear eye protection that meets a recognized safety standard. Worth wearing every time the lamp is on, since UV exposure adds up over many short cures.
📋 Get the Free Resin Safety & Prep Checklist
A one-page printable checklist covering PPE, ventilation, and workspace setup — so you’re not hunting through this guide mid-pour. Enter your email and we’ll send it straight over.
Free. We only email when there’s something useful, never more than twice a month, and you can unsubscribe anytime. Privacy Policy
Step-by-Step: Your First UV Resin Project
For a first project, pick one of two things: filling a shallow silicone mold (a small pendant or charm shape) or “doming,” which just means adding a raised, glassy layer of resin over a flat object like a sticker, a printed image, or a flat-back cabochon (a smooth, dome-shaped stone or glass piece with a flat bottom). Both are quick and forgiving.
1. Set up your space. Work in a well-ventilated room with a window open or a fan running. Cover your table. Put on your safety glasses and gloves. Keep your lamp unplugged or switched off nearby, because stray UV light from a running lamp can start curing resin you haven’t finished arranging.
2. Prep your mold or base. Make sure the mold is clean and completely dry. If you’re doming, put your sticker or image on a flat surface and make sure any paper is sealed (a thin coat of clear glue, dried fully) so the resin doesn’t soak in and darken it.
3. Pour a thin layer. Squeeze resin slowly into the mold or onto your base. Go slow; a fast squeeze whips air into it. For a mold, fill it no deeper than about 1/16 inch (2 mm) per layer. If your mold is deeper than that, stop there, cure, and add more layers. For doming, add just enough that the resin spreads to the edge and forms a gentle bulge. Surface tension will hold it in place if you don’t overdo it.
4. Spread and add inclusions. Use a toothpick to push the resin into corners and along edges. If you want glitter, dried flowers, or small charms inside, press them in now and make sure they’re fully covered.
5. Pop every bubble. This is the step beginners rush, and it’s the one that matters most. Look at the piece from a low angle against the light. Pop surface bubbles with a toothpick, or drag trapped ones up to the surface. For stubborn ones, a quick pass with a heat gun on low, held 6–8 inches away, brings them up. Never use a lighter. Usually a toothpick and a little patience are all you need. Once you cure, whatever is in there stays in there.
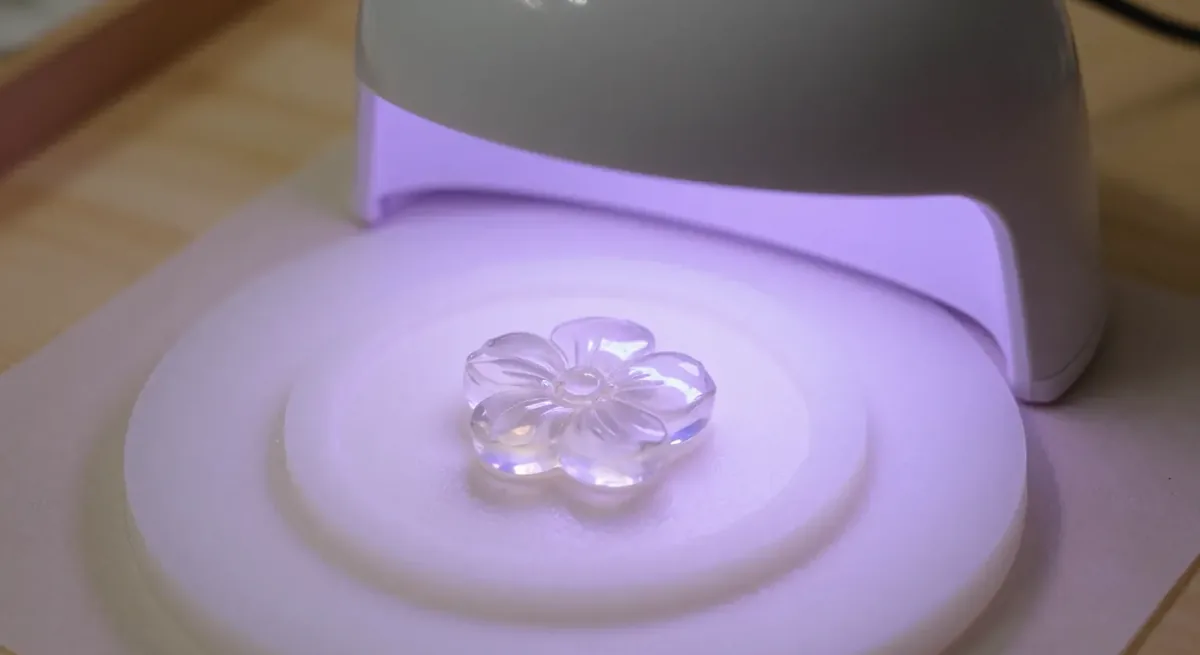
6. Cure under the lamp. Place the piece under your UV lamp and switch it on. Small, thin pieces can be done in a couple of minutes; thicker or larger pieces may need closer to 15. If your lamp has a timer, run it and check. If you’re using a mold, flip the piece and cure the other side as well, since light has to reach all of the resin.
7. Check the cure. A properly cured piece feels hard and glassy. Press it with a gloved fingertip: there should be no tack and no give. If the surface feels sticky or dents slightly, put it back under the lamp for another few minutes. A slightly sticky film on the very top is common with some resins (air slows the cure right at the surface). Waiting won’t clear it: give it another minute or two under the lamp, then wipe the surface with isopropyl alcohol.
8. Demold and finish. Peel the silicone away from the piece. If there’s a thin, ragged edge where resin crept over the mold’s rim, trim it with a craft knife or sand it lightly. Add a jump ring or bail and you’ve got a wearable piece.
If you want a full project walkthrough with photos, our companion post on how to make resin keychains uses UV resin for exactly this kind of quick, small build.
What UV Resin Is Good For (and What It’s Not)
UV resin isn’t a replacement for epoxy. It’s a different tool for a different kind of project, and knowing the line between them saves you a lot of frustration.
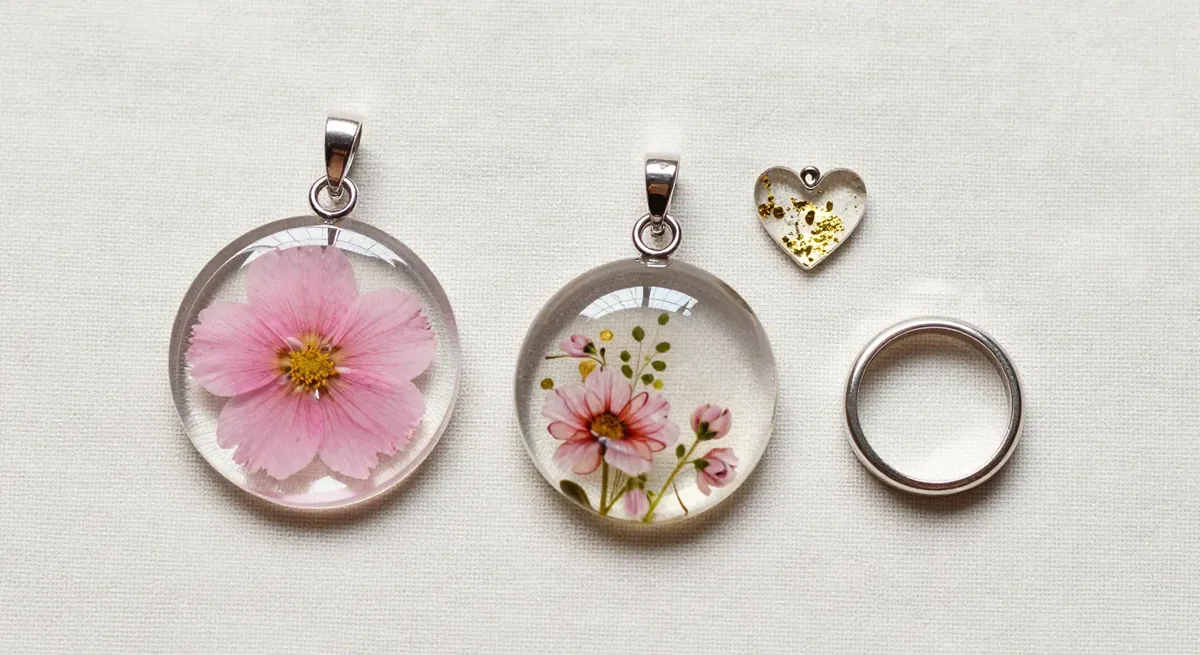
UV resin is a great choice for:
- Jewelry. Pendants, rings, earrings, and other small pieces are its home turf. They’re thin, they’re small, and you want to make several in an evening.
- Doming. A clear, raised coat over flat-back cabochons, printed images, stickers, or bottle caps. UV resin gives you that glassy magnifying look without waiting a day for it to set.
- Keychains and charms. Quick, shallow, and satisfying. See our resin keychain tutorial for a start-to-finish example.
- Quick small repairs. Filling a small chip, resealing a loose bead, or gluing a finding back on. A dab of resin, a minute under the lamp, and you’re done.
UV resin is not the right choice for:
- Anything thicker than about 1/16 inch (2 mm) in one pour. UV light only gets 1/16 inch (2 mm) deep in most resins. Pour deep and the top hardens while the middle stays gooey. You can build up thickness in layers, but past a certain point it’s more hassle than it’s worth.
- Structural pieces. Coasters that need to take weight, sturdy handles, anything load-bearing. Epoxy is the right material here.
- Large flat surfaces. A serving tray, a tabletop, a big wall piece. You can’t get even coverage under a small lamp, and the thickness limit makes it impractical anyway. Epoxy is the standard choice for this.
If any of those “not right” projects are what you actually want to make, take a look at our epoxy vs. UV resin post and consider starting with epoxy instead. There’s no shame in it; they’re simply built for different jobs.
Common Beginner Mistakes
Nearly everyone makes at least one of these on their first few pieces. Here’s what goes wrong and how to fix it.
1. Curing in a sunny window instead of under a lamp. Sunlight does contain UV and can cure resin, but its strength varies with weather, season and angle, so pieces come out tacky, soft in the middle, or half-cured on one side. Fix: Use a real UV lamp in the 365 to 405 nm range. A basic nail lamp counts.
2. Pouring too thick in one go. A deep pour looks fine from the top, but the light never reaches the bottom and the inside stays liquid. Fix: Keep each layer to about 1/16 inch (2 mm) or less, cure it fully, then add the next layer on top.
3. Not popping bubbles before curing. Once the resin hardens, that bubble is a permanent feature of your piece. Unlike slow-curing epoxy, there’s no window to go back and fix it. Fix: Pour slowly, then spend a real minute inspecting and popping bubbles with a toothpick before the lamp goes on.
4. Leaving the lamp on while you’re still working. Stray UV from a running lamp nearby can start setting the resin before you’ve finished spreading it or placing your inclusions, leaving ridges or half-set patches. Fix: Keep the lamp off until the piece is ready, and cure one piece at a time.
5. Skipping the tack test. A piece that looks cured can still be soft, and you’ll find out when it dents or picks up fingerprints. Fix: Press it with a gloved finger. If there’s any tack or give, give it more time under the lamp before demolding.
6. Not sealing paper before doming. Unsealed paper or printed images soak up resin and go dark or blotchy. Fix: Brush a thin coat of clear glue or sealer over paper and let it dry completely before the resin goes on.
Frequently Asked Questions
Do you need a UV lamp for UV resin?
Yes. UV resin only hardens when it gets the right kind of ultraviolet light, and a lamp in the 365 to 405 nm range is the reliable way to provide it. You don’t need anything fancy; an ordinary nail-curing lamp is enough for small jewelry and charms.
How long does UV resin take to cure?
Roughly 2–4 minutes per thin layer (about 1/16 inch, or 2 mm) under a UV lamp, depending on the resin and how strong your lamp is. Thin doming layers cure fastest, while thicker or pigmented layers sit at the longer end. Compare that with epoxy, which is usable after about 72 hours and reaches full hardness in about 7 days.
Can sunlight cure UV resin?
Not reliably. Sunlight can cure UV resin, but its strength varies with weather, season and angle, so you can end up with pieces that are tacky, soft inside, or unevenly cured. A real UV lamp is inexpensive and takes the guesswork out entirely.
Is UV resin as strong as epoxy?
For the small, thin pieces it’s designed for, UV resin cures hard and glossy and holds up well to everyday wear. It isn’t meant for thick or structural work, though. Anything that needs depth, weight-bearing strength, or a large surface should be made with epoxy.
What can I make with UV resin as a beginner?
Pendants, rings, and earrings are the classic starting point, along with keychains and charms. Doming over stickers, printed images, or flat-back cabochons is another easy first project. Our resin keychain guide walks through a complete beginner build.
Can you use UV resin indoors?
Yes, and that’s one of its biggest draws. UV resin has very low odor, but a low smell doesn’t mean you can skip ventilation. Work in a well-ventilated room, wearing safety glasses when the lamp is on, and keeping uncured resin off your skin. Our safety hub covers the basics in more detail.
Can you be allergic to UV resin?
Yes. Most UV craft resins are acrylate-based, like gel nail polish, and acrylates are a well-known cause of allergic contact dermatitis. The allergy usually develops after repeated skin contact with uncured resin, so wear nitrile gloves every time, change them if resin gets on them, and cure pieces fully before they touch skin. If you get an itchy rash on your fingers, hands or face, stop and see a doctor.
Sources
- MDedge, Acrylates Named Contact Allergen of the Year: the American Contact Dermatitis Society’s 2012 pick. Acrylates are the chemistry behind most UV resins.
- Contact Dermatitis, “Recreational Allergic Contact Dermatitis to ‘Epoxy UV’ Resins”: a dermatology journal paper on hobby UV resins as a new, often hidden source of (meth)acrylate allergy.
- Asthma and Allergy Foundation of America, Am I Allergic to Gel Nails?: gel nail products are acrylates cured under UV or LED light, the same process UV resin uses.
- NIOSH (CDC), Epoxies and resins: why gloves and ventilation matter with craft resins, and why smell isn’t a safety test.
- OSHA, Hazard Communication: how to read your resin’s Safety Data Sheet (SDS) for its ventilation and glove advice.
Keep Learning on ResinAffairs.com
Ready to go a little deeper? These posts pick up where this one leaves off.
- ⚖️ Epoxy vs. UV Resin for Beginners — The full side-by-side comparison, so you can decide which resin fits the project you actually want to make.
- ❓ What Is Resin? — The plain-language background on what resin is and how it works, if you want the big picture before you pour.
- 🥽 Resin Safety Hub — Everything on gloves, ventilation, and protecting your eyes from UV lamps, gathered in one place.
- 🔑 How to Make Resin Keychains — A complete first project using UV resin, from mold to finished keychain, that you can do in one sitting.
- 🔤 Personalized Name & Initial Resin Pieces → — a fast UV-resin-friendly project for turning a letter mold into a gift.
- Last-Minute Resin Gifts You Can Still Finish Before Christmas
Enjoyed this guide? Join the Resin Affairs newsletter for new tutorials, safety tips, and project ideas straight to your inbox.