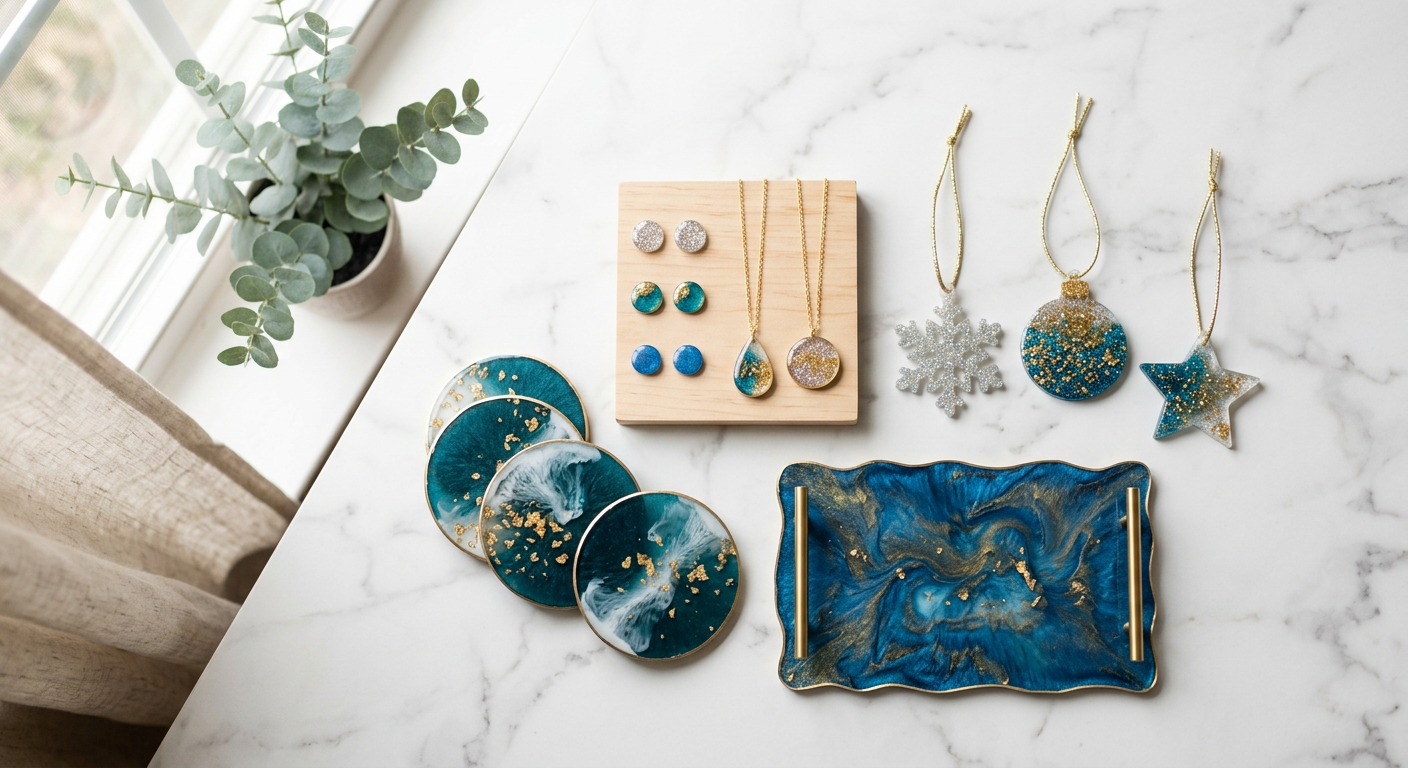
Resin Gift Ideas for Christmas: Easy DIY Gifts Anyone Will Love
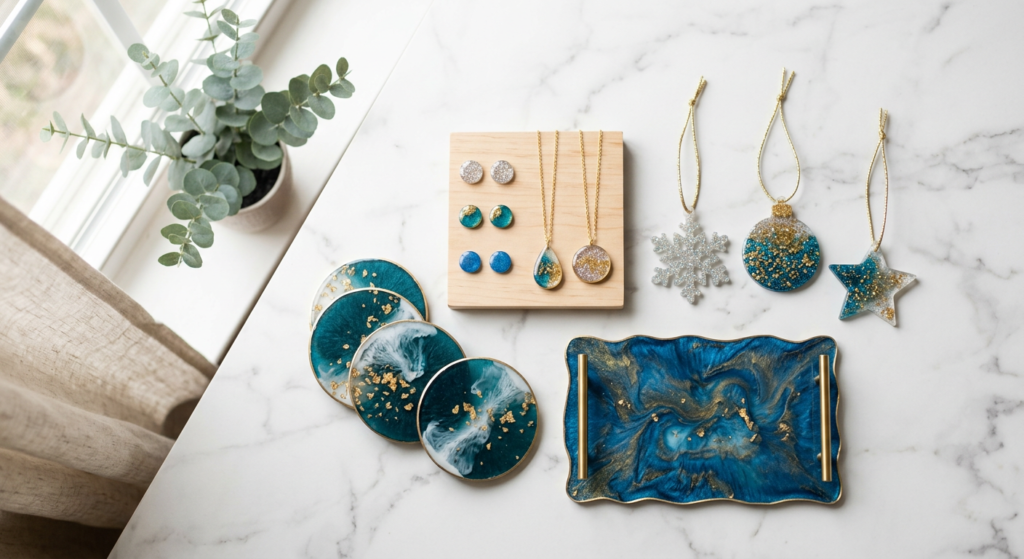
Resin Affairs is reader-supported. If you buy through links on this page, we may earn a small commission at no extra cost to you. We only recommend supplies that are relevant to beginner resin crafting. Always check the current product listing, label and Safety Data Sheet before use.
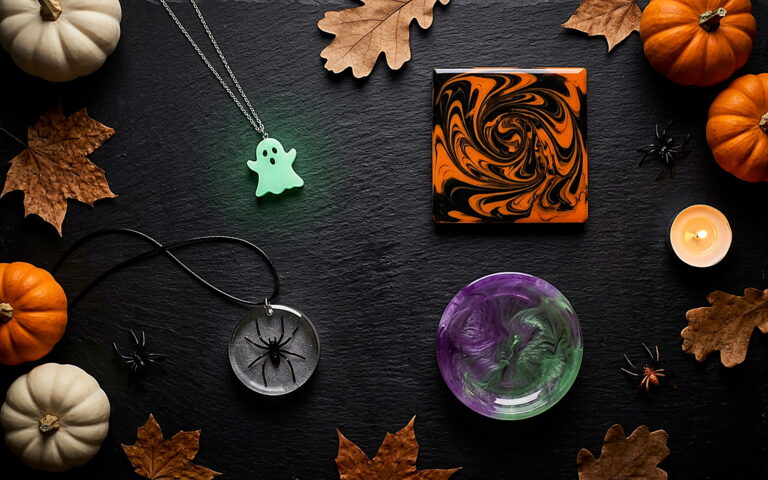
📍 Which guide do you need? This guide assumes you have a few weeks to plan. Racing the clock instead? Jump straight to Last-Minute Resin Gifts for cure-time-safe picks by exact days remaining. Making something for Halloween first? Try Halloween Resin Crafts for Beginners.
As an Amazon Associate I earn from qualifying purchases.
If you’re going to make resin gifts this Christmas, the calendar starts now — not in December. That isn’t a scare tactic; it’s just how resin works. Epoxy needs days, not hours, to cure hard enough to wrap, and a gift that’s still tacky on the 24th is the one mistake this guide exists to save you from.
The good news is that resin is one of the few crafts where a beginner’s first pour can pass for something from a boutique. A glossy coaster set, a swirled ornament, a pendant in someone’s favorite color — most people can’t tell a first attempt from a store shelf. The materials are cheap per piece, the results look premium, and nearly everything can be personalized. One bottle of beginner epoxy and a $10 mold set can cover a whole gift list for less than the cost of a single shop-bought present.
So this guide does two things. First, it gives you a simple backwards timeline from Christmas Day so you know exactly when to order, when to pour and when to stop. Second, it walks through six beginner-friendly resin gifts that all have full step-by-step tutorials on Resin Affairs, ordered roughly easiest to hardest, so you can pick the one that fits your confidence, your budget and the number of people on your list. It works just as well for birthdays, teachers and housewarmings the rest of the year — the timing math is the only thing that changes.
Quick answer: The easiest resin Christmas gifts for beginners are coasters, ornaments and keychains — small pours, cheap molds, easy to make in batches. Order supplies by mid-November, start pouring by late November, and make your last pour by about 10–12 December to allow for a full cure (about 72 hours for most craft epoxy; check your resin’s label) plus a few days’ buffer before wrapping or posting. Making gifts for Hanukkah instead? In 2026 it starts at sundown on Friday 4 December, so move every date below about three weeks earlier.
🧰 Recommended Kit for Resin Gifts
- LET’S RESIN Epoxy Resin Crafting Kit with Dyes & Accessories (1 gallon) — a simple 1:1 beginner epoxy kit, with dyes, mica and mixing tools included, from the brand used in the coaster and ornament tutorials on this site
- Round Silicone Coaster Mold Kit — four coasters per pour, the easiest gift to repeat for a long list
- Creahaus Silicone Measuring Cups & Tool Kit — reusable cups and stir sticks so batch mixing stays tidy
- Caffox Bookmark Mold Kit with 100 Tassels — molds plus tassels for a classroom’s worth of bookmarks
- Paxcoo 100 Split Key Rings with Chains — the hardware that turns a small resin charm into a stocking-stuffer keychain
📋 Get the Free Resin Safety & Prep Checklist
A one-page printable checklist covering PPE, ventilation, and workspace setup — so you’re not hunting through this guide mid-pour. Enter your email and we’ll send it straight over.
Free. We only email when there’s something useful, never more than twice a month, and you can unsubscribe anytime. Privacy Policy
Safety note: Resin products vary. Always read the label and Safety Data Sheet for your exact resin before use. This guide is general educational information, not medical or professional safety advice. If it’s your first pour, skim the Resin Safety Hub first — gloves, ventilation and a covered workspace are all you need for these small projects.
Your Christmas Resin Timeline (Work Backwards From the 25th)
Resin isn’t a night-before craft, and that’s the whole reason a plan helps. Here’s the calendar most beginners wish someone had handed them in October. Adjust it to your own resin’s label — cure times vary by brand, depth and room temperature — but the shape holds.
Now to mid-November — order and test. Get your resin, molds, gloves and cups in the drawer early. Resin supplies are the kind of thing that sells out or ships slowly in late November, and you don’t want your timeline held hostage by a delivery. If you shop on Amazon, this is one of the few times of year a free Prime trial genuinely earns its keep — fast, free shipping on a bottle of resin and a mold set in November is worth more than it is in March. Once everything arrives, do one small test pour. Not a gift — a test. It tells you your resin’s real working time and cure time in your room, which is the number every date below depends on.
Late November — first gift pours. Start with your biggest batch of small pieces: coasters, ornaments, keychains. These are the gifts you’ll make the most of, so get them curing early and let them sit. If you’re making one big “wow” piece like a serving tray, pour it in this window too — deeper pours take longer.
1–10 December — second batch and any redo. This is your buffer. If a coaster came out with a stray hair in it or a pendant has a bubble right in the middle, you have time to pour again. Most beginners need one redo; build it in rather than hoping you won’t.
10–12 December — last safe pour. For a resin that cures in roughly 72 hours, a pour on the 12th is hard by the 15th. That leaves time for demolding, edge trimming, a quick sand, and a couple of days of full hardening before it gets wrapped. Pour later than this and you’re gambling.
By 17 December — package anything being posted. Fully cured, wrapped in tissue, a layer of bubble wrap, and in the mail with time to spare: for 2026, USPS says mail by Thursday 17 December for Ground Advantage and First-Class Mail, or Friday 18 December for Priority Mail. Hand-delivered gifts can wait until the 23rd, but only if they’ve had their full cure.
The one rule that overrides all the dates: resin feels dry long before it’s actually cured. If your label says 72 hours, give it 72 hours plus a day. A piece wrapped while still curing can stick to tissue, cloud, or dent — and there’s no fixing that on Christmas morning.
How to Pick the Right Gift Project
Resin gift-making works best when the project matches the person and the clock. A serving tray is a showstopper, but a poor choice if you have one Saturday and three gifts to finish. A keychain is fast and cheap, but it won’t land the same way as a milestone present for a close friend. If you’re torn, default to coasters — they’re the safest first gift and the easiest to repeat.
⏱️ By Time Available
- A free afternoon → a set of coasters, a batch of keychains or a row of bookmarks (small pours, quick turnaround).
- A weekend → a serving tray or a jewelry batch (bigger pours, longer cure, more payoff).
- A few evenings spread out → Christmas ornaments (tiny pours that fit between other plans).
🎯 By Skill Level
- Never poured before → start with coasters; they teach measuring, mixing and bubble control at the lowest stakes.
- Poured once or twice → ornaments, keychains, bookmarks and jewelry build directly on what you already know.
🎁 By Recipient
- Practical / home-use → coasters, serving tray, trinket dish (things they’ll actually use daily).
- Wearable or carried daily → jewelry, keychains (personal, portable, easy to personalize).
- Decorative / seasonal → ornaments, bookmarks, personalized initial pieces — ideal for teachers, coworkers and stocking stuffers.
🔢 By How Many You Need
- One special person → a serving tray or a jewelry set.
- Five to ten people → coasters (four per mold run) or a mixed batch of keychains and bookmarks.
- A whole class, office or extended family → ornaments and keychains; a single mixing session can fill twenty molds.
6 Resin Gift Ideas With Full Tutorials
Every project below has a complete, beginner-friendly tutorial on Resin Affairs. Here’s the quick pitch for each, who it suits, how to personalize it, and roughly how many you can make in one session — because at Christmas, batch size matters as much as difficulty.
1. Resin Coasters (Set of 4) — The Easiest, Cheapest Gift
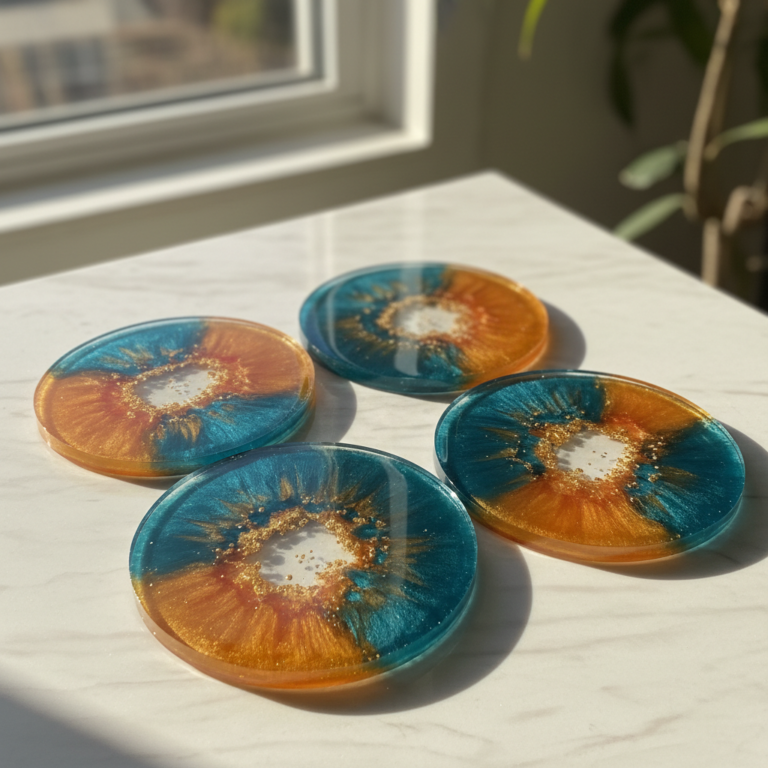
If you’re gifting resin for the first time, coasters are the move. Small molds, a manageable amount of resin, and forgiving — a slightly imperfect swirl still looks intentional. A set of four in the recipient’s colors (their kitchen accents, their team, their front door) makes a thoughtful housewarming, host or thank-you gift, and it’s the cheapest project on this list to repeat for multiple people. Pair a set with a candle or two mugs and you have a presentation-ready present.
Batch size: one 4-cavity mold and a modest mix fills a set; two molds and you’ve done two gifts in an evening. Personalize it: a pinch of gold flake, a pressed flower under the surface, or a single accent color that matches their home.
→ How to Make Epoxy Resin Coasters
2. Resin Christmas Ornaments — The Seasonal Star
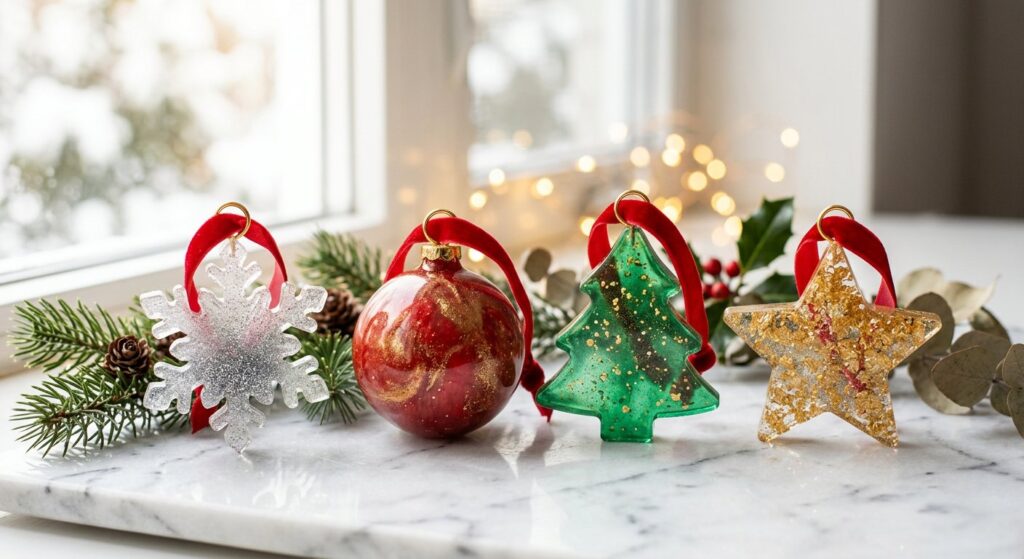
Small, fast and festive. Ornaments are the perfect entry point if you’re crafting specifically for the holidays, and the best gift on this list for volume — teachers, coworkers, neighbors, every tree in the extended family. They practice color and glitter techniques on a tiny scale, so a mistake costs almost nothing, and they store flat and ship light, which makes them the easiest resin gift to post. Tie a ribbon through the hanging hole and they’re tree-ready the moment they’re opened.
Batch size: a single mold sheet can hold a dozen or more; one mixing session covers a whole list. Personalize it: an initial letter, a year, or a color per family member.
→ DIY Resin Christmas Ornaments
3. Resin Keychains — The Stocking Stuffer
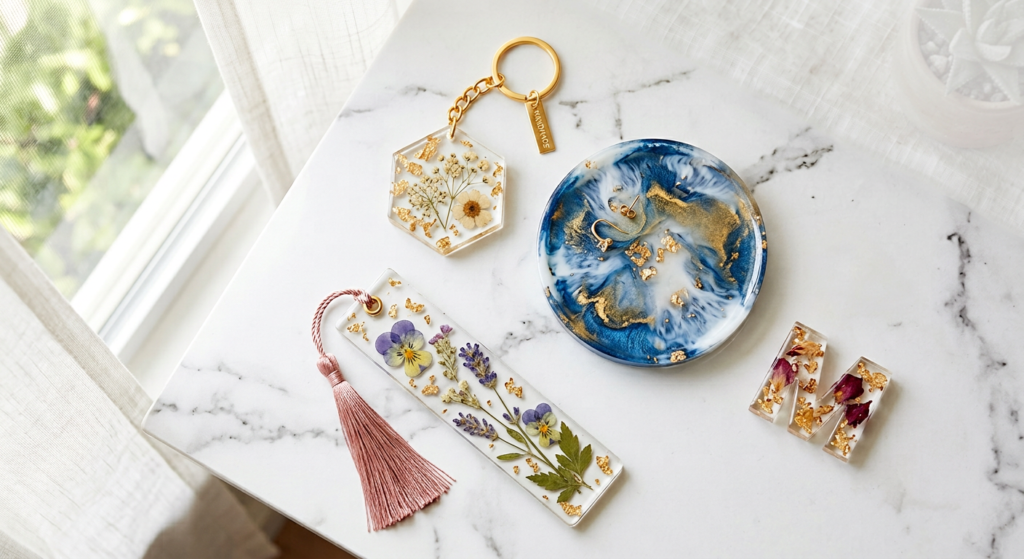
The smallest, cheapest, fastest-curing gift going, and now with its own full tutorial. Keychains are the ideal stocking stuffer: easy to personalize with initials, tiny charms or a swipe of someone’s favorite color, and cheap enough that a bowl of assorted keychains makes a lovely “grab one” station at a holiday party. UV resin makes them almost instant; epoxy gives a deeper, glassier look. The tutorial covers both.
Batch size: twenty or more from one mold set and a small mix — the best gift-per-dollar on the site. Personalize it: a letter mold for initials, a dried flower, a fleck of glitter in a school or team color.
4. Resin Bookmarks — The Reader’s Gift
A flat, shallow pour at roughly coaster skill level, with a full guide of its own. Pressed flowers and glitter shine here, and bookmarks make lovely teacher, graduate and book-club gifts that cost almost nothing per piece. Add a tassel and they look shop-bought. They’re also the best use of leftover resin from a bigger pour — a few tablespoons fills a mold.
Batch size: most bookmark molds hold three to five; two molds and a tassel pack cover a classroom. Personalize it: a pressed flower from their garden, a birth-month flower, or a strip of patterned paper sealed under the resin.
5. Resin Jewelry — The Most Personal Gift
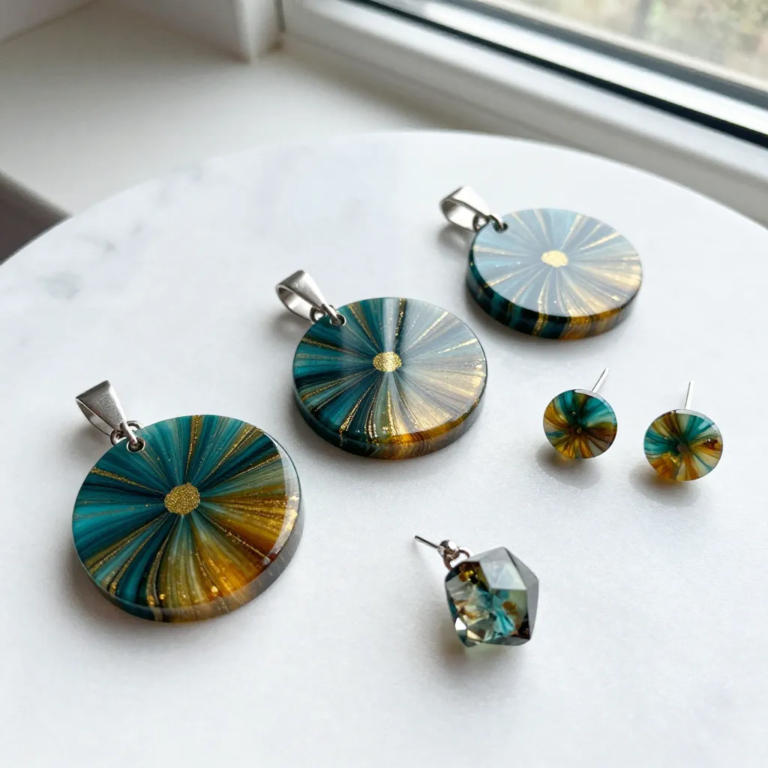
Jewelry is where handmade resin gifts get personal. A pendant in someone’s birthstone color, earrings to match an outfit, a charm that nods to an inside joke — these are the gifts people actually wear, which means they think of you every time they do. UV resin makes this fast (cure in minutes under a lamp), and one bottle plus a few molds yields dozens of pieces, so it’s a strong pick when you need several gifts from a single session. Tuck one in a small pouch and it reads as a proper, finished present.
Batch size: a dozen pendants or several pairs of earrings from one small bottle of UV resin. Personalize it: birthstone colors, a tiny initial, a pressed petal. Gifting in February instead? The Valentine’s Resin Jewelry guide has heart pendants and a cure-time calendar of its own.
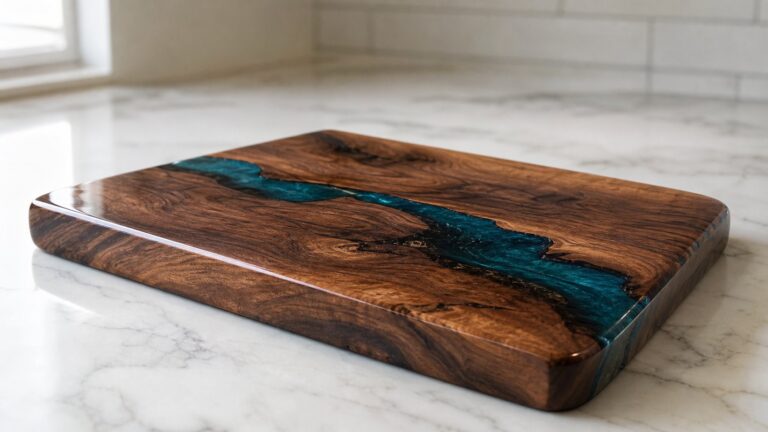
6. Resin Serving Tray — The “Wow” Gift for Someone Who Has Everything
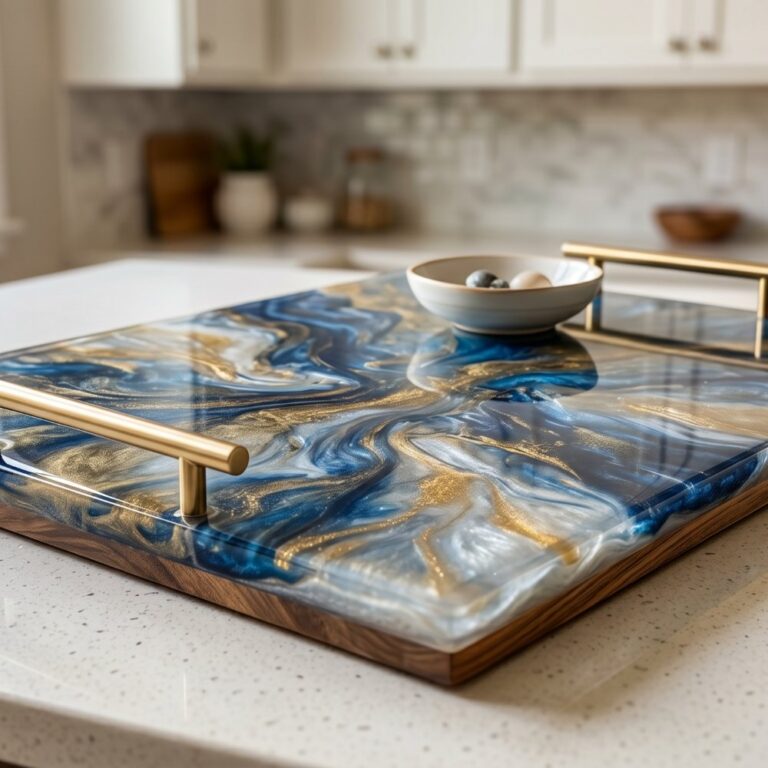
A serving tray reads as premium. The glossy, one-of-a-kind surface looks like something from a boutique, which is exactly why it lands so well as a housewarming, wedding or milestone gift for the person who “already has everything.” It’s a bigger pour than coasters, so it suits someone who has done at least one small project — but the payoff in perceived value is huge, and you can match the colors to their home so it feels custom-made, because it is. Add handles and it becomes a centerpiece they’ll show off for years.
Batch size: one. This is the single special-person gift on the list, and it needs the longest cure — pour it in the first window of the timeline above. Personalize it: their kitchen’s color story, a marbled vein in metallic gold, a name or date on the underside.
→ How to Make an Epoxy Serving Tray
Ideas for Leftover Resin
Two more gift ideas now have full tutorials on the site — perfect for the last few tablespoons in your mixing cup. Trinket dishes and phone stands need slightly more mold work but carry higher perceived value for the effort — a small dish for rings by the sink or keys by the door is a gift anyone actually uses. See the full guide: Resin Trinket Dishes & Phone Stands. Personalized name or initial pieces — a keychain, an ornament or a small plaque with a single letter — are the “this was made for me” gift that reads as far more effort than it is; a letter mold set is all you need. See the full guide: Personalized Name & Initial Resin Pieces.
How to Make Resin Gifts Look Store-Bought
The gap between “nice homemade gift” and “did you really make this?” usually comes down to finishing, not the pour itself. A few habits take almost no extra time but noticeably raise the perceived value:
- Demold carefully and check the edges. Trim any thin flashing with a craft knife, and if a piece feels rough, a quick pass with fine sandpaper (wet-sanding around 400–800 grit works well) leaves a smooth, professional edge.
- Keep dust away while it cures. A stray speck sets into the surface and reads as a flaw. Cover projects with a clean box or a makeshift tent.
- Use a flat, level curing spot. An uneven cure shows as a wobble on a coaster or tray — and a wobble reads as “amateur” fast.
- Match the color story. Coordinated colors, or a single accent that matches the recipient’s home, look more intentional than a random mix.
- Finish with a care card and clean packaging (next section) so the unboxing feels considered.
For fixing deeper surface issues, see our Common Resin Problems guide.
Packaging & Giving Resin Gifts
The number-one rule: let it cure fully before you wrap it. Resin feels dry to the touch long before it’s fully hardened, and a piece wrapped while still curing can stick to tissue, cloud, or pick up dents. Check your resin’s label for full cure time (our cure-time guide covers the stages and why they matter), and give yourself a day or two of buffer past that before you box it up.
Once it’s fully cured, packaging is easy and cheap — and a little effort here is what turns “a thing I made” into “a gift.” A few ideas:
- A kraft paper box (the plain brown kind) looks intentional and eco-friendly, and it reads as “carefully wrapped,” not “thrown in a bag.”
- A little tissue paper to cushion the piece and add a pop of color that matches the resin.
- A handwritten care card — see the template below. It’s the detail that makes a handmade gift feel finished and shows you thought about how they’ll use it.
- For ornaments: tie a simple ribbon or twine through the hanging hole so it’s tree-ready the moment they open it.
- For jewelry: a small jewelry pouch or a tiny box with a pad keeps pendants from rattling and looks shop-bought.
- For trays and dishes: wrap in tissue, then a slim layer of bubble wrap so the glossy surface can’t be scratched in transit.
- A small “made for you” tag with your name turns a handmade object into a keepsake and quietly signals the effort behind it.
Care note to include with any resin gift (copy-paste friendly):
“Hand-wash only, wait a week before hot drinks, and keep out of direct sun and heat — resin can soften or yellow with prolonged exposure. With a little care, this piece will last for years.”
If you’re posting gifts: wrap each piece in tissue, add a layer of bubble wrap, and ship only after full cure — resin is tough but can chip on a hard corner if it slides around a box, and a soft piece in a warm delivery truck is a sad surprise for everyone. Allow a week for delivery in December, which is why the timeline above has packaging done by the 17th.
Rough Budget Breakdown (Per Gift)
Resin is one of the most cost-effective crafts once you own the basics, but costs vary with resin brand, mold quality, and how many you make at once. Here’s an honest ballpark to plan with — not hard numbers, because your first batch also includes “one-time” starter kit costs (resin, gloves, mixing cups, a heat tool) that spread across every gift after:
| Gift type | Material cost per piece (rough) | Notes |
|---|---|---|
| Coasters / keychains (small batch) | Low — pennies to a couple of dollars per piece in resin + mold amortization | Cheapest to repeat for many recipients |
| Jewelry / bookmarks / ornaments | Low–moderate per piece | Molds and findings add a little; UV resin stretches far |
| Serving tray / trinket dish (bigger single piece) | Moderate per piece | More resin per item; higher perceived value justifies it |
A quick scenario: say you need gifts for ten people. Lean on small-batch items — coasters (four per mold run), keychains, or ornaments — and one bottle of resin plus a few molds can cover the whole list for the price of a single store-bought present. That’s also why resin is such a natural fit if you’re exploring resin gifts to make and sell: the same low per-piece cost that makes handmade gifting affordable is exactly what leaves room for profit at a craft fair or in an online shop. Start with a few test pieces for friends, learn your cure times, then scale up a batch when you’re confident.
A note on molds: silicone molds are reusable for dozens (sometimes hundreds) of pours, so the per-gift cost keeps dropping the more you make — which is why a single $15 mold can quietly become the cheapest gift supply you own. And don’t underestimate “the set”: a coaster set, a trio of keychains, or a small ornament bundle reads as more generous than one lone item, even when the material cost is nearly identical.
The takeaway: if you’re gifting to lots of people, small batches win on cost and speed. If it’s one special person, a bigger single piece like a tray delivers the most “wow” per hour you spend.
Selling them instead of gifting? My guide to pricing resin crafts costs out a real coaster batch and shows what Etsy takes from a sale.
FAQ
When should I start making resin Christmas gifts?
Order supplies by mid-November and start pouring by late November. Make your last pour by about 10–12 December so there is time for a full cure (about 72 hours for most craft epoxy, depending on your resin), finishing, and a buffer before wrapping or posting. If you are making gifts for a lot of people, start earlier.
What resin gifts can I make in bulk for teachers or coworkers?
Ornaments, keychains and bookmarks. All three use small molds that hold many pieces at once, need only a small amount of resin per piece, and are easy to personalize with an initial or a color. One mixing session can fill twenty or more molds.
How far in advance should I start a resin gift?
At least a week before you need it in hand — more if you’re making several. Between mixing, pour depth, and full cure time (about 72 hours for most craft epoxy), plus a packaging buffer, a week keeps things calm. Don’t start the night before.
Can I make resin gifts in bulk for a craft fair or class gifts?
Yes, and it’s one of resin’s strengths — these are exactly the kind of resin gifts to make and sell or to hand out in volume. Small molds (coasters, keychains, ornaments) let you pour many at once. Batch your mixing, keep your workspace level and dust-free while they cure, and stagger pours across evenings if you run out of mold space.
Do resin gifts need special care instructions included?
A short one-liner is enough: hand-wash only, avoid direct sun and heat. It protects your work and makes the gift feel considered. We’ve got a ready-to-copy version in the packaging section above — print it small or write it on a tag.
What’s the cheapest resin gift to start with?
Resin coasters. Small molds, a modest amount of resin, and the lowest stakes if something goes slightly off. They’re also the easiest to repeat for multiple recipients, which keeps your per-gift cost down.
What resin should I use for gifts?
For coasters, trays, and ornaments, a beginner epoxy resin with a simple 1:1 ratio is the easiest place to start. For tiny jewelry or charms, UV resin cures in minutes under a lamp and is very forgiving. The Epoxy vs UV Resin guide breaks down which to pick.
Are resin gifts food-safe?
Most craft resins are not rated for direct food contact, so treat coasters and trays as “wipe-clean decor,” not cutting boards or plates. Always check your resin’s label and Safety Data Sheet — if food-safe use matters, look for a product specifically rated for it, and even then it only counts when mixed exactly, fully cured and colored with resin-safe pigment, not alcohol ink.
Can I personalize resin gifts without special equipment?
Absolutely — personalization is the cheapest “wow” in this whole list. Use the recipient’s favorite colors, embed a tiny initial with a letter mold, press in a meaningful dried flower, or swirl in a school or team color. None of it needs anything beyond basic pigments and the molds you already own.
Ready to Make Something They’ll Actually Keep?
Pick your project, give yourself curing time, and you’ve got a gift that looks boutique but came from your own kitchen table. If Christmas is the goal, start with DIY Resin Christmas Ornaments and a coaster set this weekend — you’ll learn the rhythm of a pour and have real, giftable pieces in hand by next week, with the whole timeline above still ahead of you.
New to resin? Grab the free Resin Safety & Prep Checklist above before your first pour — it’s the five-minute setup that keeps small projects like these calm and fume-free — and bookmark the Resin Projects hub for every tutorial in one place.
Sources
- Let’s Resin Help Center, Know More About Epoxy Resin: cure times for its 1:1 epoxy.
- ArtResin, Is Epoxy Food Safe?: food contact only once fully cured (about 72 hours), mixed at the exact ratio, and without alcohol ink or solvent dyes.
- USPS, 2026 Holiday Shipping Deadlines: send-by dates for delivery by December 25 in the contiguous US.
- My Jewish Learning, Hanukkah: Hanukkah 2026 begins at sundown on Friday, December 4.
Keep Learning on ResinAffairs.com
Looking for more projects to make and give? Here’s where to go next:
- 🎄 DIY Resin Christmas Ornaments → — the seasonal companion to this guide: small, fast, festive, and the best gift for a long list.
- 🧩 Best Resin Molds for Beginners → — silicone vs. plastic vs. DIY molds, and which one to buy for each project.
- 🚀 How to Start Resin Crafting → — the beginner roadmap: what to buy first, what to skip, and the easiest first project.
- 💗 Valentine’s Resin Jewelry → — for February 14 specifically: heart pendants, matching studs and a cure-time calendar.
- 🔑 How to Make Resin Keychains: A Beginner’s Guide → — a fast, giftable project with UV or epoxy resin, plus design ideas anyone will love.
- 🥣 Resin Trinket Dishes & Phone Stands → — a mold-based project with higher perceived value than effort, perfect for last-minute leftover resin.
- 🔤 Personalized Name & Initial Resin Pieces → — the “made for me” gift, using a simple letter mold.
- How to preserve flowers in resin →
- Last-Minute Resin Gifts You Can Still Finish Before Christmas
- Resin Gift Wrapping & Pairing Ideas
- 🎁 Gifts for Resin Artists 2026 → — kits, molds and safety gear by budget, for anyone buying for a resin crafter.
Want the step-by-step for any project above? Every linked guide walks you through supplies, mixing, and finishing — no guesswork.
Enjoyed this guide? Join the Resin Affairs newsletter for new tutorials, safety tips, and project ideas straight to your inbox.