How to Preserve Flowers in Resin: A Beginner’s Guide
Resin Affairs is reader-supported. If you buy through links on this page, we may earn a small commission at no extra cost to you. We only link to gear we would use ourselves — prices and availability change, so check the current listing. Always follow your resin product’s label and Safety Data Sheet.
As an Amazon Associate I earn from qualifying purchases.
A wedding bouquet, the first rose from a new garden, a sprig of lavender from a trip, the flowers from a funeral you cannot bring yourself to throw away: these are the reasons most people search for how to preserve flowers in resin. It is one of the most satisfying projects a beginner can take on, and one of the easiest to get wrong on the first try.
The good news is that almost every failure comes down to a single rule. The flowers must be completely dry before they touch resin. Not mostly dry, not dry on the outside: bone-dry all the way through. Get that right and the rest is a normal, careful pour.
Quick answer: Dry the flowers completely first (silica gel takes about 2–4 days), seal them with two light coats of clear spray, place them face-up on a thin gelled base layer, then pour clear casting resin in layers, popping bubbles between each one. The piece is usable in about 72 hours and reaches full hardness in about 7 days; a thick block can need longer.
Why Flowers Must Be Completely Dry First
A fresh petal is mostly water. Resin is a waterproof plastic. When you seal water inside plastic it has nowhere to go, and it does what trapped water always does: it turns the petal brown, and then it rots.
That is only part of the damage. Moisture clouds the resin around the flower, and as the petal warms during the cure it gives off tiny bubbles that collect under the petals and along the edges. Within a few days a fresh flower goes translucent and dark, and the piece you were proud of looks like something pulled out of a pond.
There is no resin that fixes a wet flower. No brand, no UV formula, no sealer spray. Drying is not an optional prep step you can rush past on a Saturday afternoon; it is most of the project. Plan for it before you plan anything else.
The check is simple. A properly dried flower feels papery and stiff, the stem snaps rather than bends, and there is no cool, damp feel at the base of the petals where they meet the stem. If you are not sure, give it another day.
4 Ways to Dry Flowers for Resin
There are four practical ways to get a flower dry enough for resin. Which one you choose depends on whether you want the bloom to keep its shape or lie flat, how much time you have, and how much color you are willing to lose.
1. Silica gel (best for 3-D blooms)
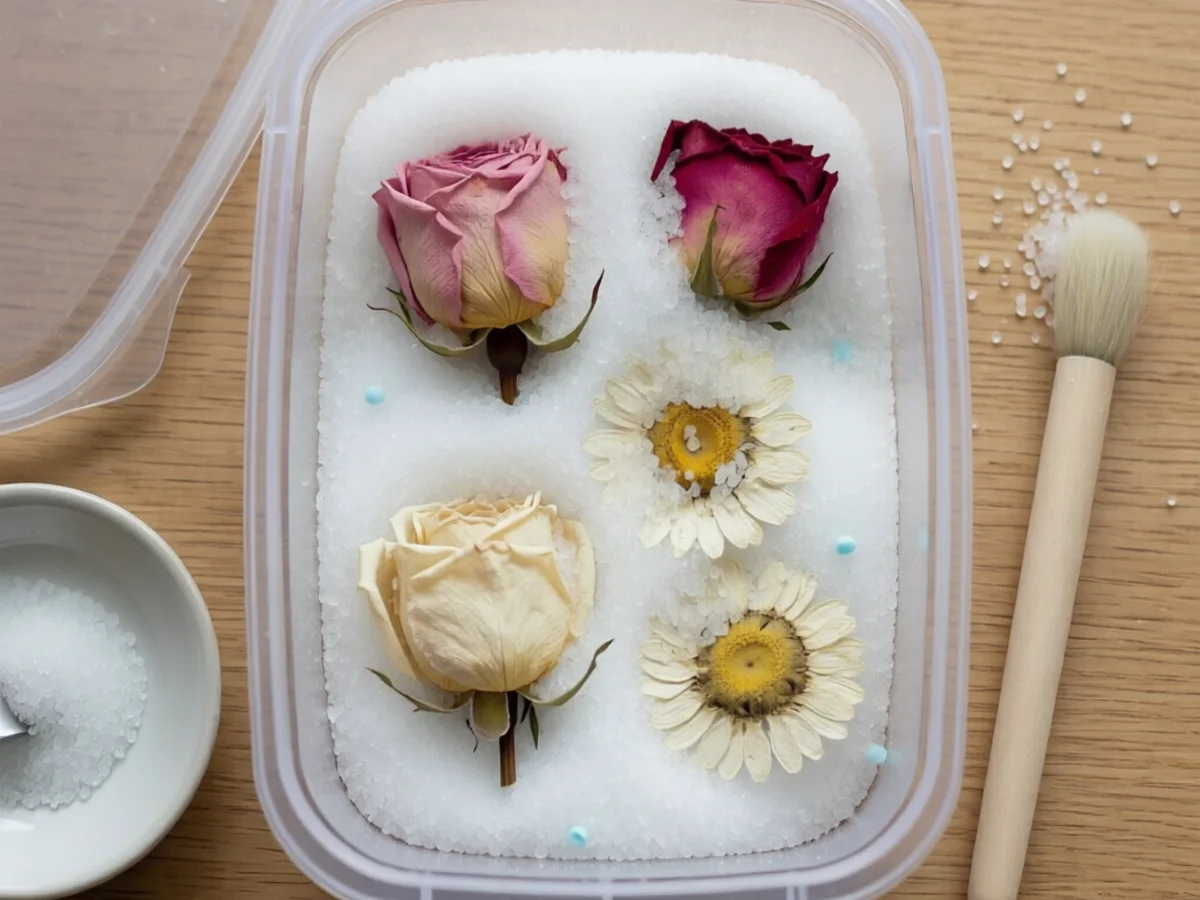
Silica gel is the sand-like crystal you find in the little packets that come with shoes and electronics, sold in bulk tubs for flower drying. It pulls the moisture out of a petal while supporting its shape, so a rose comes out looking like a rose instead of a pressed one. For any flower you want to keep three-dimensional, it is the method to use.
Here is how it works:
- Use an airtight container with a lid, and pour in a bed of crystals 1 to 2 inches deep.
- Set the flowers face-up on the bed, trimming the stems short so they sit upright.
- Pour more crystals gently in and around the petals, working from the outside in, until every flower is covered.
- Put the lid on and leave it alone. Most flowers take 2–4 days. If a petal still feels cool or soft, cover it again and give it another day or two.
- Uncover carefully, lift each flower out, and brush off the remaining crystals with a soft, dry paintbrush.
If you are in a hurry, there is a microwave shortcut. Use a microwave-safe container with no lid, set a glass of water beside it in the microwave, and heat it one minute at a time. Thin flowers need about 1 minute and dense blooms about 3. Then leave the flowers in the gel for 12–24 hours before you dig them out: the crystals hold heat, and the petals firm up as they cool.
Silica gel is reusable. When the crystals stop pulling moisture, spread them on a baking sheet, dry them in the oven at 250°F (121°C) for about an hour, and store them in a sealed jar between projects.
2. Pressing (flat flowers for bookmarks, pendants and coasters)
Pressing gives you a flat, paper-thin flower, which is exactly what you want for bookmarks, thin pendants, coasters and phone grips. Lay the flowers between two sheets of parchment paper, then either close them inside a heavy book with more books stacked on top, or use a proper flower press. Leave them for about 2 weeks, swapping in fresh parchment at the end of the first week.
Pansies, violas, daisies and small leaves press beautifully. Thick flowers like roses press better if you pull them apart and press the petals on their own.
3. Air drying (cheapest, most color loss)
Tie the stems in small bunches and hang them upside down somewhere dark, dry and warm with a little airflow, such as a closet or a spare room. Give them 2–3 weeks. It costs nothing and it works well for lavender, baby’s breath and small sturdy flowers.
The trade-off is color. Air-dried petals fade and darken more than with any other method, and larger blooms tend to shrivel. If the exact color matters, use silica gel instead.
4. Buying pre-dried flowers (the shortcut for a first project)
For a first cast, there is nothing wrong with skipping the drying altogether. Bags of pre-dried and pre-pressed flowers made for resin are inexpensive, come in mixed colors and sizes, and are already as dry as they will ever be. You learn the pouring side of the project without a two-week wait, and you save your own garden roses for once you know what you are doing. The dried and pressed sets in the kit list further down are a good place to start.
Which flowers work best in resin?
| Flower | How it does | Best drying method |
|---|---|---|
| Roses | Excellent, keeps its shape | Silica gel (2–3 days) |
| Carnations | Very good | Silica gel |
| Daisies | Very good | Silica gel or pressing |
| Baby’s breath | Very good | Air drying or silica gel |
| Lavender | Very good | Air drying |
| Chrysanthemums, marigolds, zinnias | Good | Silica gel |
| Pansies and violas | Excellent flat | Pressing |
| Lilies, tulips, orchids | Poor, shrivel or brown | Not recommended |
| Succulents | Poor, too much water | Not recommended |
One more thing to know before you start: white petals often turn slightly cream once they are dried and cast. It is not a mistake, just what happens, so if you are preserving a white bouquet, expect a soft ivory rather than a bright white.
Should You Seal Dried Flowers Before Resin?
Yes, for almost everything. A dried petal is porous, and when liquid resin soaks into it the petal goes translucent and dark, a bit like a paper towel that has been dipped in oil. Sealing closes those pores first.
Two light coats of clear acrylic sealer spray, applied a few minutes apart, is the usual method. Spray outdoors or by an open window, hold the can well back, mist rather than soak, and let each coat dry fully before the next. If you would rather not use a spray, a thin coat of mixed resin brushed onto the petals with a soft brush does the same job; let it cure before casting.
Sealing does three things at once. It stops petals going translucent and dark, it holds the color so the finished piece looks like the flower did, and it cuts down the tiny outgassing bubbles that dry petals release into the resin. Skip it and you will often get all three problems together.
Always test on one spare petal first. Sealer can change the look of some petals slightly, and it is far better to find that out on a leftover than on the one flower you cannot replace.
Choosing the Right Resin and Mold
The right resin depends on how thick the finished piece is going to be. That is the whole decision.
| Resin type | Use it for | Pour depth per layer |
|---|---|---|
| Clear casting / deep-pour epoxy | Blocks, spheres, paperweights, anything over 1/4 inch | Up to 2 inches (check your label) |
| Coating / craft epoxy | Pendants, bookmarks, thin coasters | 1/4 inch |
| UV resin | Small, shallow pieces only | Thin layers under a lamp |
Clear casting or deep-pour epoxy is the choice for anything thicker than 1/4 inch, which covers most flower projects: bouquet blocks, hexagons, spheres and paperweights. It has a long working time, so you are not rushing to place petals, it releases far fewer bubbles, and it cures with low heat, which matters when delicate petals are sitting in it. If you are not sure how it differs from the resin you already own, read casting resin vs coating resin before you buy.
Coating or craft epoxy is fine for thin pieces and pendants, poured in 1/4-inch layers. It cures faster and hotter, so keep each layer thin and let it gel before adding the next.
UV resin works only for small, shallow pieces such as a single pressed viola in a pendant. Thick UV pours cure unevenly, because the lamp cannot reach the middle of a block. Our UV resin for beginners guide covers what it can and cannot do.
Whichever type you pick, choose a UV-resistant formula. All epoxy yellows a little over time, and that yellowing shows far more against a pale pink rose or a white daisy than it ever does in a colored coaster.
For the mold, silicone is the sensible choice for a beginner, because the piece pops out without prying. Popular shapes for flowers include a cube or hexagon block for a bouquet, a sphere for a paperweight, a round coaster for a single bloom, a bookmark or pendant for pressed flowers, and a dome for a small cluster. There is a full rundown in best resin molds for beginners.
🧰 Recommended Kit
- LET’S RESIN Deep Pour Epoxy Resin (Preservation) — a clear, low-heat casting resin with the long working time and deep layers a bouquet block needs.
- Dried Flowers for Resin, 106pcs Natural Flowers and Leaves — a big mixed bag of already-dry 3-D blooms and leaves, so your first cast does not wait on a week of drying.
- Pressed Dried Flower Mix for Resin — flat pressed flowers ready for bookmarks, pendants and coasters.
- Plaid Clear Acrylic Sealer Spray — the light spray sealer that keeps petals from going translucent and dark once resin soaks in.
- 45-Piece Wet/Dry Sandpaper Assortment 400–3000 Grit — the full grit run for wet-sanding demolded edges to a clear, polished finish.
📋 Get the Free Resin Safety & Prep Checklist
A one-page printable checklist covering PPE, ventilation, and workspace setup — so you’re not hunting through this guide mid-pour. Enter your email and we’ll send it straight over.
Free. We only email when there’s something useful, never more than twice a month, and you can unsubscribe anytime. Privacy Policy
Step-by-Step: Casting Flowers in Resin
Set aside an afternoon for the pour and a few days for the cure. Here is the full process, in order.
- Set up your workspace and put on your PPE. Work in a well-ventilated room at 70–80°F (21–27°C) or your label’s range, wear nitrile gloves and safety glasses, cover the bench with a silicone mat or plastic sheet, and keep pets and kids out for the day. If you are new to resin, the resin safety hub covers everything you need to know before opening a bottle.
- Dry and seal your flowers. Everything above applies here: bone-dry flowers, two light coats of sealer, fully dry before you go any further. Do this a day ahead so nothing is rushed.
- Dry-fit the layout. Place the flowers in the empty mold exactly as you want them to appear, and take a photo. Remember that the bottom of the mold comes out glossy and becomes the front face of the finished piece, so plan the layout as though you are looking at it from below.
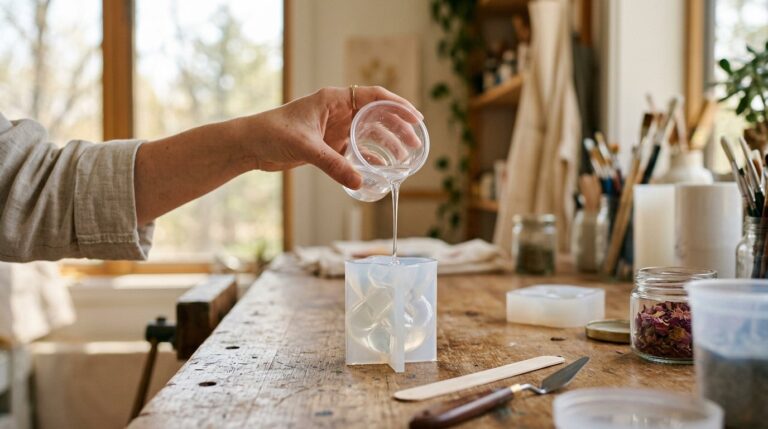
- Mix the resin. Measure carefully, stir slowly for the full time on the label, and scrape the sides and bottom of the cup. Our guide on how to mix epoxy resin walks through it. Mix only what you need for the first layer or two.
- Pour a thin base layer and let it gel. Pour just enough to cover the bottom of the mold, then wait until it turns tacky and thick, like honey that has started to set. This gelled base stops the flowers from sinking to the bottom or floating up when you add the next layer. Timing varies by resin, so check it every 15–30 minutes.
- Dip or brush resin into each flower. Before a flower goes in, dip it in the mixed resin or work resin into the petals with a small brush. This wets every surface and pushes out the air trapped between the petals, which is where most flower bubbles come from.
- Place 3-D flowers face-up (flat pieces face-down). Set each flower onto the gelled base with the face of the bloom pointing up toward you. Bubbles rise, so with the petals facing up any air escapes away from the flower instead of collecting underneath it. Nudge each one into position with a toothpick. That’s the right call for 3-D blooms in a block or sphere. For flat pieces such as coasters, pendants and bookmarks, the mold floor becomes the front, so lay pressed flowers face-down on the gelled base instead (see our bookmarks guide).
- Pour the next layer and pop the bubbles. Pour slowly in a thin stream over the flowers until they are covered, then pass a heat gun on low 6–8 inches above the surface in quick passes, or a torch 4–6 inches away. Never use a lighter. Do not linger: too much heat browns the petals. Stop as soon as the bubbles are gone.
- Repeat in layers. Keep adding layers until the mold is full, letting each one gel before the next. Stick to 1/4 inch per layer with coating resin, or up to 2 inches with deep-pour. Check for new bubbles every 15–30 minutes during the first hour, because dried flowers keep releasing tiny air pockets for a while. Our guide to getting bubbles out of resin covers outgassing embeds in more detail.
- Cover and cure. Put a box or tote over the mold to keep dust off, keep the room at 70–80°F (21–27°C) and leave it alone. Shallow pieces are usually firm enough to demold at about 24 hours; a deep block needs at least 72 and often longer, so follow the label and do not rush the demold. Full hardness takes about 7 days.
- Demold. Peel the silicone back gently from the edges, then press the piece out from the bottom of the mold. If it flexes or feels soft, put it back and give it another day.
- Wet-sand and polish. Sand any rough edges and the flat pour surface with wet/dry sandpaper, working up through the grits from 400 to 3000 and keeping the paper wet the whole time. Wet sanding keeps the dust down; wear gloves, and an N95 mask for any dry sanding (see our dust collection guide). Finish with a polishing compound or a thin clear top coat for a glassy shine.
Design Ideas
Once you have the process down, flowers in resin turn into a whole shelf of gift ideas. These are the ones people search for and pin most:
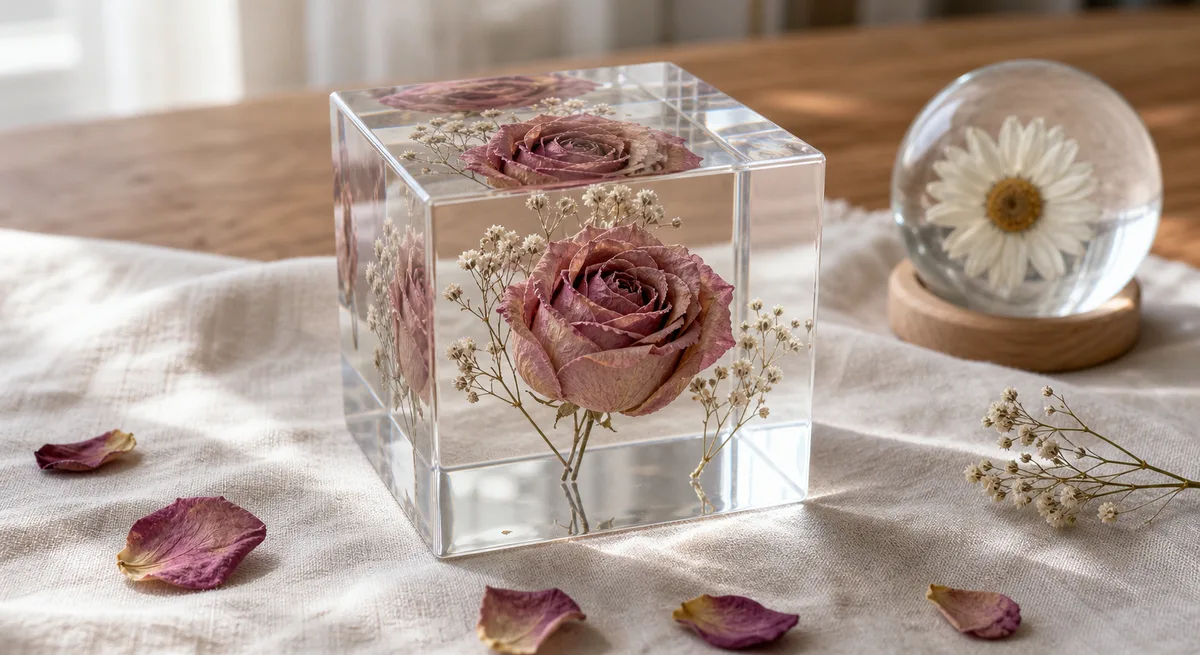
- Wedding bouquet block or hexagon. Dry the whole bouquet in silica gel, then arrange it in a large cube or hexagon mold and pour in deep-pour layers. It becomes a keepsake that sits on a mantel for years.
- Birth-month flower pendants. A single small pressed flower in a pendant or dome, one for each month, makes a personal gift for a mother or grandmother.
- Pressed-flower bookmarks and phone grips. Flat, fast and forgiving, these are the best first project. Our resin bookmarks tutorial is written for exactly this.
- A single bloom in a coaster. One rose or one daisy centered in a round coaster, with the rest left clear.
- A sphere paperweight. A silica-dried rose suspended in a clear sphere is the classic showpiece.
- An initial filled with tiny flowers. Baby’s breath and small pressed petals packed into a letter mold, along the lines of our personalized name resin pieces project.
- Memorial pieces. Flowers from a service, preserved in a small block or pendant, are among the most meaningful things you can make with resin. Take extra care with the drying, because there is no second chance at the flowers.
Common Mistakes
Most flower-casting problems trace back to one of six things:
- Pouring over flowers that aren’t bone-dry. The number one cause of brown, rotted, cloudy flowers. If in doubt, dry for another day or two.
- Flowers floating up. Dry petals are light and drift to the top of a deep pour. Pour a thin base layer, let it gel, then place the flowers and build up in layers.
- Petals turning translucent or dark. Unsealed petals soak up resin. Two light coats of sealer first, dried fully.
- Browning from too much torch heat. A torch held close, or a heat gun on high, cooks petals. Use the heat gun on low, 6–8 inches away, in quick passes, and stop when the bubbles are gone.
- One thick pour instead of layers. A single deep pour of coating resin overheats, cracks and yellows. Respect the layer limits: 1/4 inch for coating resin, up to 2 inches for deep-pour.
- Bubbles trapped under petals. Air hides in the folds of a bloom. Dip or brush resin into each flower first, and place it face-up so bubbles rise away from it.
If something goes wrong anyway, our guide to common resin problems and how to fix them covers sticky surfaces, soft spots and cloudy resin.
Frequently Asked Questions
Can you put fresh flowers in resin?
No. Fresh flowers are mostly water, and resin seals that water in. Within days the petals turn brown, go translucent and start to rot, while the moisture clouds the resin and releases bubbles. Dry flowers completely first, using silica gel for 3-D blooms (about 2–4 days) or pressing for flat ones (about 2 weeks), then seal them before casting.
How long do flowers need to dry before putting them in resin?
It depends on the method. Silica gel takes 2–4 days for most flowers, or 1–3 minutes in the microwave followed by 12–24 hours resting in the gel. Pressing in a book or flower press takes about 2 weeks. Air drying upside down takes 2–3 weeks. The flower should feel papery and stiff with no cool, damp spots before it goes anywhere near resin.
Do you need to seal dried flowers before resin?
Yes, for almost every flower. Dried petals are porous, and liquid resin soaks in and turns them translucent and dark. Two light coats of clear acrylic sealer spray, or a thin brushed coat of resin, closes the pores, holds the color and reduces the tiny bubbles petals release into the resin. Let the sealer dry fully and test it on one spare petal first.
What resin is best for preserving flowers?
A clear casting or deep-pour epoxy is best for most flower projects. It has a long working time, releases fewer bubbles and cures with low heat, so delicate petals are not cooked, and it can be poured up to 2 inches per layer. Use coating epoxy in 1/4-inch layers for thin pendants and bookmarks, and UV resin only for small, shallow pieces. Pick a UV-resistant formula so yellowing does not show against pale petals.
Why did my flowers turn brown in resin?
Almost always because the flowers were not completely dry. Moisture trapped inside the petals has nowhere to go, so the petals brown and rot, sometimes within days. Two other causes: too much heat from a torch or heat gun held too close, which scorches petals, and skipping the sealer, which lets resin soak in and darken them. Dry fully, seal with two light coats, and use a heat gun on low.
How long do flowers last in resin?
Properly dried, sealed and cast flowers last for years. The resin protects them from air and moisture, so they do not decay the way a dried bouquet on a shelf does. Colors soften slowly over time, and white petals often turn slightly cream. To keep them bright, use a UV-resistant resin and display the piece out of direct sunlight.
Sources
- University of Missouri Extension, Drying Flowers and Foliage for Arrangements (G6540): drying times and methods for silica gel (most flowers 2–3 days), the microwave method (1–3 minutes, then 12–24 hours in the gel), pressing (two weeks) and air drying (two to three weeks), plus re-drying silica gel at 250°F.
- Craft Resin, Deep Pour casting epoxy: an example of a deep-pour formula rated for pours up to 2 inches. Your own product’s label sets the real limit.
- Epoxyworks (WEST SYSTEM), Controlling Exotherm: thick pours trap their own heat, which is why coating resin goes on in thin layers.
- WEST SYSTEM, Health Effects From Overexposure to Epoxy: uncured epoxy is a skin sensitizer, and you can become sensitized after many exposures or just one, so gloves stay on whenever you handle wet resin.
- NIOSH (CDC), Epoxies and resins: wear the right gloves, increase ventilation, and wash skin as soon as possible after contact.
- OSHA, Hazard Communication: your kit’s label and Safety Data Sheet carry the mixing, layer-depth and cure details for that product.
Keep Learning on ResinAffairs.com
Ready for the next project, or need a refresher on the basics? Start here.
- How to make resin bookmarks with pressed flowers →
- The best resin molds for beginners →
- Casting resin vs coating resin: which one to use →
- How to mix epoxy resin properly →
- Resin gift ideas for beginners →
- Common resin problems and how to fix them →
- How to color resin →
Enjoyed this guide? Join the Resin Affairs newsletter for new tutorials, safety tips, and project ideas straight to your inbox.