How to Get Bubbles Out of Resin: Before & After Curing
Resin Affairs is reader-supported. If you buy through links on this page, we may earn a small commission at no extra cost to you. We only link to gear we would use ourselves — prices and availability change, so check the current listing. Always follow your resin product’s label and Safety Data Sheet.
As an Amazon Associate I earn from qualifying purchases.
A careful mix, a clean pour, and then you look down and the surface is speckled with tiny silver dots. Bubbles are the most common complaint in resin crafting, and almost all of them are preventable. Most of the rest are fixable.
Bubbles are one of the five things that can go wrong with a pour. Our full guide to common resin problems and how to fix them covers sticky resin, soft spots and cracks too; this page is just bubbles, in depth.
Quick answer: Warm the resin, mix slowly for three minutes, let it rest, pour in a thin stream close to the surface, then pass a torch (about 4–6 inches away) or a heat gun (about 6–8 inches) over the surface within the first 10–15 minutes. Most bubbles are prevented before you ever reach for a torch.
⚠️ Safety first: work in a well-ventilated space, wear nitrile gloves and eye protection, and keep uncured resin off your skin. New to resin safety? Start with Is Epoxy Resin Safe? and Resin PPE for Beginners.
Why Resin Gets Bubbles (and How to Tell Which Kind You Have)
Every bubble in resin is trapped air or gas that didn’t escape before the resin thickened. Where that air came from decides how you get rid of it, so it is worth knowing the six usual sources.
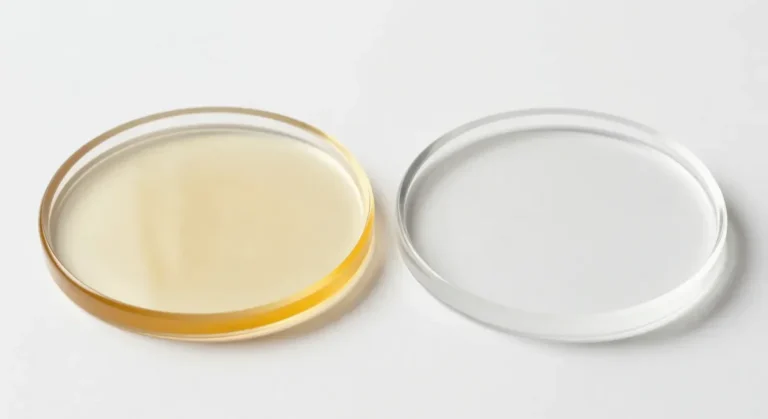
Cold or thick resin. Epoxy gets more viscous as it cools, and thick resin holds on to air like honey. Resin that is cooler than the 72–78°F (22–26°C) sweet spot traps hundreds of microbubbles that give the finished piece a milky, frosted look instead of a glassy one. This is the single most common cause in a cold garage or a winter craft room.
Whipping air in while mixing. Fast stirring, lifting the stick out of the mix, and beating the cup like cake batter all fold air into the resin. Wooden craft sticks make it worse because wood is porous and releases air as it soaks up resin. Paper cups do the same. A flat silicone or plastic stick in a smooth plastic or silicone cup is the fix.
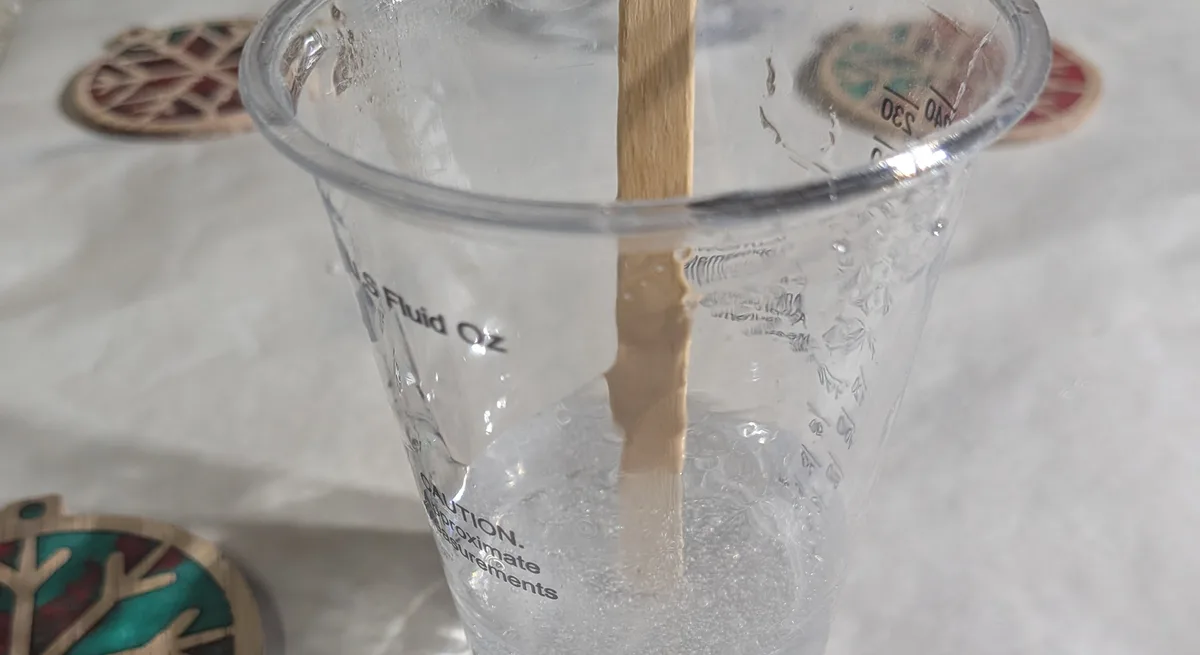
Pouring from too high or too fast. A stream falling from six inches folds air into itself on the way down and again when it hits the surface. Dumping the whole cup in one go traps air underneath the mass of resin, where it takes far longer to rise.
Porous embeds outgassing. Wood, paper, dried flowers, fabric, cork and unglazed clay are all full of tiny air pockets. When resin soaks in, that air is pushed out as a stream of bubbles that can keep coming for 20–30 minutes, long after you thought the surface was clear. Pressed flowers, like the ones in our resin bookmarks tutorial, are the classic example.
Mold geometry. Fine detail, sharp corners, textured surfaces and deep narrow cavities all trap air that resin simply flows over. The bubble sits pressed against the mold wall and cures there as a visible pit on the finished surface.
Moisture and humidity. Water in resin, whether from a damp mold, wet embeds, condensation on a cold bottle or a room above about 70% humidity, causes cloudiness and fine bubbles that look almost identical to cold-resin haze. If your workspace is humid and your resin was warm, moisture is the likely culprit.
How to read your bubbles
The bubbles themselves tell you where they came from. Before you reach for a torch, take ten seconds to look at the pattern.
| What you see | Most likely cause | What fixes it |
|---|---|---|
| Large bubbles rising in the first few minutes | Fast mixing or a high pour | Slow 3-minute mix, low pour, one heat pass |
| Fine milky haze through the whole pour | Cold resin or moisture | Warm-water bath, 72–78°F room, dry tools |
| Bubbles clustered on or streaming from one object | The embed is outgassing | Seal or dip embeds, re-check at 20–30 min |
| Bubbles pinned in mold corners or detail | Trapped mold air | Thin first layer, tilt, toothpick into detail |
| Pits on the bottom or edges of a cured piece | Cold mold or thick pour | Warm the mold, thin layers, tap the mold |
Big rising bubbles are a mixing or pouring problem and respond well to heat. A fine milky haze is a temperature or moisture problem, and no amount of torching will fix it once it is spread through a thick pour. Bubbles clustered on one object are outgassing, and they need time and a second heat pass, not a hotter first one.
🧰 Recommended Kit
- Butane Micro Torch — the fastest way to clear surface bubbles on flat pieces like coasters and trays.
- LET’S RESIN Heat Gun — the safer choice around silicone molds and alcohol ink, where an open flame is a bad idea.
- Gartful Reusable Silicone Stir Sticks — flat, non-porous and easy to scrape, so you don’t whip air in the way a wooden stick does.
- MaxTite 99.9% Isopropyl Alcohol Spray — a fine mist breaks surface tension on stubborn bubbles and cleans your tools afterward.
- LET’S RESIN Crystal Clear Epoxy Resin Kit — a beginner-friendly 1:1 formula that is thin enough to release bubbles on its own once warmed.
Step 1: Prevent Bubbles Before You Pour
Every bubble you prevent is one you never have to chase with a torch. This routine adds about ten minutes to a session and removes most of the problem.
- Warm the bottles in a warm-water bath for 5–10 minutes. Keep the caps on and stand the sealed bottles in a bowl or sink of warm tap water, not hot, and not deep enough to reach the lids. Warm resin is thinner, so air rises out of it easily. The trade-off is that warm resin also cures faster, which knocks roughly 10 minutes off your working time, so have everything laid out before you mix. Dry the bottles completely before opening them; a drop of water in the cup causes exactly the cloudiness you are trying to avoid.
- Get the room and the resin to 72–78°F (22–26°C). A cold room undoes a warm bath within minutes. If your space runs cool, warm it an hour before you start and keep it steady until the piece has cured. Move the work away from open windows and drafts, and keep the humidity at 60% or lower (a dehumidifier helps in a damp space).
- Mix slowly for three full minutes. Set a timer. Stir with a flat silicone or plastic stick, keeping it under the surface the whole time and scraping the sides and bottom of the cup every few passes. Slow, deliberate figure-eights fold in far less air than fast circles. Skip wooden sticks and paper cups, which add bubbles of their own. Our guide to mixing epoxy resin covers ratios and the streak-free test in detail.
- Let the mixed cup rest for 2–5 minutes. With a thin coating or craft resin, a short rest lets most of the mixing bubbles rise and pop on their own before they ever reach your mold. Watch the pot life on the label: a resin with a 30-minute working time can spare five minutes, but a fast-cure formula cannot, and you have already spent some of that time warming the bottles.
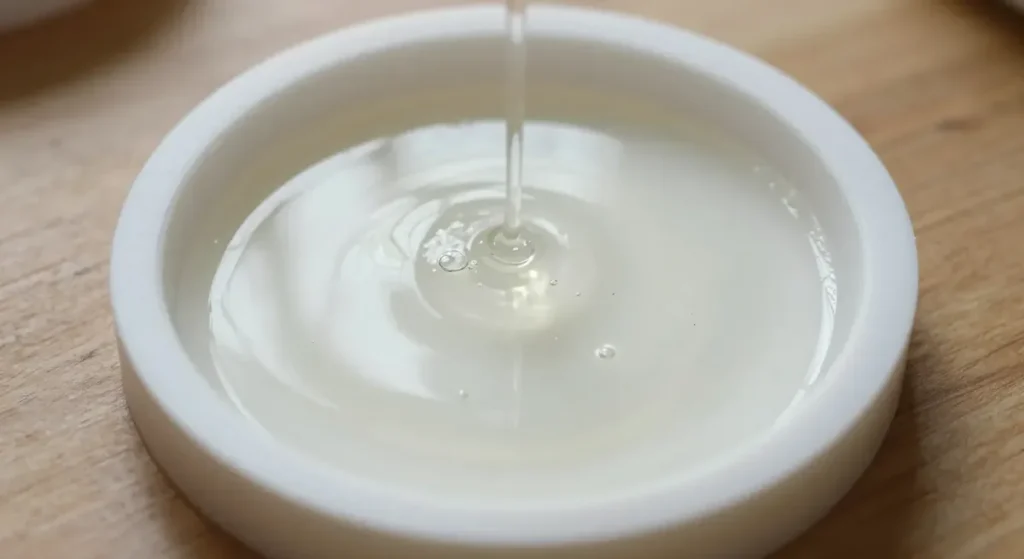
- Pour low, in a thin steady stream. Hold the cup an inch or two above the surface and pour in a slow, continuous ribbon. Never dump. If you are covering a large surface, keep the cup moving so you don’t pile resin in one spot.
- Pour in stages for anything with detail. A thin first layer, followed by the rest once it has settled, gives trapped air a short distance to travel. This applies to deep molds, pieces with embeds and anything with texture.
- Seal porous embeds before they go in. Dried flowers, paper, wood and fabric will outgas unless you stop them. Two light coats of a spray sealer, a brushed-on coat of resin, or simply dipping the item in your mixed resin so it is fully wetted all break the surface tension and push the air out before the object is in the pour. Let sprayed or brushed sealers dry fully first.
- For molds, pour a thin layer first and roll it around. Tilt and rotate the mold so a skim of resin wets every corner and detail, then top it up. This one step prevents most of the pitted corners that beginners blame on the mold.
Wear nitrile gloves and work in a ventilated room for all of this; warm resin releases a little more vapor than cold resin. If you are new to pouring, the epoxy pouring for beginners guide walks through a full first session.
Step 2: Remove Bubbles While the Resin Is Still Wet
Even with a perfect routine, a few bubbles will surface. The trick is timing: get to them while the resin is thin enough for them to move.
The timing windows
- First 5–15 minutes after pouring. This is the sweet spot. The resin is at its thinnest, bubbles are still rising, and a single heat pass clears almost everything.
- 20–30 minutes. Come back and look again, especially on deep pours and anything with embeds. Wood, flowers and paper keep outgassing after the surface looked clear. A second light pass now catches the stragglers.
- After the gel stage, stop. Once the resin starts to thicken and pull strings from a stick, it has gelled. Heat will no longer move bubbles; it will just wrinkle the surface, and popping a bubble now leaves a crater that can’t self-level. For a standard craft epoxy that point usually arrives somewhere past the 30–40 minute working time printed on the label, and sooner if the resin was warm.
Heat gun
Set it to low, hold it about 6–8 inches above the surface and keep it moving in slow sweeps. Warm air thins the top layer of resin so bubbles rise and pop. It is slower than a torch but far more forgiving, and it is the right tool around silicone molds and anything colored with alcohol ink. High settings blow resin around and can push it right over the edge of the mold.
Butane torch
A small kitchen or craft torch is the fastest fix for a flat surface like a tabletop, tray or coaster. Hold the flame about 4–6 inches above the resin and make quick, sweeping passes, as if you are painting the surface with the tip of the flame. Never linger on one spot. The bubbles pop almost instantly as the heat drops the surface tension. Refill it before you start mixing, not mid-pour, so the flame stays steady: here’s how to refill a butane torch safely.
Before you light it, check three things. There is no alcohol ink in the piece, because the ink is flammable once mixed in. There are no open solvent or alcohol bottles, alcohol-soaked paper towels or aerosol cans on the bench. And the mold is not thin silicone that a flame can scorch. If any of those apply, use the heat gun instead. Tie back long hair, keep the gloves on and work with a window open.
A toothpick or a pin
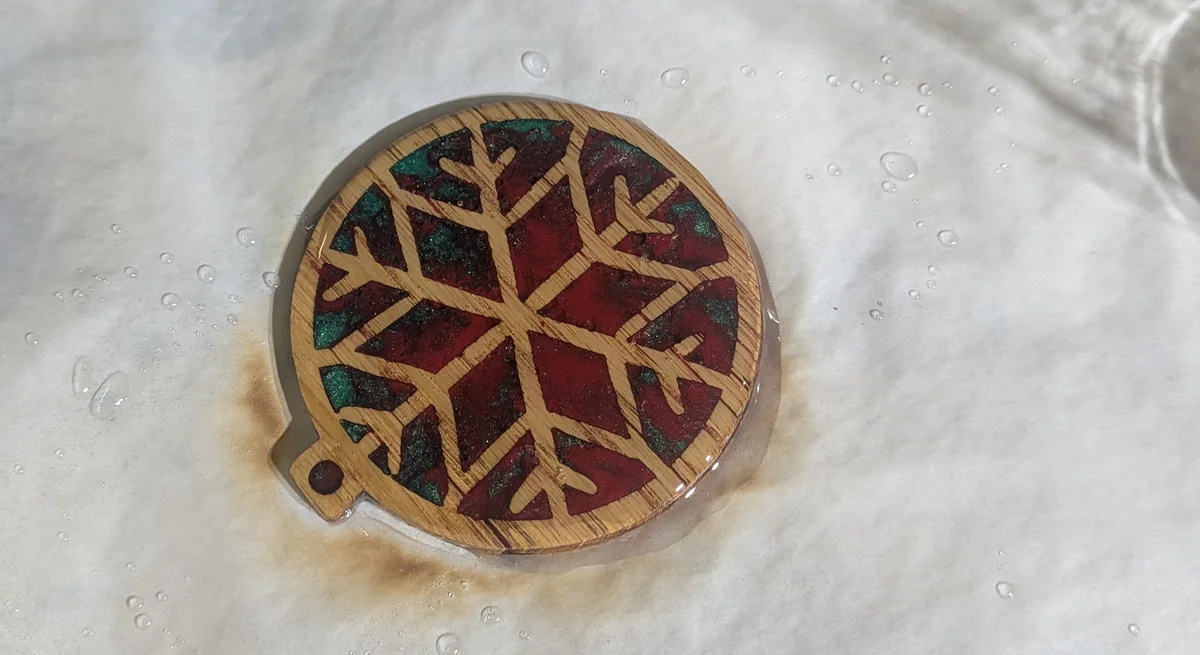
For one or two stubborn bubbles, or a bubble stuck to an edge or clinging to an embed, a toothpick or a pin is better than heat: touch it, drag it to the surface and let it pop. This is the only method that reliably works on bubbles that have anchored themselves to an object. Skip the lighter, though: its flame is hard to control this close to wet resin and can leave soot in the surface.
A mist of isopropyl alcohol
A very light mist of 99% isopropyl alcohol over the surface breaks the surface tension so bubbles pop on contact. It is useful when you can’t use heat at all, for instance on resin with alcohol ink in it. Keep it to a mist from at least a foot away. Too much alcohol leaves dimples and fisheyes, and enough of it soaked into the resin can interfere with the cure. Never spray alcohol anywhere near a lit torch.
Pressure pots and vacuum chambers
A pressure pot squeezes bubbles so small they become invisible; a vacuum chamber pulls air out of the mixed resin before you pour. Both produce flawless castings and both are overkill for a beginner. They are a real investment, need a compressor or a pump, and solve a problem that a warm-water bath, a slow mix and a heat gun already solve for coasters, jewelry and trays. Consider one only if you move into thick production castings.
What not to use: a hair dryer
A hair dryer moves a lot of air at a low temperature, which is the opposite of what you want. It ripples the surface, blows dust into the pour and does very little to the bubbles. We explain why in can I use a hair dryer for resin instead of a heat gun.
| Method | Best for | Watch out for |
|---|---|---|
| Heat gun on low | Silicone molds, alcohol ink, beginners | High setting ripples and spills resin |
| Butane torch | Flat tabletops, trays, coasters | Lingering: smoke, wrinkles, yellowing |
| Toothpick or pin | Bubbles on edges and embeds | Only before the gel stage |
| Isopropyl mist | Ink pieces, no-heat situations | Too much causes dimples |
| Pressure pot or vacuum | Thick production castings | Cost and setup a beginner doesn’t need |
Bubbles in Silicone Molds: The Extra Steps
Molds trap air in a way flat pours never do. The resin flows over corners and detail rather than into them, so the bubble is pinned against the mold wall where a torch can’t reach it. These extra steps fix that.
- Warm the mold first. A cold mold chills the resin on contact and thickens it exactly where you need it thin. Sit the mold near a lamp or on a heat mat for a few minutes, or simply keep it in the warm room with your bottles.
- Pour a thin first layer, then tilt. Add just enough resin to cover the floor of the mold, then tilt and roll it so the resin runs into every corner and over every bit of texture. Let it sit a minute and look for pinned bubbles before you top it up.
- Brush or toothpick resin into fine detail. For letters, lace patterns, tiny flowers and other detailed molds, use a small brush or a toothpick to work resin into the detail before the main pour. It takes a couple of minutes and it is the difference between crisp detail and pitted detail.
- Tap and vibrate. Tap the filled mold firmly on the bench a dozen times, or rest it on a cheap vibrating device such as an electric toothbrush or a massage pad for a minute. Vibration shakes trapped bubbles loose and sends them to the surface, where a heat gun can finish them.
- Flex the sides gently. Squeezing and releasing the mold walls dislodges bubbles that are stuck to the silicone. Be gentle with thin molds so you don’t splash resin out.
- Use UV resin or a syringe for tiny cavities. Small, deep shapes such as charms, tiny letters and skinny bars fight you with epoxy. A syringe or pipette lets you fill from the bottom up so air is pushed ahead of the resin. UV resin is thin and cures in minutes, so you can fill and cure in thin layers with no waiting; our UV resin for beginners guide covers how.
- Demold gently. Bubbles that cured against the mold wall leave a fragile skin. Peel the mold away from the piece rather than pulling the piece out, and don’t sand or polish until it is fully cured.
If bubbles keep showing up in the same mold, the mold may be the problem: cheap, stiff or heavily textured molds hold air. Our roundup of the best resin molds for beginners covers which shapes and materials are forgiving.
How to Fix Bubbles in Cured Resin
Once resin is hard, you can’t pop or heat a bubble away. What you can do depends on where the bubble sits, so work up this ladder from the least effort to the most.
Surface bubbles and pits: sand and flood coat
Small bubbles that popped at the surface and left pinholes, or that cured as tiny domes, are the easiest fix. Wait until the piece is usable, about 72 hours, and passes the fingernail test, then sand the whole surface: start with 220 grit to level the pits, move to 400, then wet-sand at 800–1000 so the surface is uniformly matte. Wear gloves and an N95 mask for the dry grits. Wipe it down with isopropyl alcohol and let it dry completely. Mix a fresh batch of resin, pour a thin flood coat over the whole piece, and torch or heat-gun it within the first 10–15 minutes. The new layer fills the pits and restores the gloss; the sanded haze disappears the moment the wet resin hits it.
Sanding one pit in isolation doesn’t work. The new coat needs to cover the whole surface or the repair shows as a ring.
A single deep bubble: open, fill, sand flush
Sometimes one large bubble cures just under the surface and shows as a dome, a dark dot or a soft spot. Open it with a pin, or drill it out with a small bit so you have a clean hole rather than a thin shell. Blow out the dust, wipe with alcohol, and fill the hole with a drop of UV resin or a drop of freshly mixed epoxy. UV resin is the easier choice here because you can cure it in minutes under a lamp and top it up if it sinks. Once cured, sand the fill flush through the same 220, 400 and wet 800–1000 sequence and polish, or give the whole piece a flood coat.
Interior bubbles in a cast: accept, design around, or recast
Bubbles frozen deep inside a solid cast can’t be reached. You have three options. First, accept them; a few small interior bubbles read as sparkle in a clear cast and most people never notice. Second, design around them: paint the back, add a mica or ink layer behind, or use the piece somewhere the flaw faces away. Third, recast: if the bubbles ruin the piece and the embed can be recovered, cut it out, clean it and start again with a warm mix and staged pours.
When to start over
Start over when the piece is hazy all the way through (cold or wet resin, which no coat will fix), when bubbles cover more than a small patch of the front face, or when the sanding and recoating would take longer than a fresh pour. A single coaster is not worth an hour of repair. The common resin problems guide has a broader walk-through of the salvage-or-scrap decision for every kind of failed pour.
📋 Get the Free Resin Safety & Prep Checklist
A one-page printable checklist covering PPE, ventilation, and workspace setup — so you’re not hunting through this guide mid-pour. Enter your email and we’ll send it straight over.
Free. We only email when there’s something useful, never more than twice a month, and you can unsubscribe anytime. Privacy Policy
Common Bubble-Removal Mistakes
- Torching too long. Hovering the flame over one spot scorches the resin. You get smoke, a wrinkled skin and a yellow patch that never comes out. Quick sweeping passes, then stop and look.
- Heat gun on high. Full power ripples the surface, drives resin over the edge of the mold and can blow dust and pet hair into the pour. Low setting, 6–8 inches away, constant motion.
- Torching resin colored with alcohol ink. The ink is flammable once it is mixed in and a flame can ignite the surface. Use a heat gun or an isopropyl mist instead.
- Popping bubbles after the gel stage. Once the resin has thickened, a popped bubble leaves a crater that cannot self-level. Leave it, let it cure, then sand and recoat.
- Mixing in a tall, narrow cup. Tall cups make you stir vertically, which lifts air in with every stroke and hides unmixed resin on the bottom. A wide, shallow cup with a flat stick is easier to scrape and folds in less air.
- Giving up on a pour that just needed 15 more minutes. Bubbles keep rising for half an hour on a warm pour. Beginners often torch once at the two-minute mark, see more bubbles at ten and assume the pour is ruined. Come back at 15 minutes and again at 25–30; the second pass is where most pieces are saved.
Frequently Asked Questions
Why does my resin have so many bubbles?
The usual causes are cold or thick resin, stirring too fast, pouring from too high and porous embeds releasing air. A fine milky haze means the resin was too cold or damp; large bubbles mean air was whipped in while mixing or pouring. Warm the sealed bottles in warm (not hot) water for 5–10 minutes, mix slowly for three minutes with a flat stick, and pour low in a thin stream.
How do you get bubbles out of resin without a torch?
A heat gun on low, held about 6–8 inches above the surface and kept moving, clears bubbles almost as well as a torch and is safer around silicone molds and alcohol ink. For a few stubborn bubbles, use a toothpick or a light mist of 99% isopropyl alcohol. Warming the resin and mixing slowly prevents most bubbles before you need any tool at all.
Can I use a hair dryer to get bubbles out of resin?
No. A hair dryer pushes a large volume of air at a low temperature, which ripples the resin, blows dust into it and barely affects the bubbles. A heat gun on low or a small butane torch delivers the concentrated heat that thins the surface and lets bubbles pop. If you have neither, a toothpick and a mist of isopropyl alcohol will do.
Will bubbles in resin go away on their own?
Some will. In warm, thin resin, most mixing bubbles rise and pop within the first 15–30 minutes, which is why resting the cup and waiting before you torch matters. Cold or thick resin, deep pours and bubbles trapped in mold detail will not clear by themselves, and once the resin gels, every remaining bubble is locked in place for good.
How do you get bubbles out of resin after it has cured?
Sand the surface through 220, 400 and wet 800–1000 grit, wipe with isopropyl alcohol and pour a fresh flood coat, torching it within the first 15 minutes. For a single deep bubble, open it with a pin or drill bit, fill with UV resin, cure and sand flush. Bubbles deep inside a solid cast cannot be removed; accept them, hide them or recast.
Does rubbing alcohol get rid of resin bubbles?
A very light mist of 99% isopropyl alcohol breaks the surface tension so bubbles pop on contact, and it is a useful no-heat option for pieces colored with alcohol ink. Keep it to a fine mist from about a foot away. Too much causes dimples and fisheyes and can interfere with the cure. Standard 70% rubbing alcohol contains water and is a poor substitute.
Sources
- OSHA, Hazard Communication: your resin’s label and technical data sheet give its working time and gel time, which set the windows for chasing bubbles.
- Epoxyworks (WEST SYSTEM), Controlling Exotherm: every 18°F rise roughly halves epoxy’s working time, which is why warmed resin releases bubbles well but gives you less time to work.
- NIOSH Pocket Guide to Chemical Hazards: Isopropyl alcohol: isopropyl alcohol has a flash point of 53°F and is a Class IB flammable liquid, which is why the mist never goes near a lit torch.
- WEST SYSTEM, Health Effects From Overexposure to Epoxy: uncured epoxy is a skin sensitizer, and you can become sensitized after many exposures or just one, so gloves stay on for every step here.
- NIOSH (CDC), Epoxies and resins: wear the right gloves, increase ventilation, and wash skin as soon as possible after contact.
- WEST SYSTEM, Preventing Overexposure: ventilation, gloves and dust control, including while you sand a cured piece for a flood coat.
Keep Learning on ResinAffairs.com
Bubbles are only one of the things that can go wrong with a pour; these guides cover the rest.
- Common resin problems and how to fix them →
- Epoxy pouring for beginners →
- How to mix epoxy resin →
- Can I use a hair dryer for resin instead of a heat gun? →
- Best resin molds for beginners →
- How long does resin take to cure →
Enjoyed this guide? Join the Resin Affairs newsletter for new tutorials, safety tips, and project ideas straight to your inbox.